
I recently purchased some second-hand Mellanox (now NVIDIA) ConnectX-4 Lx network cards for my GPU Homelab. Unfortunately, they didn’t work out of the box as expected. While they were detected in ESXi using the built-in drivers, I couldn’t establish a link.
I’m using Cisco SFP-10G-SR transceivers, which are listed as compatible in firmware version 14.32.1900 (the latest at the time of writing) according to the NVIDIA Firmware Compatible Products documentation.
Given this, I suspected either an outdated firmware version or a custom setting from the previous owner. My plan was to upgrade to firmware 14.32.1900 and reset the device to factory defaults.
However, performing a firmware update required the NVIDIA Firmware Tools (MFT). Mellanox’s official instructions suggest deploying the MFT VIBs via VMware Lifecycle Manager Images, but my ESXi cluster wasn’t fully built to support this method.
Additionally, I ran into an unexpected issue—Secure Boot prevented the MFT VIBs from installing. Below is the process I followed to manually upgrade the firmware on each host.
- Download MFT
- Download the Firmware
- Disable Secure Boot
- Install MFT
- Upgrade the Firmware
- Troubleshooting
- Enable Secure Boot
- Conclusion
- References
Download MFT
- First download the NVIDIA Firmware Tools (MFT) from NVIDIA’s website
- I selected Version 4.30.0-139 -> Vmware ESX Server -> 8.0.X Native -> x64
- Download both the nmst and mft VIBs
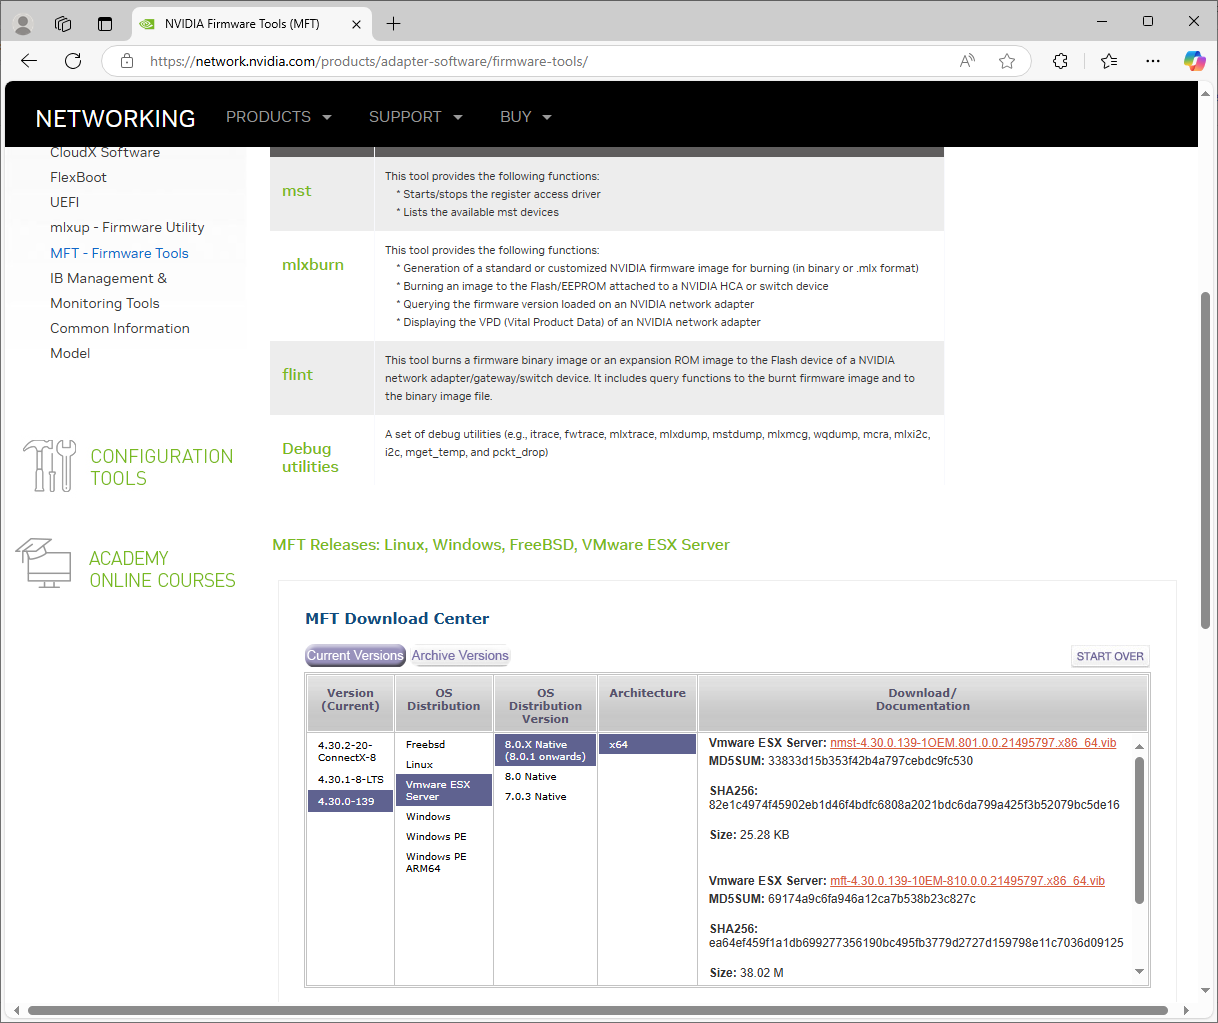
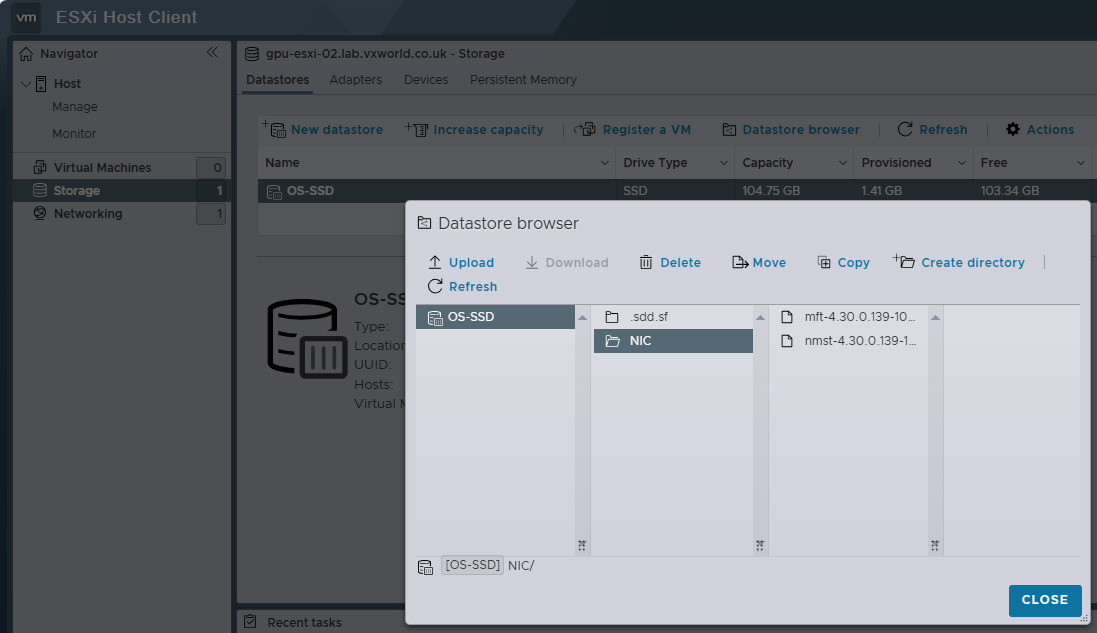
- Copy the VIBs to an ESXi datastore you will have access to
Download the Firmware
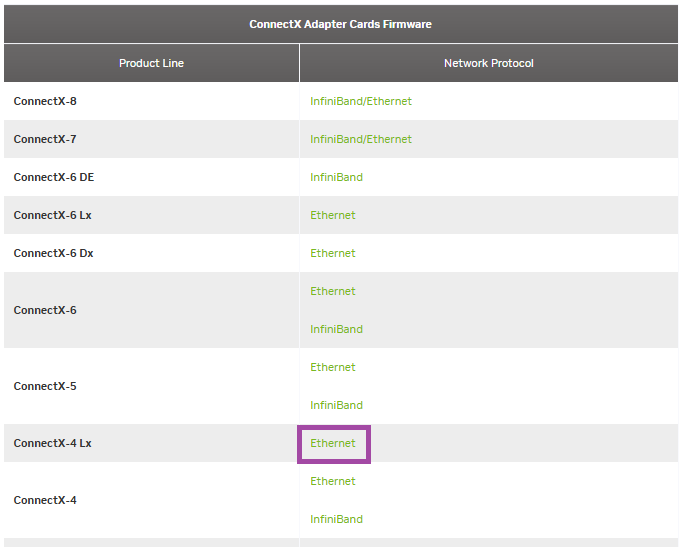
- To download the firmware, go to NVIDIA Networking Firmware Downloads
- Click the Connect-4 Lx link
- I selected 14.32.1900 -> MCX4121A-ACAT (the exact model of card I have) -> MT_2420110034
- Download the zip file (containing the firmware bin)
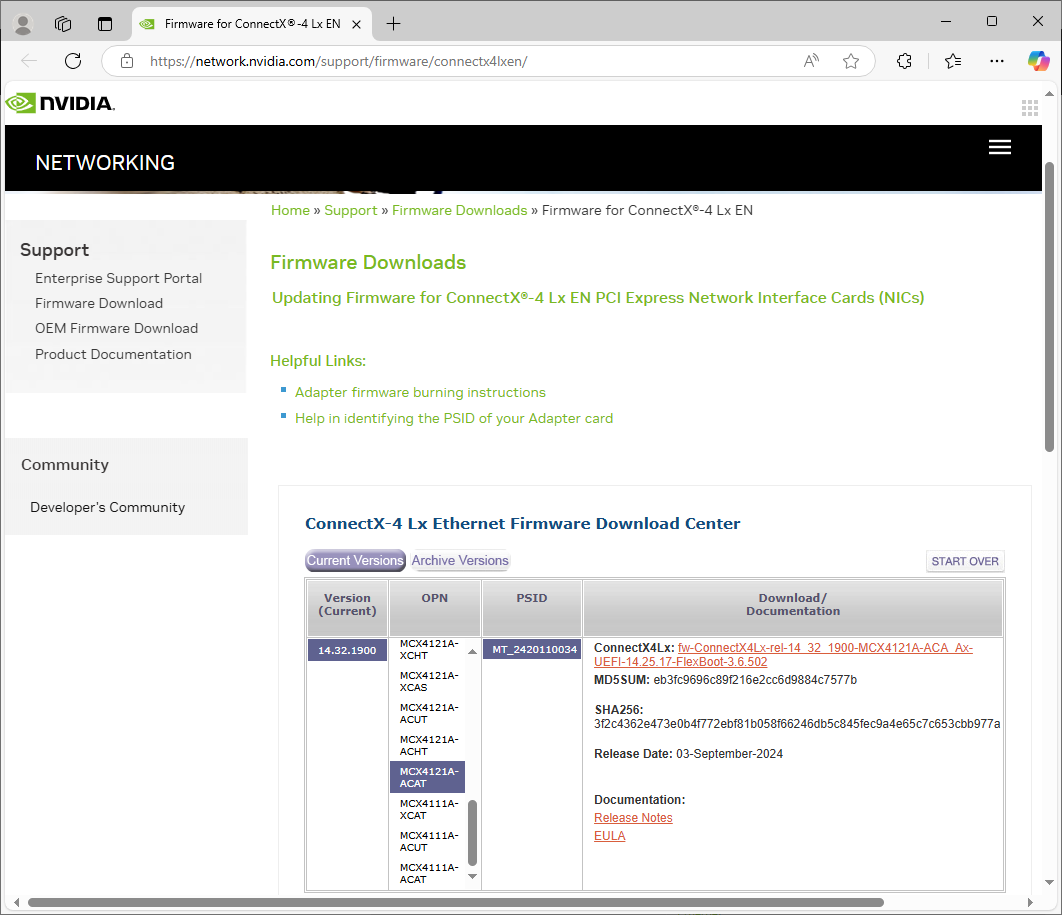
- Extract the zip file so you have the bin file to upload to a ESXi datastore
- Copy the bin file to an ESXi datastore you will have access to

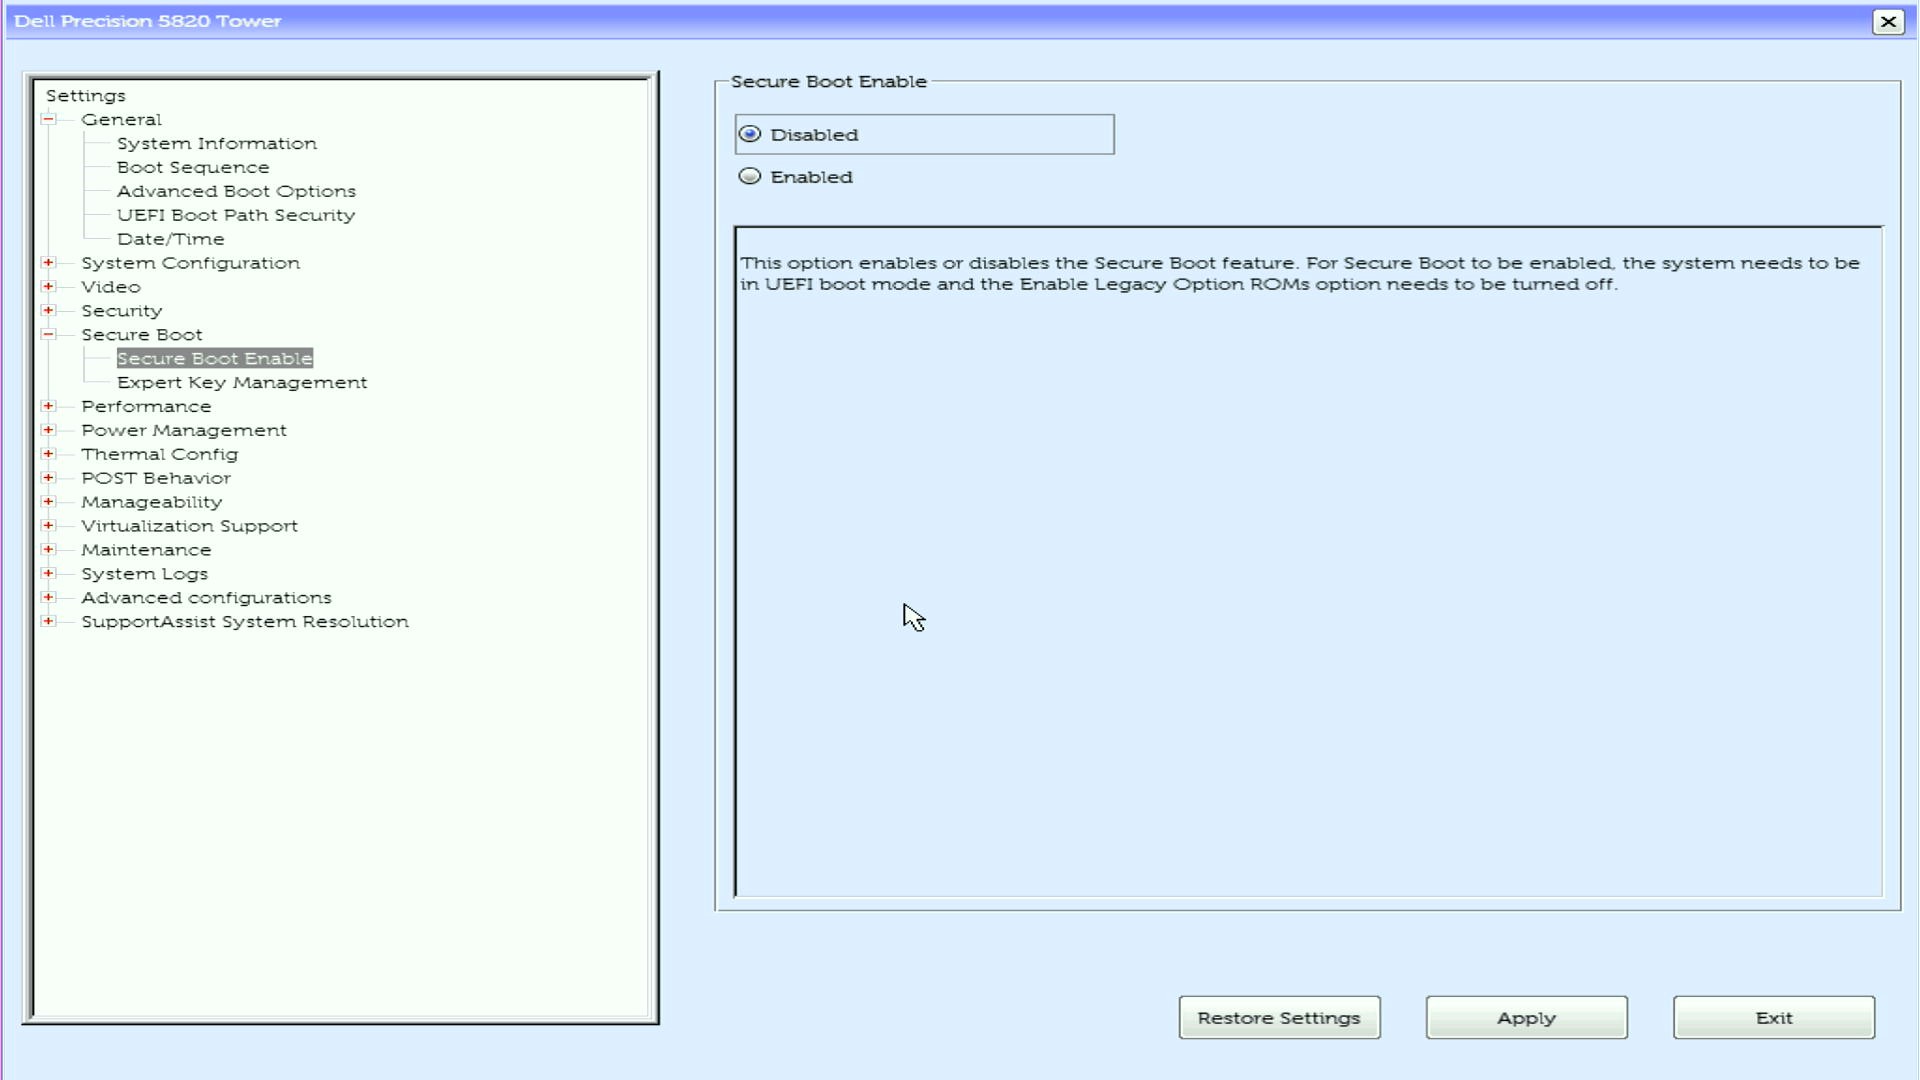
Disable Secure Boot
- SSH onto the host
- List the current settings on the ESXi host
esxcli system settings encryption get
- Run the following ESXCLI command to disable secure boot
esxcli system settings encryption set --require-secure-boot=F- Confirm that Require Secure Boot displays false.
esxcli system settings encryption get
- To save the setting, run the following command
/bin/backup.sh 0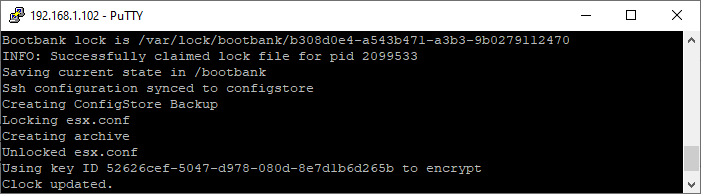
- Reboot the host
reboot- Enter the BIOS and disable Secure Boot
Install MFT
- Once booted, SSH back onto the host
- Confirm the current software acceptance level. By default, it should be PartnerSupported
esxcli software acceptance get- Set the software acceptance to CommunitySupported
esxcli software acceptance set --level=CommunitySupported
- Install the nmst VIB. Update the path to the location you coped the VIB to
esxcli software vib install -v /vmfs/volumes/OS-SSD/NIC/nmst-4.30.0.139-1OEM.801.0.0.21495797.x86_64.vib -f --no-sig-check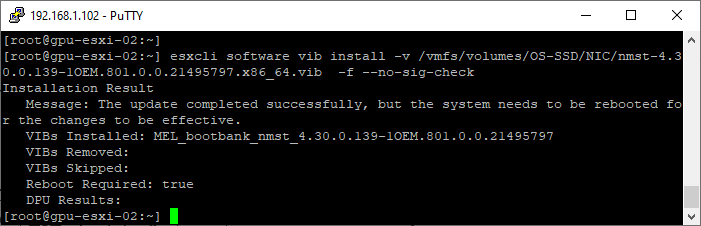
- Install the mft VIB. Update the path to the location you coped the VIB to
esxcli software vib install -v /vmfs/volumes/OS-SSD/NIC/mft-4.30.0.139-10EM-810.0.0.21495797.x86_64.vib -f --no-sig-check
- Set the software acceptance back to the orginal setting. In my case, PartnerSupported
esxcli software acceptance set --level=PartnerSupported- Reboot the host
reboot- Once booted, SSH back onto the host
- Now we will validate the MFT software has installed
- Use the following command to make sure the mst driver is started
/opt/mellanox/bin/mst start
- To identify the devices, use the following command. As you can see from the output below, the single NIC I have in this system is listed twice, because it has two ports. The ports are identified by the MST value. mt4117_pciconf0 is port 1 and mt4117_pciconf0.1 is port 2
/opt/mellanox/bin/mst status -v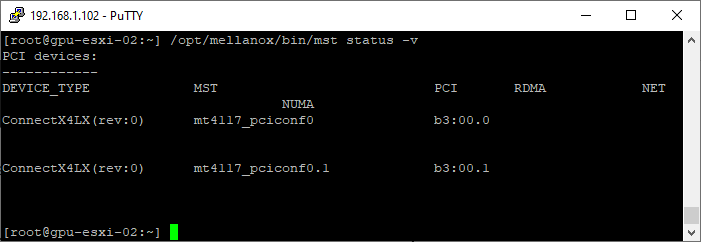
- Query the device
/opt/mellanox/bin/mlxfwmanager --query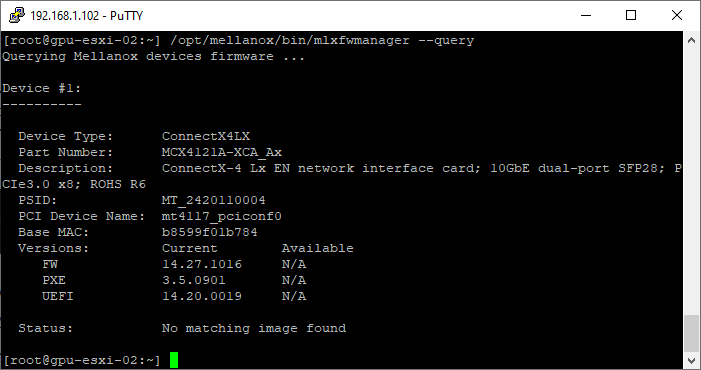
Upgrade the Firmware
Now we have a working set of Mellanox Firmware Tools (MFT), we can upgrade the firmware on the card.
- SSH onto the host if you are not already on it
- Use the following command to make sure the mst driver is started
/opt/mellanox/bin/mst start- Use the following command to identify the device name. In my example, it is mt4117_pciconf0
/opt/mellanox/bin/mst status
- Query the device to confirm the current firmware version. TIP: you can use the -d parameter to limit to the device identified above
/opt/mellanox/bin/mlxfwmanager --query- Use the following command to burn the firmware onto the NIC.
- Replace <device_name> with the one you identified above.
- Replace <binary image> with the path to the image bin file you uploaded to the ESXi hosts datastore earlier
/opt/mellanox/bin/flint -d <device_name> -i <binary image> burn

Example
/opt/mellanox/bin/flint -d mt4117_pciconf0 -i /vmfs/volumes/OS-SSD/NIC/fw-ConnectX4Lx-rel-14_32_1900-MCX4121A-XCA_Ax-UEFI-14.25.17-FlexBoot-3.6.502.bin burn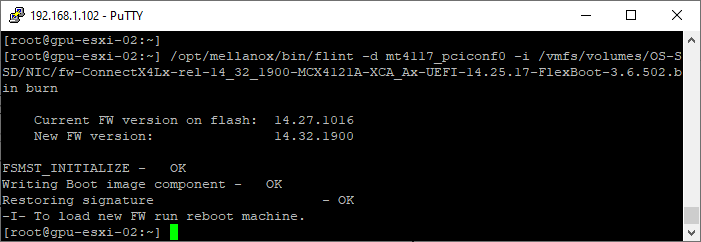
- Run the following command to confirm the new firmware is staged
/opt/mellanox/bin/mlxfwmanager --query -d <device_name>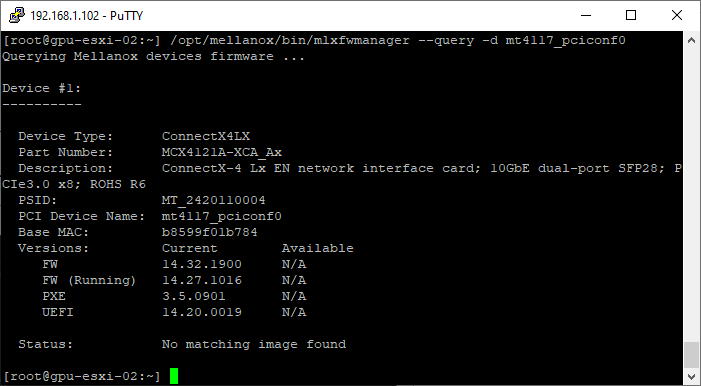
- Reboot the host
reboot- SSH onto the host
- Query the device to confirm the new firmware has applied
/opt/mellanox/bin/mlxfwmanager --query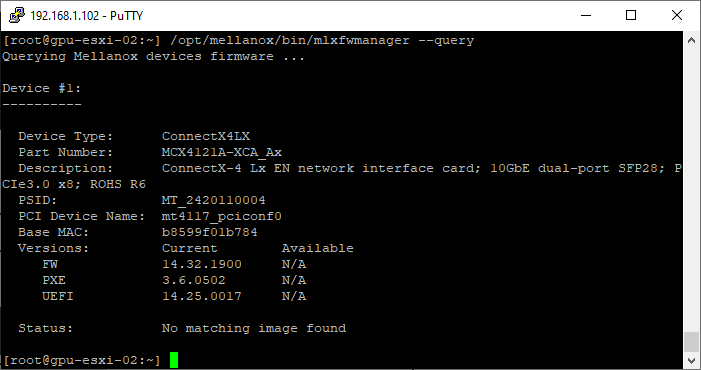
Troubleshooting
As part of my troubleshooting I used the following commands
- Identify the device names. As you can see from the output below, the single NIC I have in this system is listed twice, because it has two ports. The ports are identified by the MST value. mt4117_pciconf0 is port 1 and mt4117_pciconf0.1 is port 2
/opt/mellanox/bin/mst status -v- Reset the config. NOTE: This requires a reboot after
/opt/mellanox/bin/mlxconfig -d mt4117_pciconf0 reset
- Get the status of Connectx-4 Lx Port 1. Note: Device name identified using commands above
/opt/mellanox/bin/mlxlink -d mt4117_pciconf0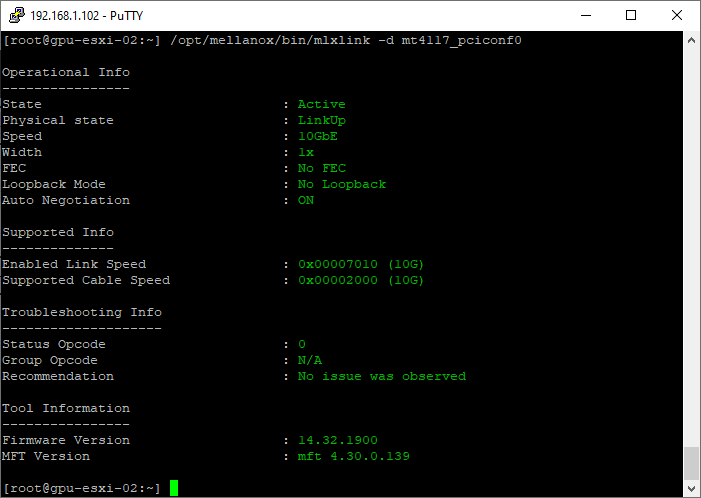
- Get the status of Connectx-4 Lx Port 2. Note: Device name identified using commands above
/opt/mellanox/bin/mlxlink -d mt4117_pciconf0.1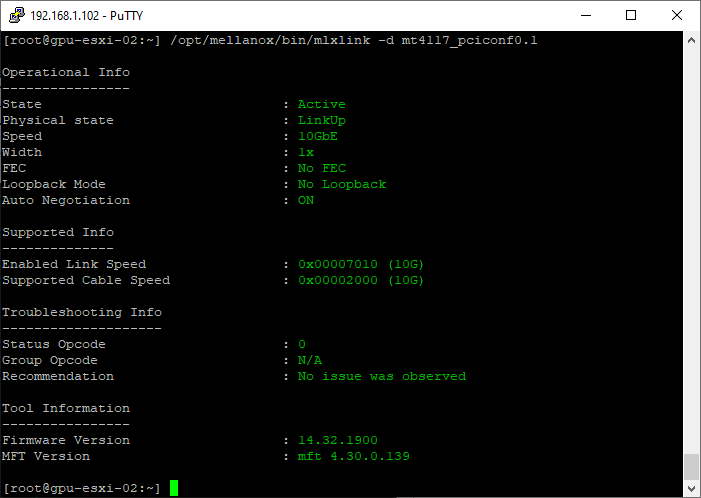
Enable Secure Boot
WARNING
I’ve included the instructions below for completeness, but when I attempted to re-enable Secure Boot, ESXi failed to boot due to the Mellanox Tools not being signed. I believe this requires adding the NVIDIA/Mellanox certificate to the UEFI trusted list, but I haven’t figured out how to do that yet.
For now, since this is a Homelab, I’m comfortable keeping Secure Boot disabled. Once vCenter is available, I’ll try installing the VIBs using Lifecycle Manager as per NVIDIA’s instructions. Hopefully, this will allow Secure Boot to be re-enabled.
If you know how to do this manually, please share your method in the comments.
- Reboot the host
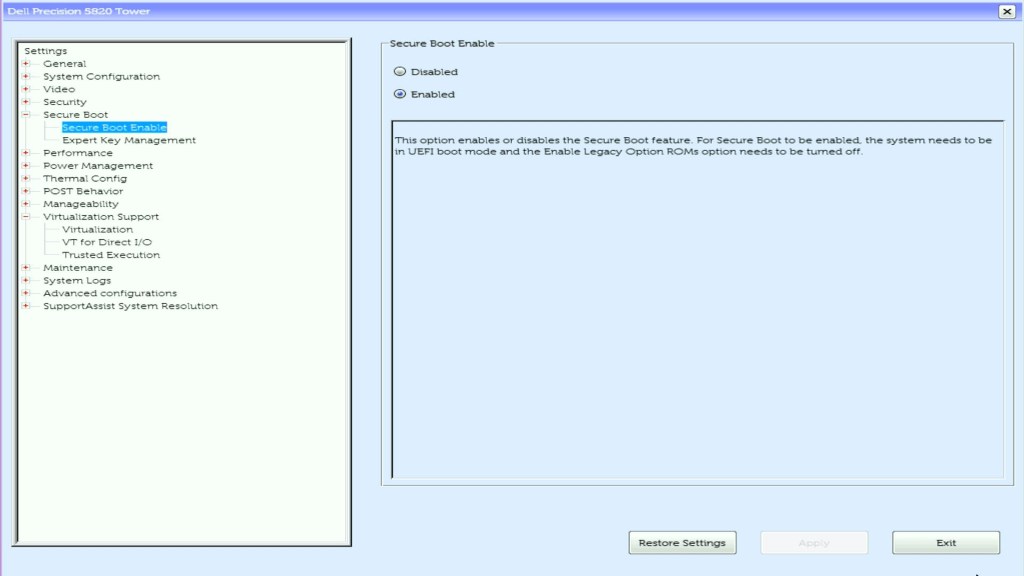
- Enter the BIOS and Enable Secure Boot
- SSH onto the host
- Run the following ESXCLI command to enable secure boot
esxcli system settings encryption set --require-secure-boot=T- Confirm that Require Secure Boot displays true.
esxcli system settings encryption get
- To save the setting, run the following command
/bin/backup.sh 0
- Reboot the host
rebootConclusion
If you’re dealing with second-hand Mellanox ConnectX-4 Lx cards, upgrading the firmware and resetting configurations can resolve compatibility issues. While ESXi’s Secure Boot may complicate the process, disabling it allows for a successful firmware upgrade.
Hopefully, this guide helps others facing similar challenges! Let me know in the comments if you have questions or insights.
References
- Enable or Disable the Secure Boot Enforcement for a Secure ESXi Configuration
- Updating Firmware for a Single Mellanox Network Interface Card (NIC)
- HowTo Install NVIDIA Firmware Tools (MFT) on VMware ESXi 8.0 – NVIDIA Docs
- I need to upgrade the firmware in a Mellanox Card MT27800, they are installed in a ESXi running vpshere 6.7 u3 i tried to install the mft tool but i have this error L ‘Could not find a trusted signer: certificate has expired’), – Infrastructure & Networking / Adapters and Cables – NVIDIA Developer Forums


Leave a comment