In VCF 9, VMware introduces a major shift in Single Sign-On (SSO) architecture via the new “Identity Broker” service. This change not only consolidates identity management across the VCF stack, but also enables more flexible deployment models and tighter integration with enterprise identity providers. In this two-part blog series I’ll walk you through how to deploy and configure the Identity Broker – in this first instalment we focus on deployment and component configuration, laying the foundation for role-assignment and validation in Part 2.
- VCF Identity Broker Overview
- Preparation
- Phase 1: VCF Identity Broker Deployment
- Phase 2: Component Configuration
- Conclusion
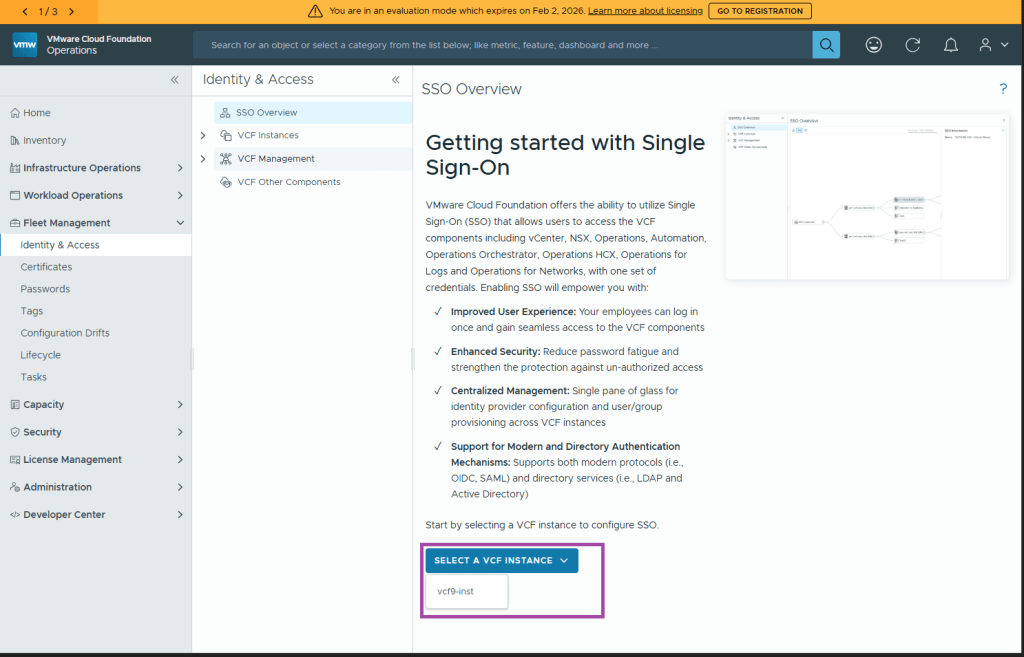
VCF Identity Broker Overview
VCF Identity Broker (vIDB) is the central identity intermediary between your identity provider (for example Microsoft Entra ID / Azure AD) and VMware Cloud Foundation components such as vCenter, NSX and VCF Operations/Automation. By standardising federation and authentication, vIDB reduces configuration complexity, improves compliance and centralises access controls across the VCF stack.
The identity broker may be deployed embedded (in the management vCenter) or as a standalone appliance, depending on scale and availability requirements – see deployment modes later.
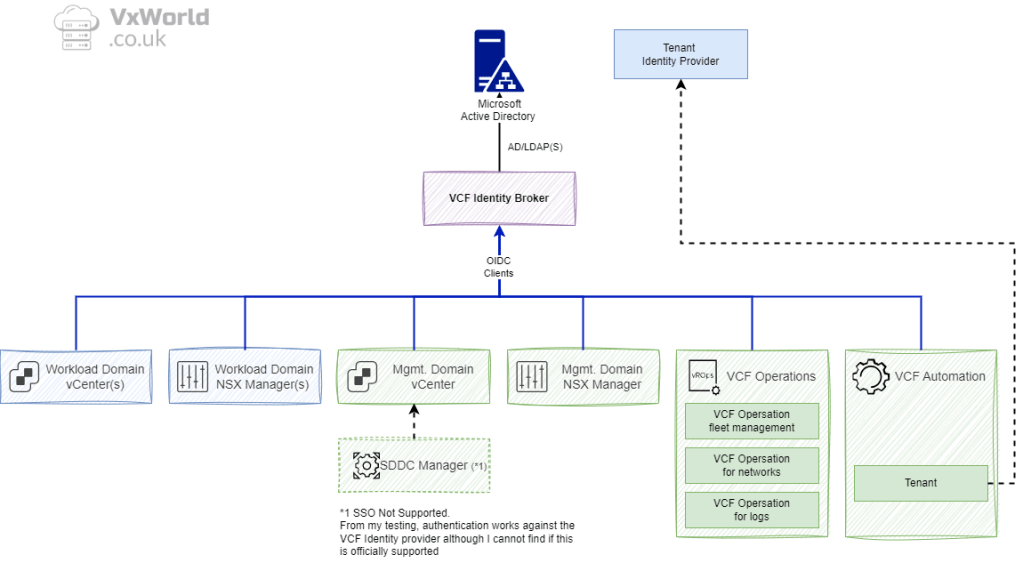
*1 Note: SDDC Manager does not participate in VCF SSO for interactive logins to the SDDC Manager UI; the SDDC Manager UI continues to use local domain accounts for login.
Deployment Sequence
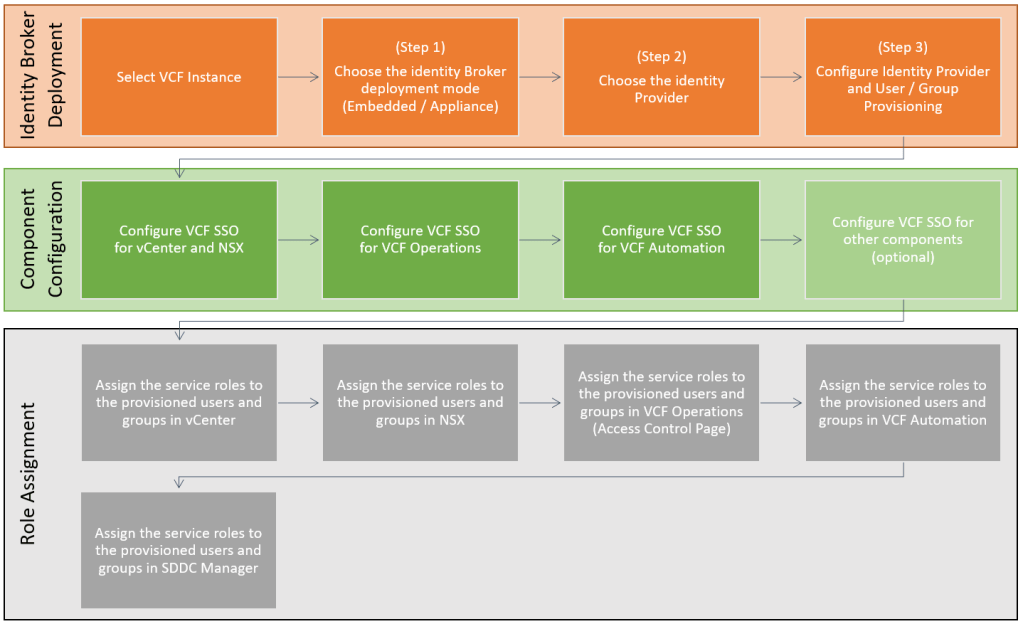
The deployment is carried out in three phases:
- VCF Identity Broker deployment — deploy and configure vIDB and connect to an identity source.
- Component configuration — point each VCF component (vCenter, NSX, VCF Operations, VCF Automation) at the identity broker.
- Role assignment — map provisioned users/groups to service roles in each component (RBAC).
Note: plan your role mapping before beginning Phase 3; role design is easier when you know which AD groups will be provisioned.
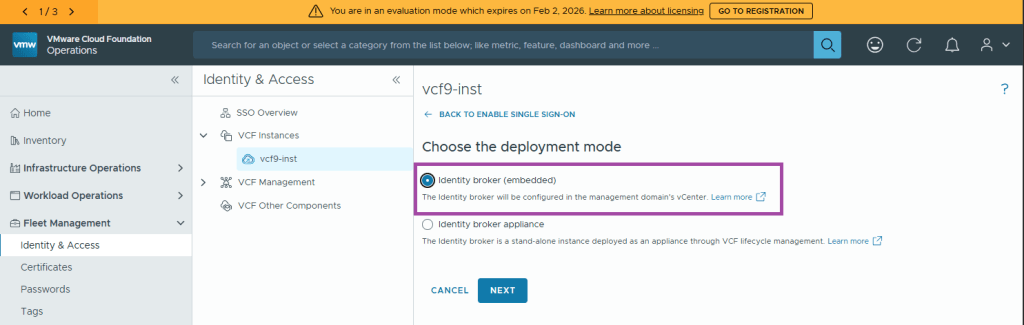
Deployment Modes
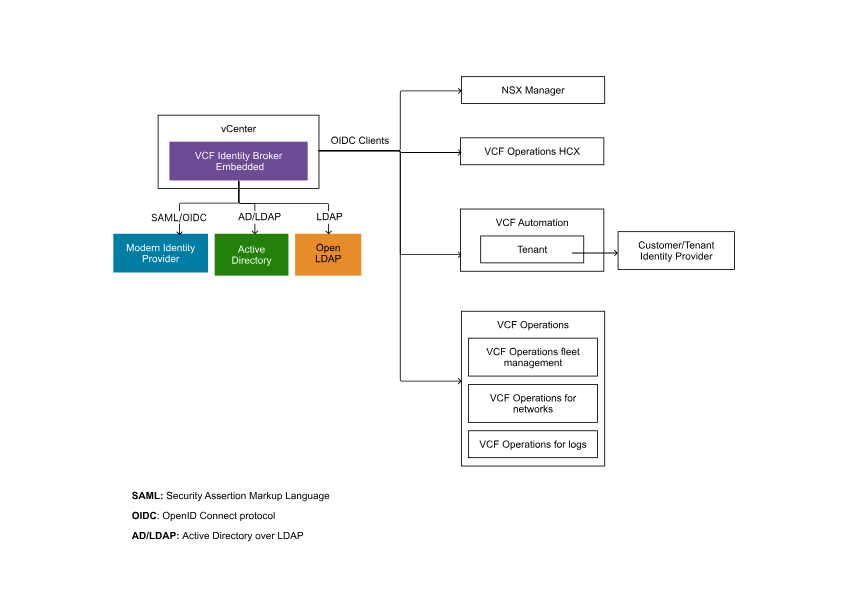
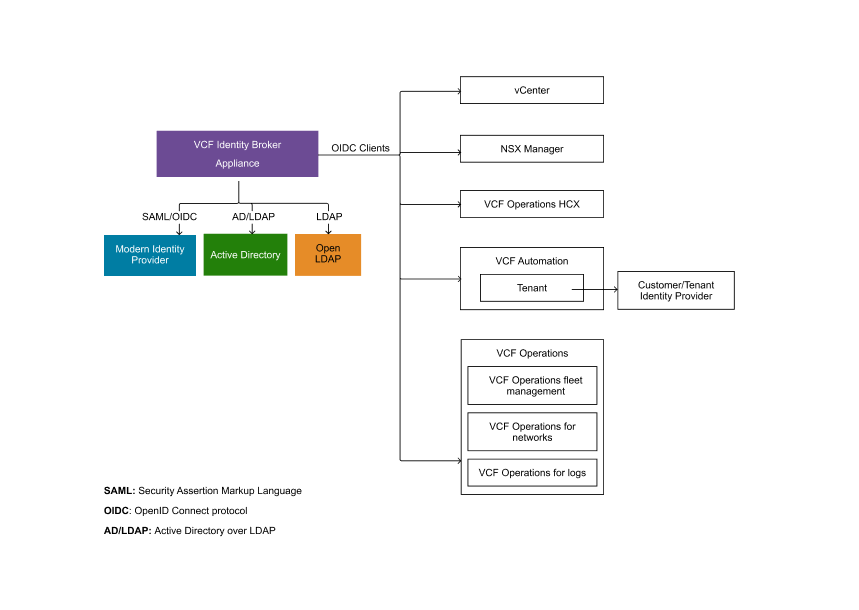
VCF SSO is provided by the VCF Identity Broker and can be deployed in two modes: embedded (runs inside the management domain vCenter) or appliance (stand-alone VIDB appliance cluster for HA and fleet scale). Embedded is suitable for smaller, single-instance VCF deployments; appliance mode is recommended for multi-instance or fleet use.
Identity broker (embedded)
Identity broker will be configured in the management domain’s vCenter. No additional deployment is required.
Identity broker appliance
Identity broker will be deployed and managed as a stand-alone instance through Lifecycle under Fleet Management.
Prerequisites
You can Learn more about the prerequisites on Broadcom’s website. Below is the summary provided by the installer.
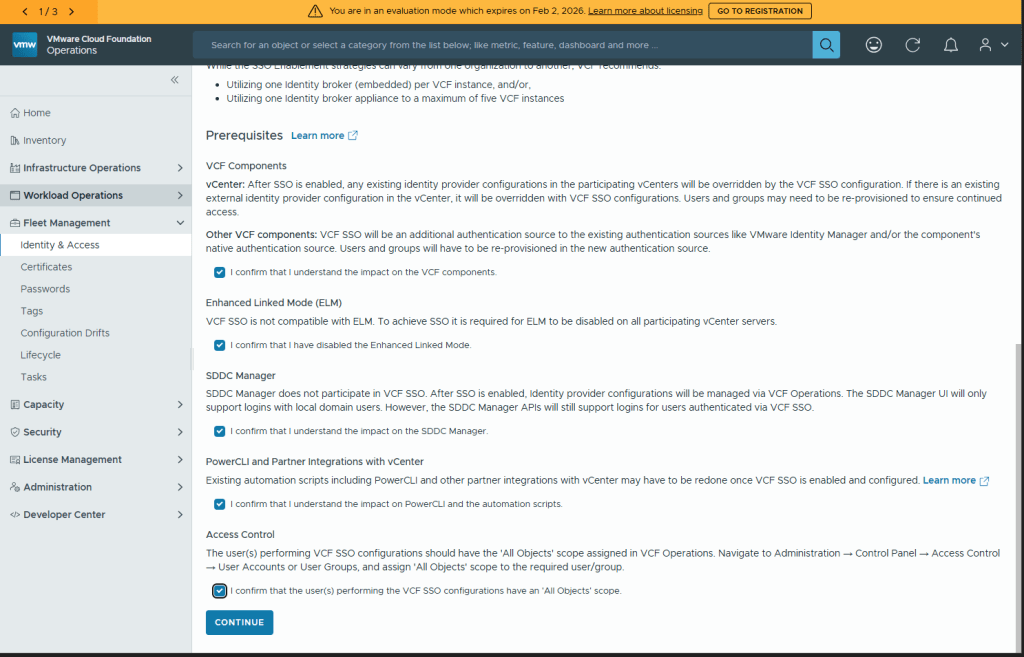
VCF Components
vCenter: After SSO is enabled, any existing identity provider configurations in the participating vCenters will be overridden by the VCF SSO configuration. If there is an existing external identity provider configuration in the vCenter, it will be overridden with VCF SSO configurations. Users and groups may need to be re-provisioned to ensure continued access.
Other VCF components: VCF SSO will be an additional authentication source to the existing authentication sources like VMware Identity Manager and/or the component’s native authentication source. Users and groups will have to be re-provisioned in the new authentication source.
Enhanced Linked Mode (ELM)
VCF SSO is not compatible with ELM. To achieve SSO it is required for ELM to be disabled on all participating vCenter servers.
SDDC Manager
SDDC Manager does not participate in VCF SSO. After SSO is enabled, Identity provider configurations will be managed via VCF Operations. The SDDC Manager UI will only support logins with local domain users. However, the SDDC Manager APIs will still support logins for users authenticated via VCF SSO.
PowerCLI and Partner Integrations with vCenter
Existing automation scripts including PowerCLI and other partner integrations with vCenter may have to be redone once VCF SSO is enabled and configured. Learn more
Access Control
The user(s) performing VCF SSO configurations should have the ‘All Objects’ scope assigned in VCF Operations. Navigate to Administration → Control Panel → Access Control → User Accounts or User Groups, and assign ‘All Objects’ scope to the required user/group.
Preparation
Identity Broker Deployment
If you are going to configure the VCF Identity Broker to use AD/LDAP as your identity source, you will need to have the following to hand.
| Property | Example Value |
|---|---|
| Base DN | OU=vcf9,DC=lab,DC=vxworld,DC=co,DC=uk |
| Bind User | CN=svc-vcf-m1-ops-bind,OU=Service Accounts,OU=vcf9,DC=lab,DC=vxworld,DC=co,DC=uk |
| CA Chain | If you are going to use LDAPS, you need the certificate chain in pem format |
| Base group DN | OU=Groups,OU=vcf9,DC=lab,DC=vxworld,DC=co,DC=uk |
| Base user DN | OU=Users,OU=vcf9,DC=lab,DC=vxworld,DC=co,DC=uk |
| Groups to provision | viadmins |
| Users to provision | vcfadmin |
Role Assignment
It is recommended to plan our your role assignment before commencing configuration. Below is an example of the group to role mapping for each component. In my lab, I am only assigning permissions to the VIAdmin AD group. In production, you would have several groups to assign roles to, allowing a least privilege RBAC model.
| User or Group | Component | Role | Scope |
|---|---|---|---|
| viadmins | vCenter | Administrator | Global Permissions |
| viadmins | NSX | Enterprise Admin | – |
| viadmins | VCF Operations | Administrator | All Objects |
| viadmins | VCF Automation | ||
| viadmins | SDDC Manager | Admin | – |
Phase 1: VCF Identity Broker Deployment
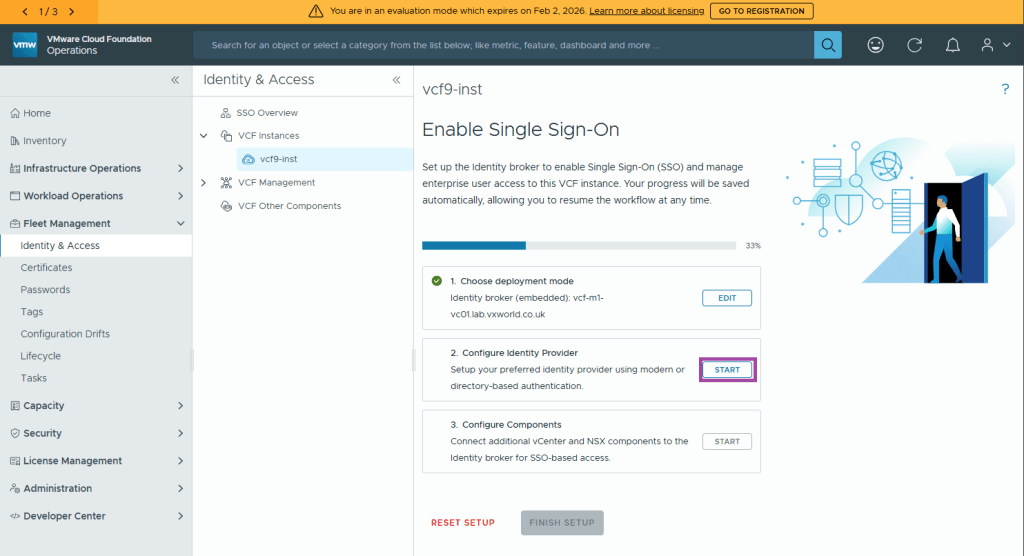
In VCF Operations, go to Fleet Management → Identity & Access Management.
Accept each of the prerequisites
Click CONTINUE
Select a VCF Instance. In my case, that is vcf9-inst
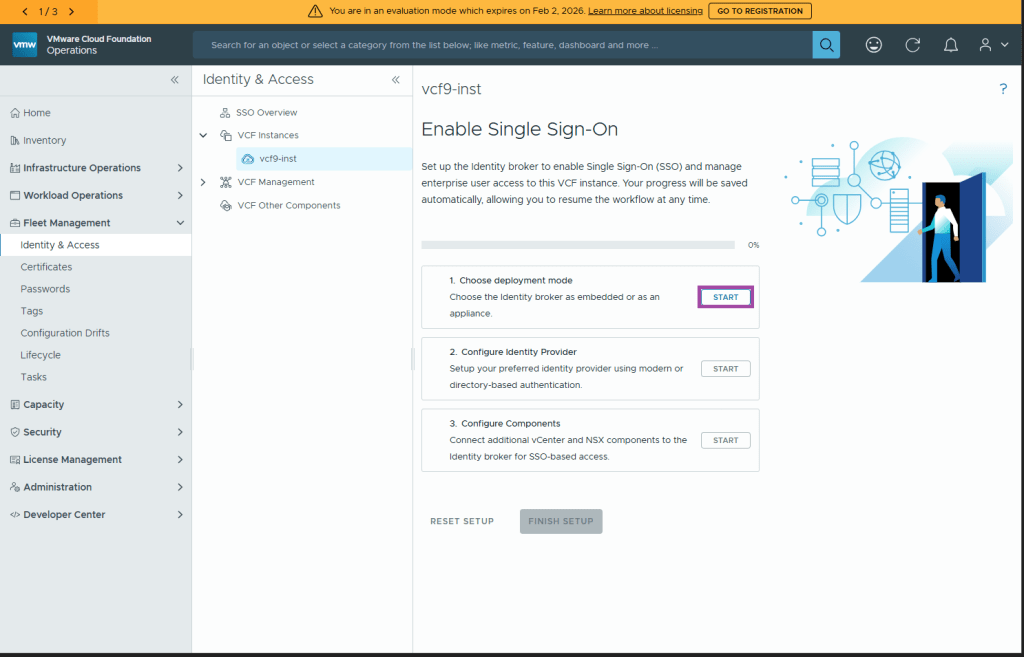
(Step 1) Choose Deployment mode
Under Step 1, Choose Deployment mode, click Start
I will be deploying the VCF Identity Broker in the embedded mode. In this mode, it runs within the Management Domain vCenter and I will uses Active Directory (AD/LDAP) as my identity provider.
Select Identity broker (embedded) and click Next
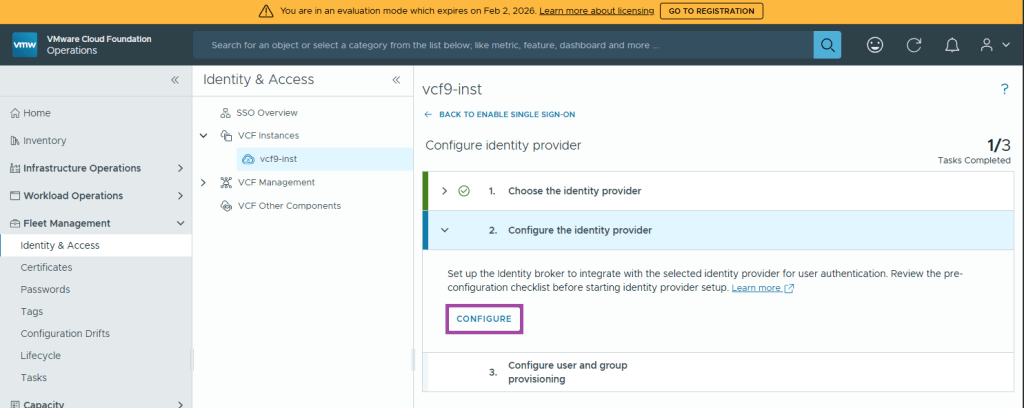
(Step 2) Configure the identity provider
Under Step 2, Configure Identity Provider, click Start
Select your identity provider and click Next. In my case I will be using AD/LDAP

Now it’s time to Configure the identity provider, click Configure
Fill in the Directory Information and click Next
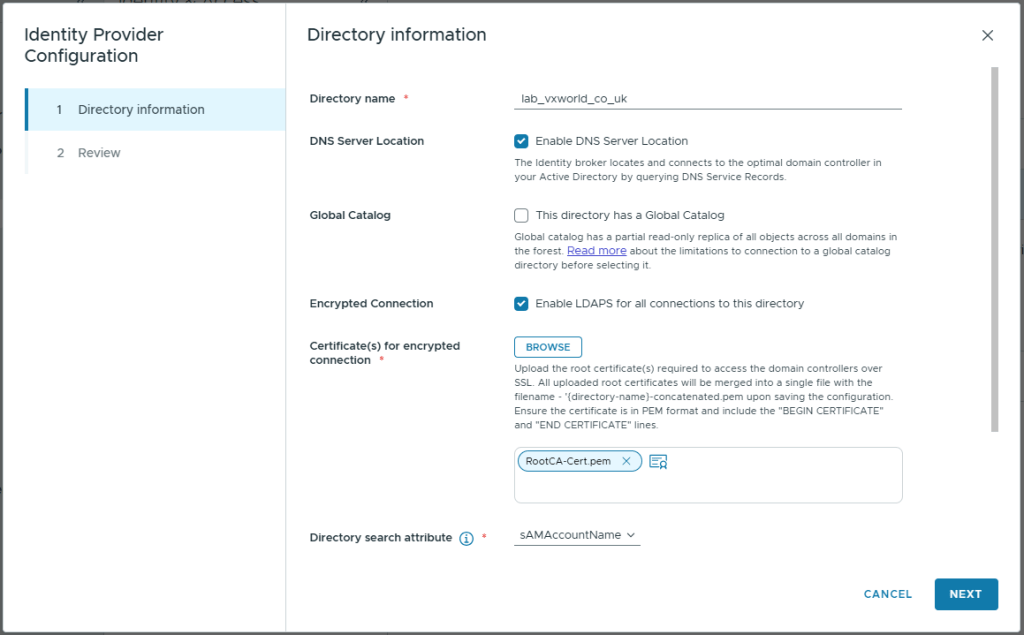
Below are the values I used for my lab
| Property | Value |
|---|---|
| Directory name | lab_vxworld_co_uk |
| DNS Server Location | Checked (Enable DNS Server Location) |
| Global Catalog | Unchecked (This directory has a Global Catalog) Global catalog has a partial read-only replica of all objects across all domains in the forest. Read more about the limitations to connection to a global catalog directory before selecting it. |
| Primary domain controller | (n/a when ‘DNS Server Location’ is checked) |
| Secondary domain controller | (n/a when ‘DNS Server Location’ is checked) |
| Encrypted Connection | Checked (Enable LDAPS for all connections to this directory) |
| Certificate(s) for encrypted connection | Upload the cert (public key) for the domain controller or preferably the issuing CA chain. |
| Directory search attribute | sAMAccountName |
| Base DN | OU=vcf9,DC=lab,DC=vxworld,DC=co,DC=uk |
| Bind user name | CN=svc-vcf-m1-ops-bind,OU=Service Accounts,OU=vcf9,DC=lab,DC=vxworld,DC=co,DC=uk |
| Bind user password | – |
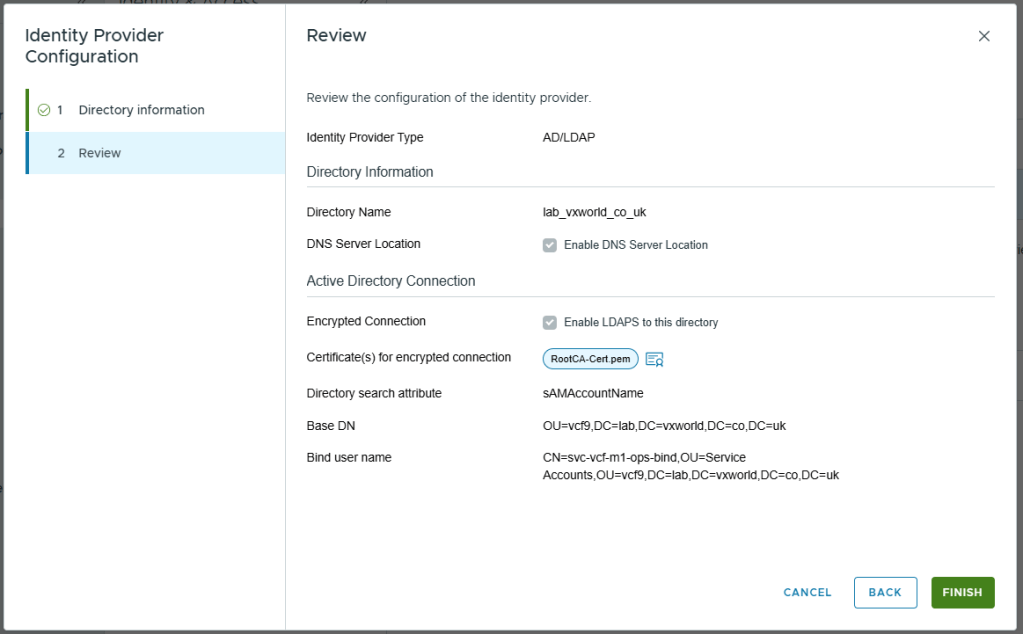
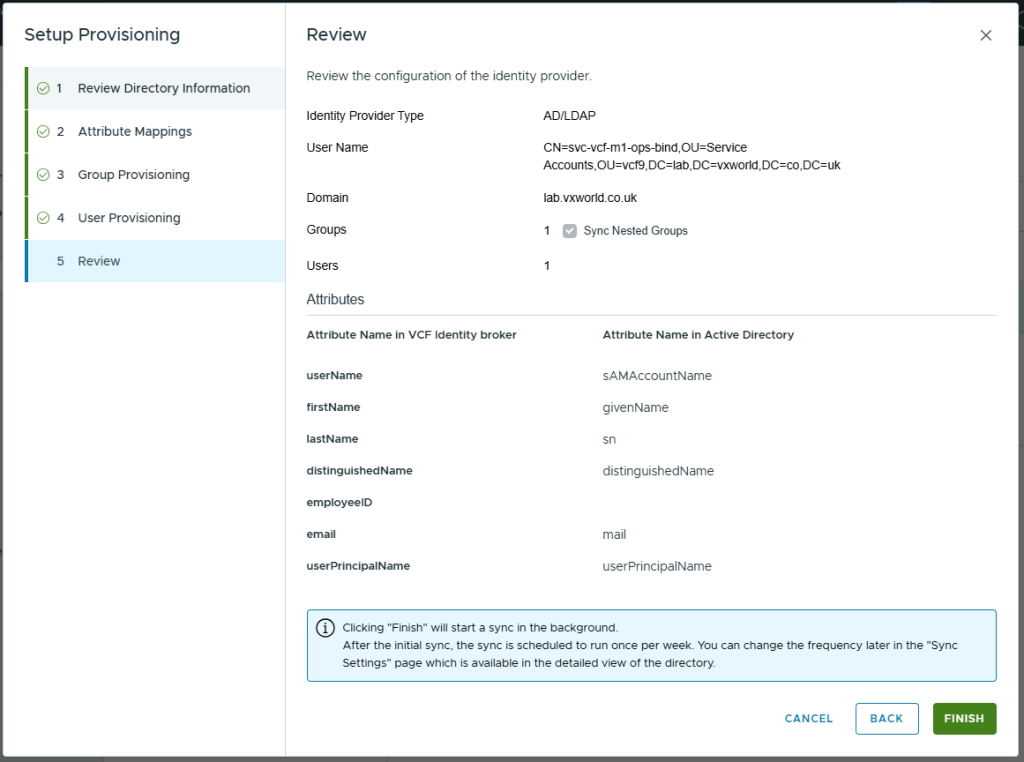
Review and click Finish
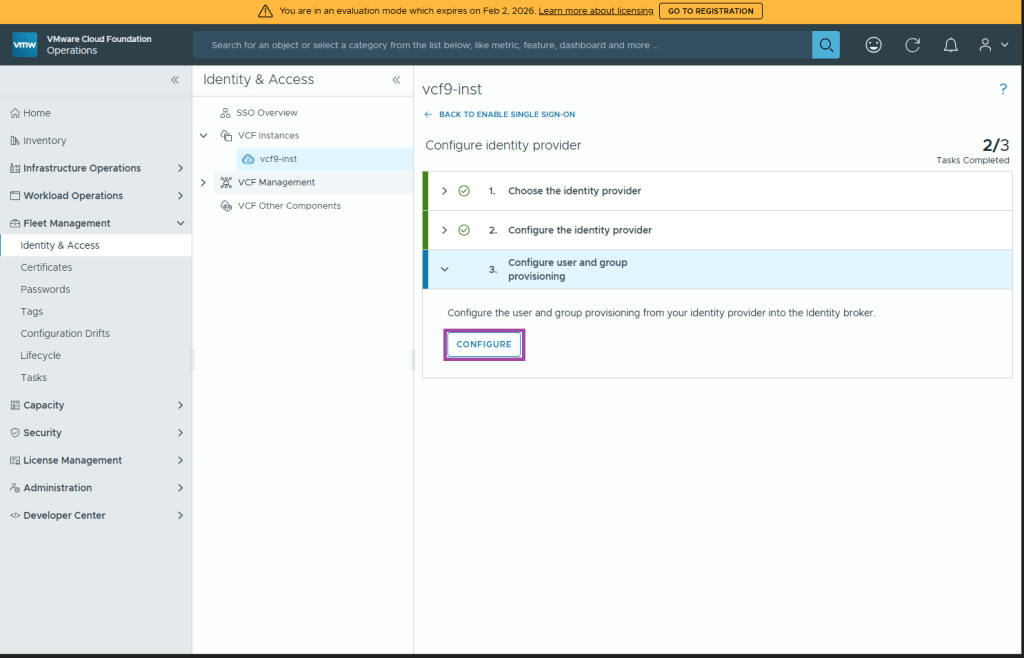
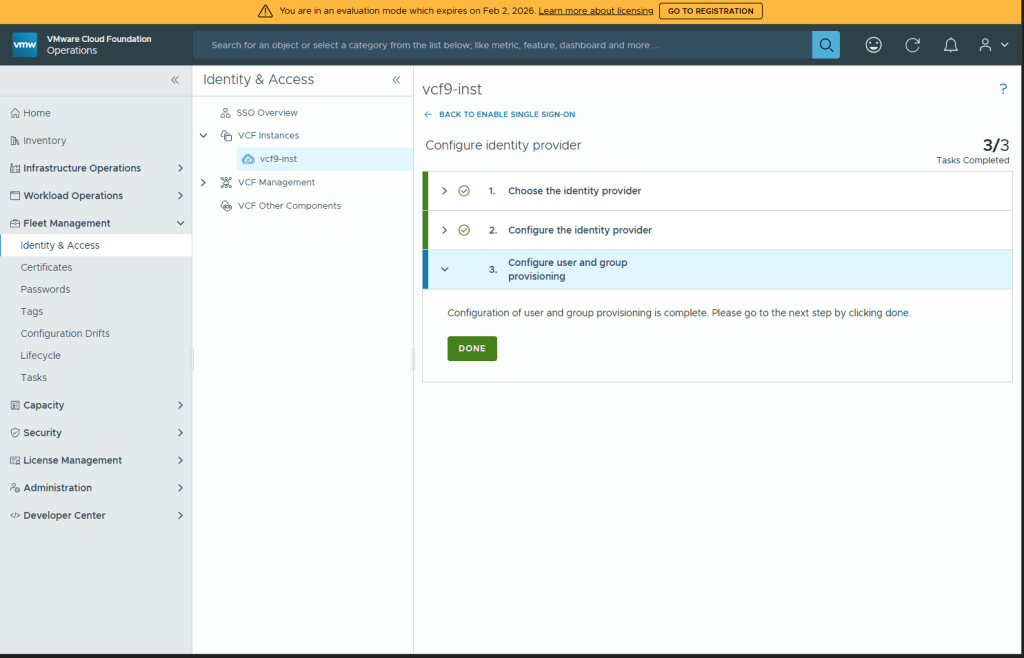
(Step 3) Configure user and group provisioning
Under Step 3, Configure user and group provisioning, click Configure
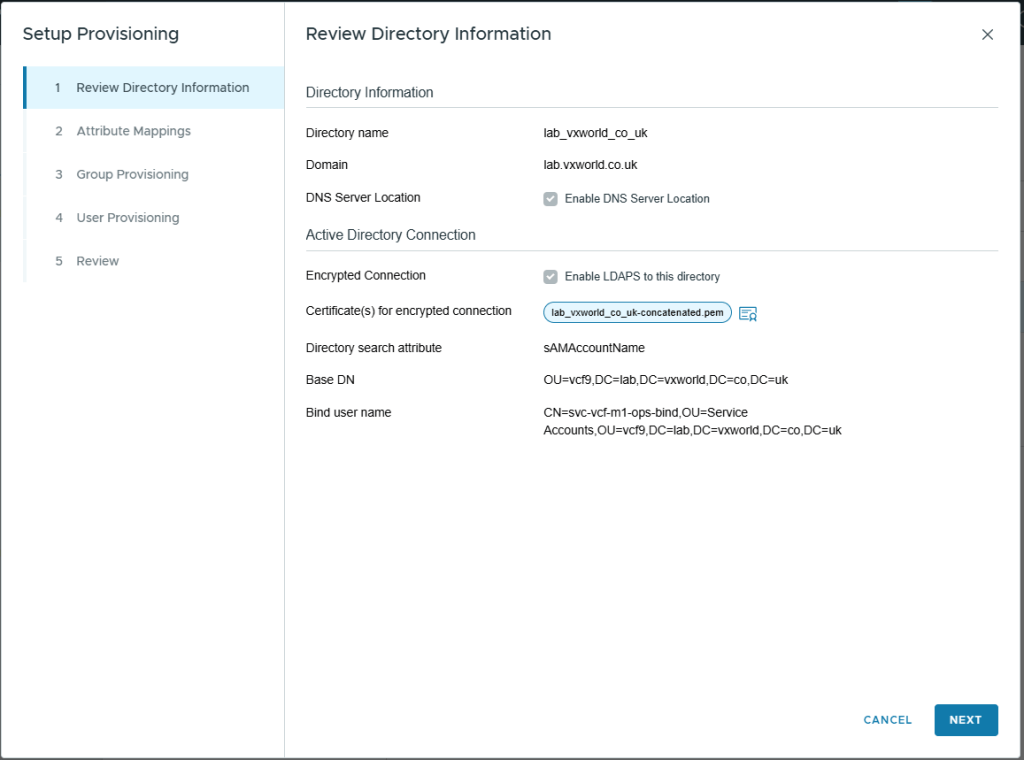
On the Review Directory Information screen, Click Next
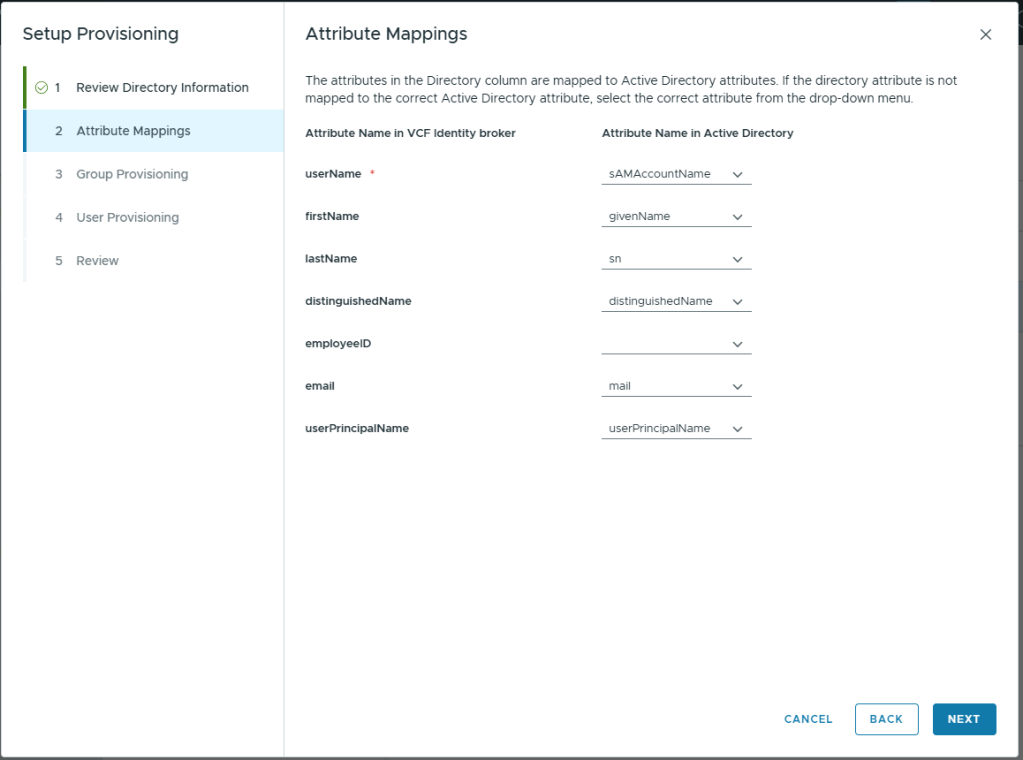
On the Attribute Mappings screen, Click Next.
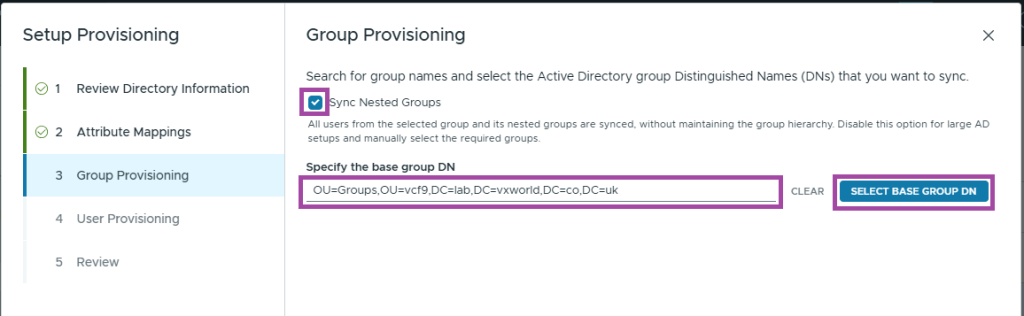
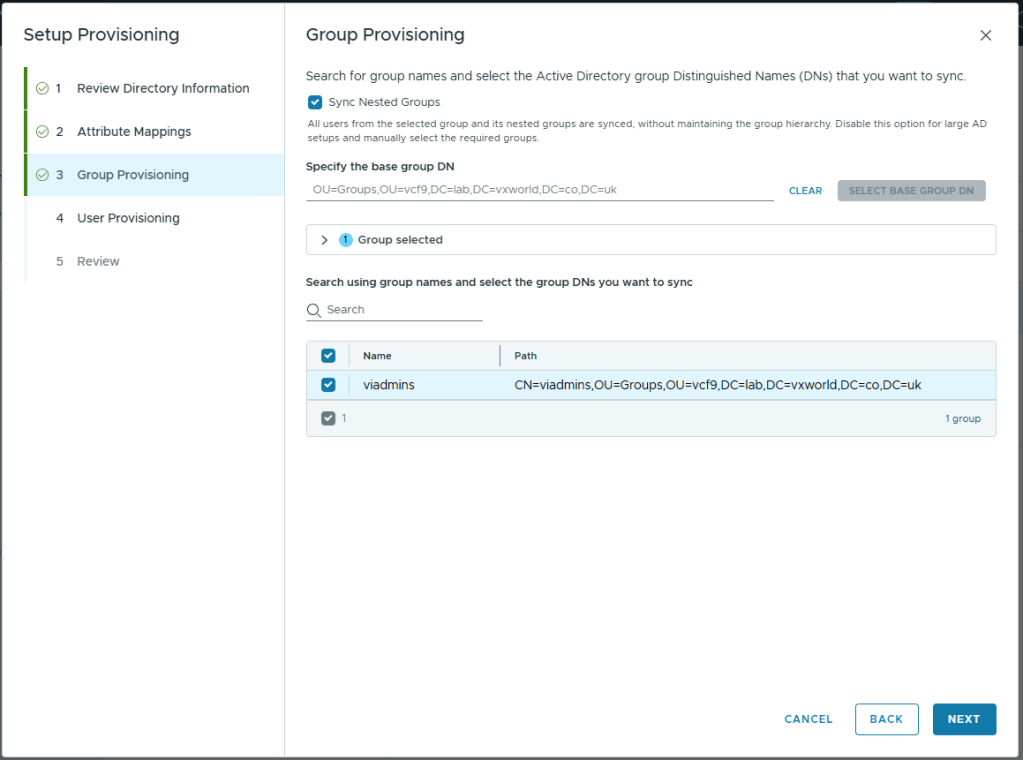
On the Group Provisioning screen
- Check Sync Nested Groups
- Enter the Group Base DN to search. In my lab this is OU=Groups,OU=vcf9,DC=lab,DC=vxworld,DC=co,DC=uk
- Click SELECT BASE GROUP DN
Select the groups you want to provision in VCF Identify Broker and click Next
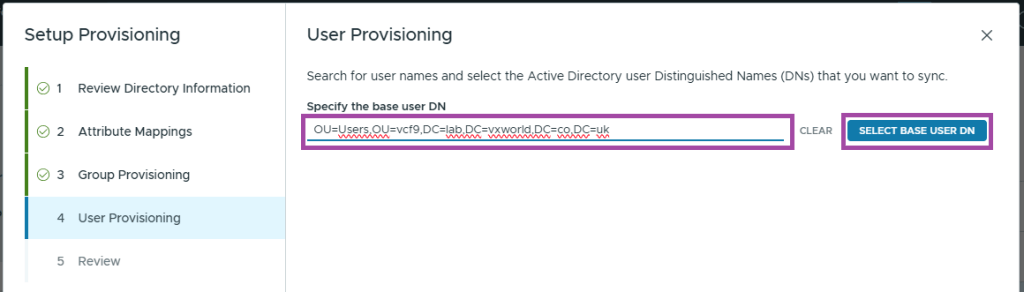
On the User Provisioning screen
- Enter the User Base DN to search. In my lab this is OU=Users,OU=vcf9,DC=lab,DC=vxworld,DC=co,DC=uk
- Click SELECT BASE USER DN
It will look like no users have been returned. Enter a user in the search box
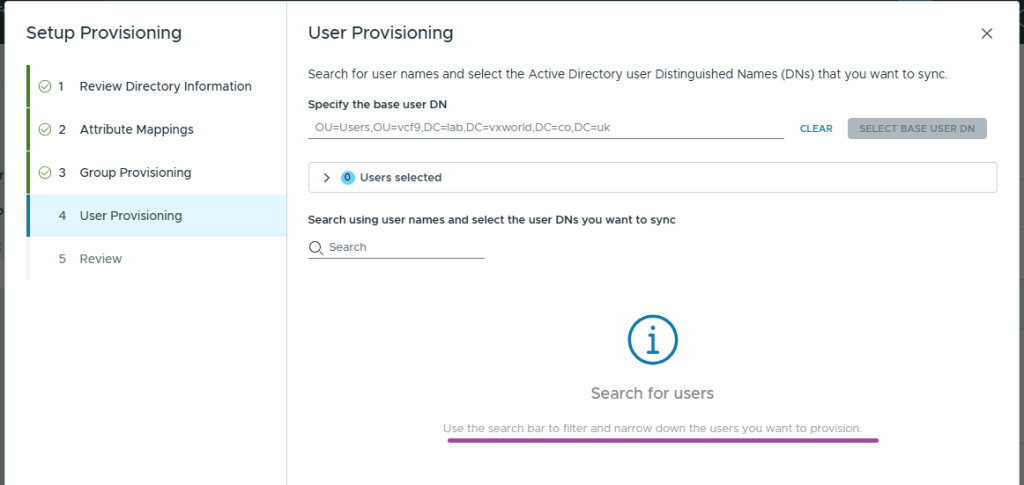
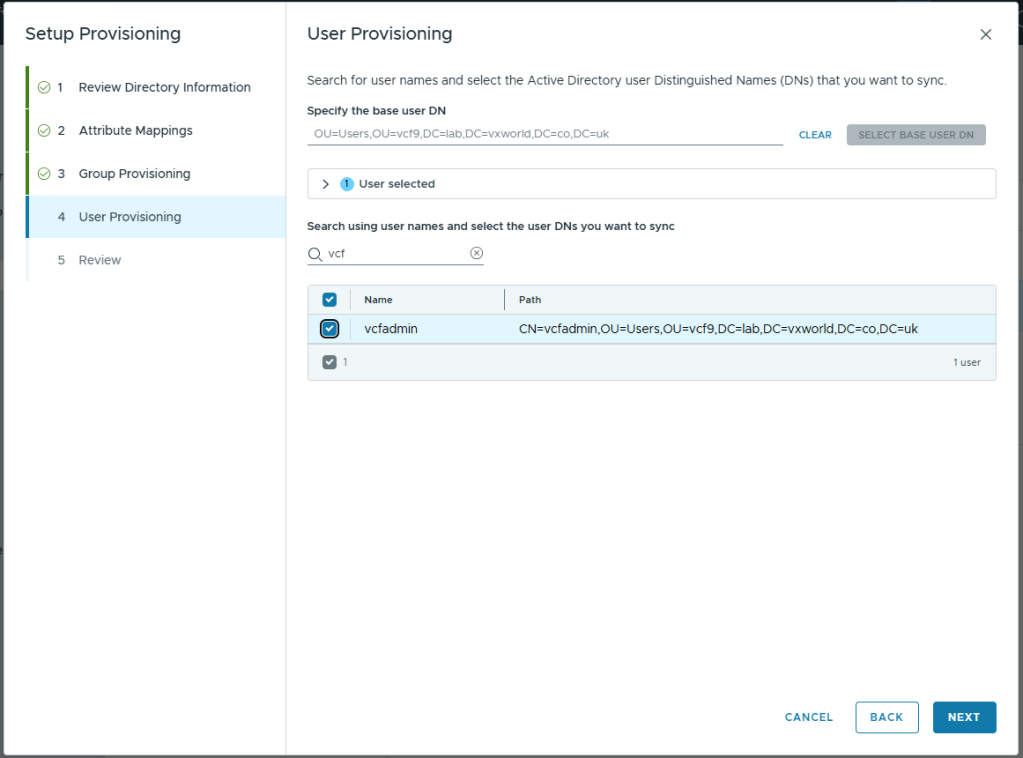
Enter a user in the search box. You should now see users to select.
Select the users you want to provision in VCF Identify Broker and click Next
Review and click Finish
Click Done
Click Finish Setup
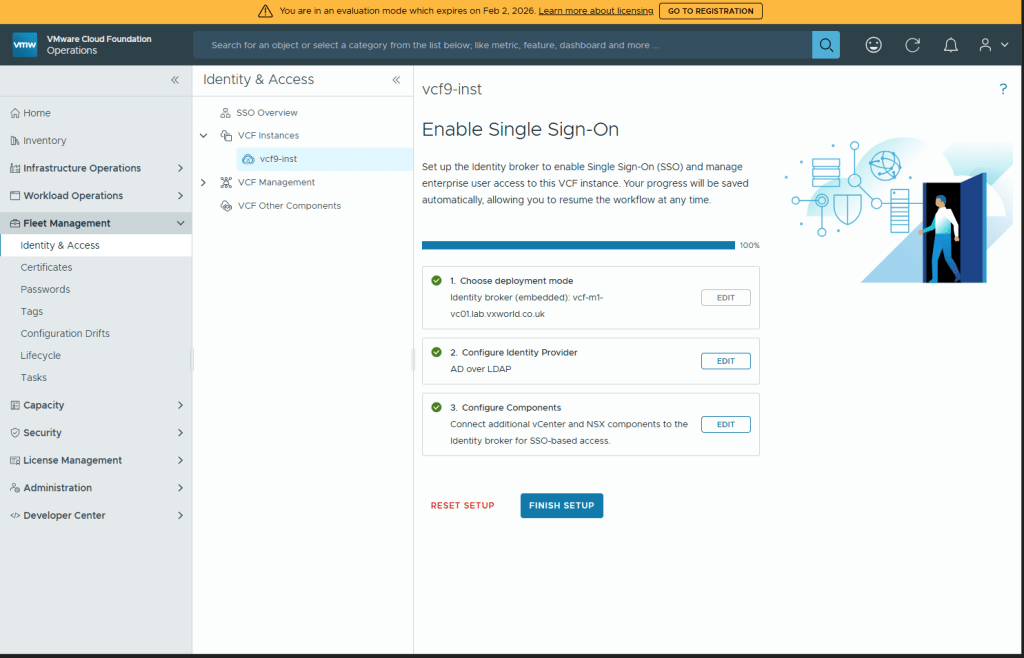
Note the recommendation to backup vCenter/VIDB Appliance and you will need to assign roles to each VCF component.
Click CONTINUE

You should now need the configured Identity Source

Phase 2: Component Configuration
We now need to make the VCF Identity Broker the identity source for our VCF components. The vCenter for the Management Domain should already be configured automatically as part of the installer.
Configure VCF SSO for vCenter and NSX
Under Fleet Management -> Identity & Access -> VCF Instances
Select your VCF instance for the management domain
Click Component Configuration
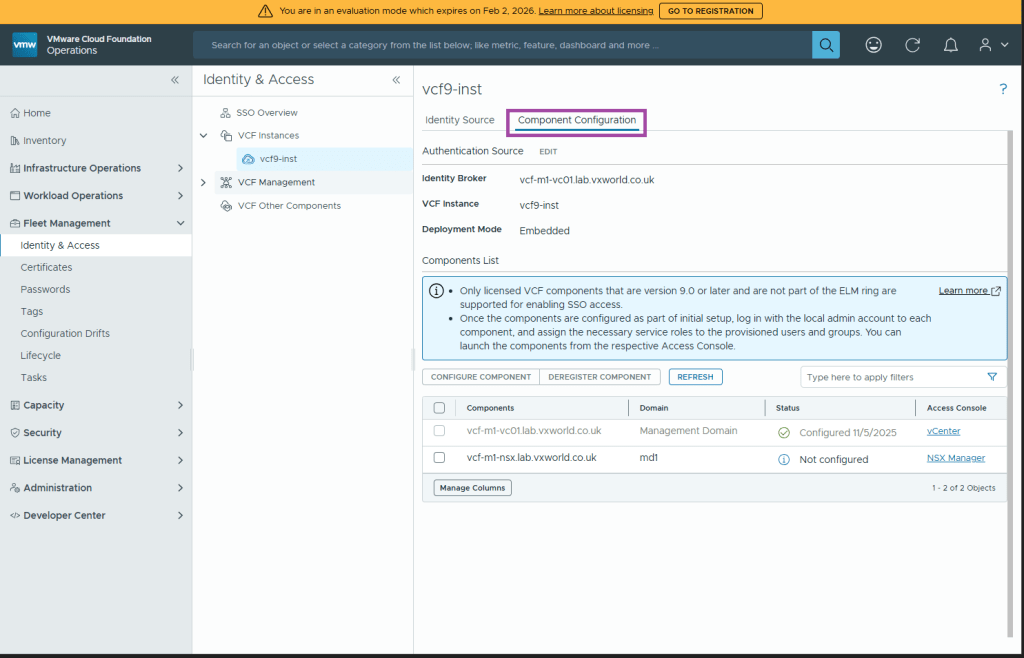
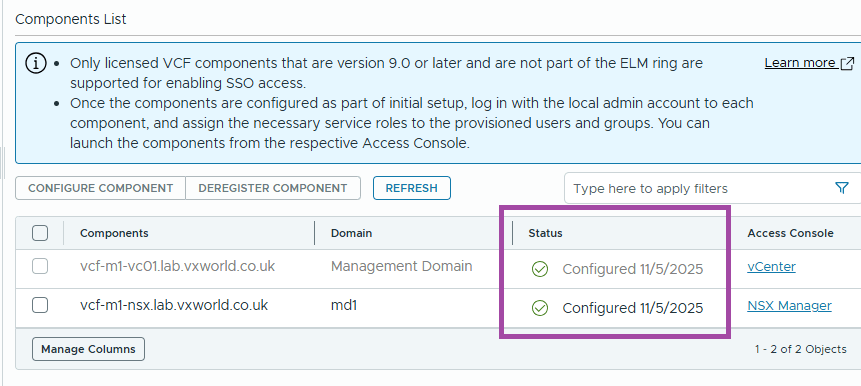
Select the NSX component for your management domain and click CONFIGURE COMPONENT

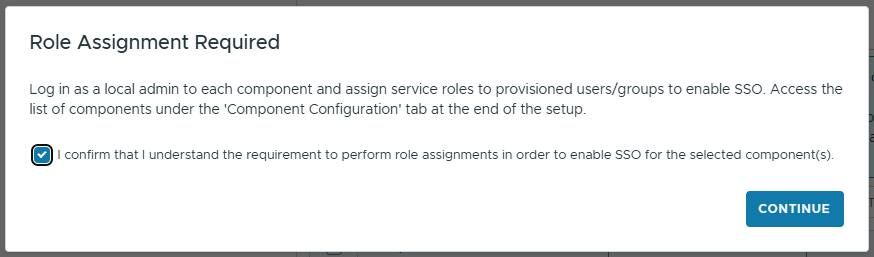
Note you will need to assign roles to each VCF component and click CONTINUE
All components should now show as Configured
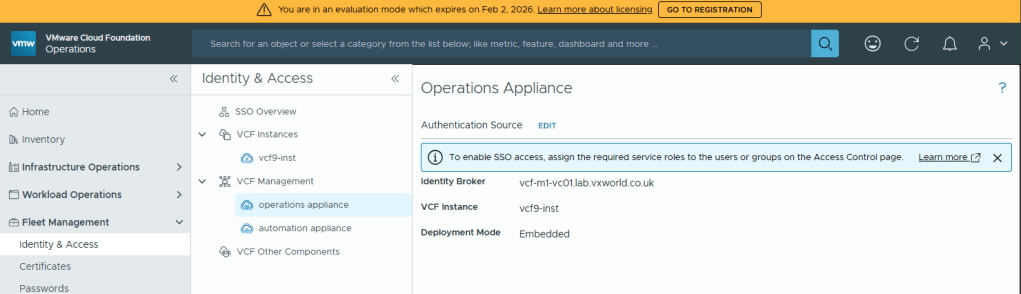
Configure VCF SSO for VCF Operations
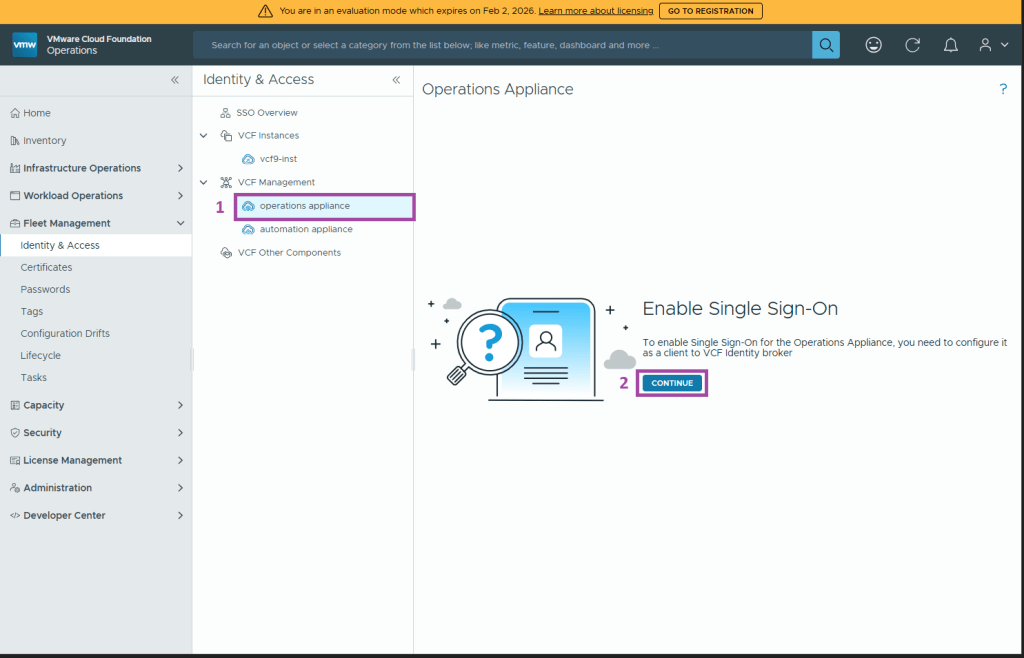
Under Fleet Management -> Identity & Access -> VCF Management
Select operation appliance and click CONTINUE
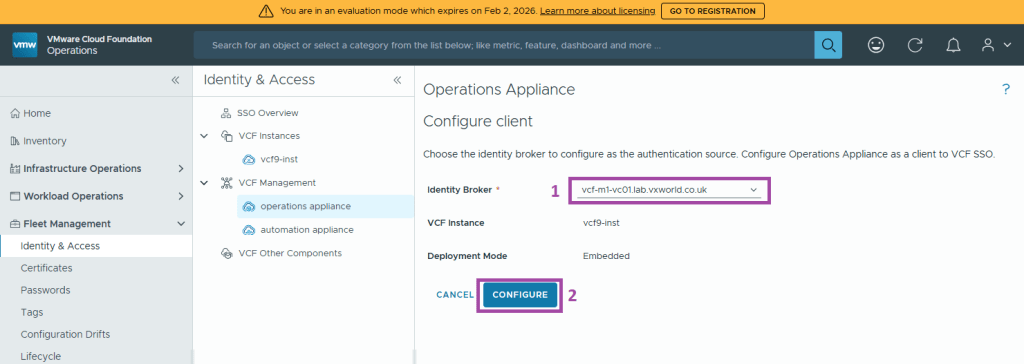
Select the Identity Broker and click CONFIGURE
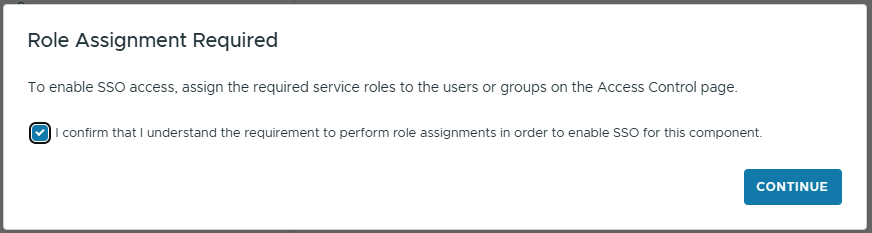
Note you will need to assign roles on the Access Control page and click CONTINUE
You should now see that VCF Operations Appliance is integrated into VCF Identity Broker
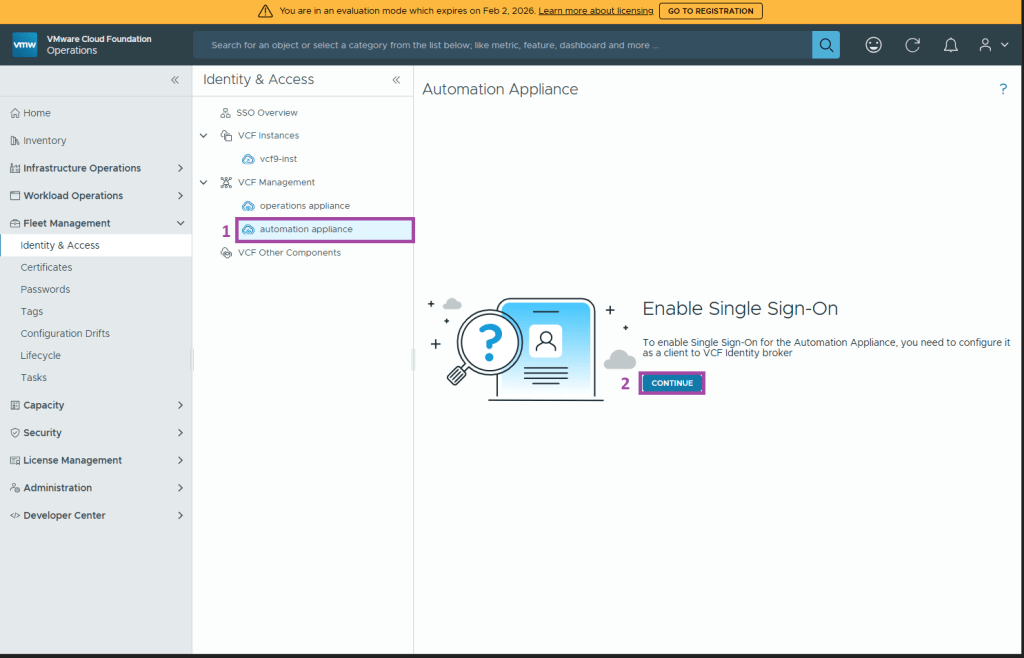
Configure VCF SSO for VCF Automation
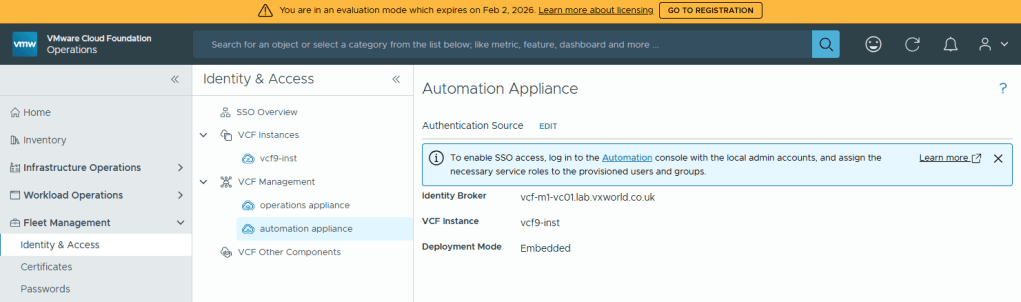
Under Fleet Management -> Identity & Access -> VCF Management
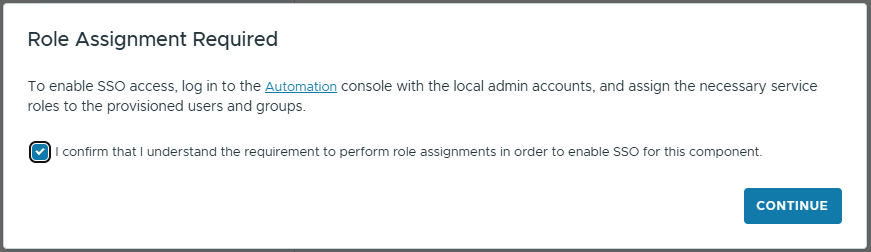
Select automation appliance and click CONTINUE
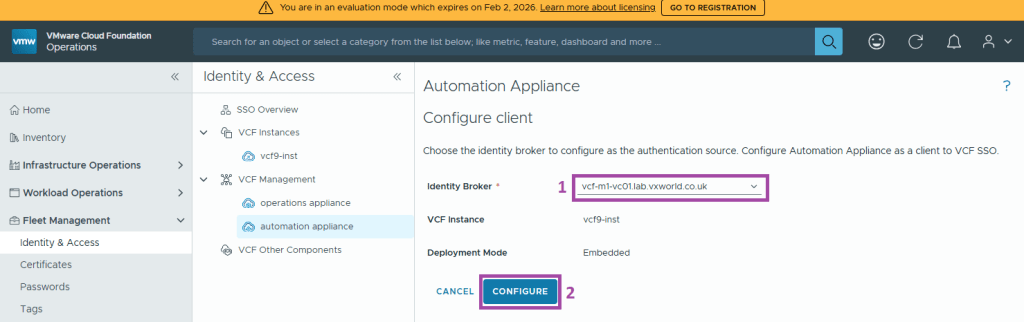
Select the Identity Broker and click CONFIGURE
Note you will need to assign roles to the provisioned users and groups and click CONTINUE
You should now see that VCF Automation Appliance is integrated into VCF Identity Broker
Conclusion
With the Identity Broker successfully deployed and the core VCF components now connected, we’ll move on to assign roles and permissions and validate the setup in part 2.
Continue to Part 2: Role Assignment and Validation


Leave a comment