Now that we’ve covered how to deploy the Identity Broker and link the key VCF components, it’s time to focus on the operational side of the implementation. In this concluding part we’ll walk through how to assign service and admin roles, validate the SSO integration end-to-end.
If you haven’t done Phase 1 & 2, read Part 1 here VCF 9 – Deploying VCF Identity Broker
As a reminder, I have split the Deployment Sequence into three phases, this post covers the Role assignment phase, validation and troubleshooting.
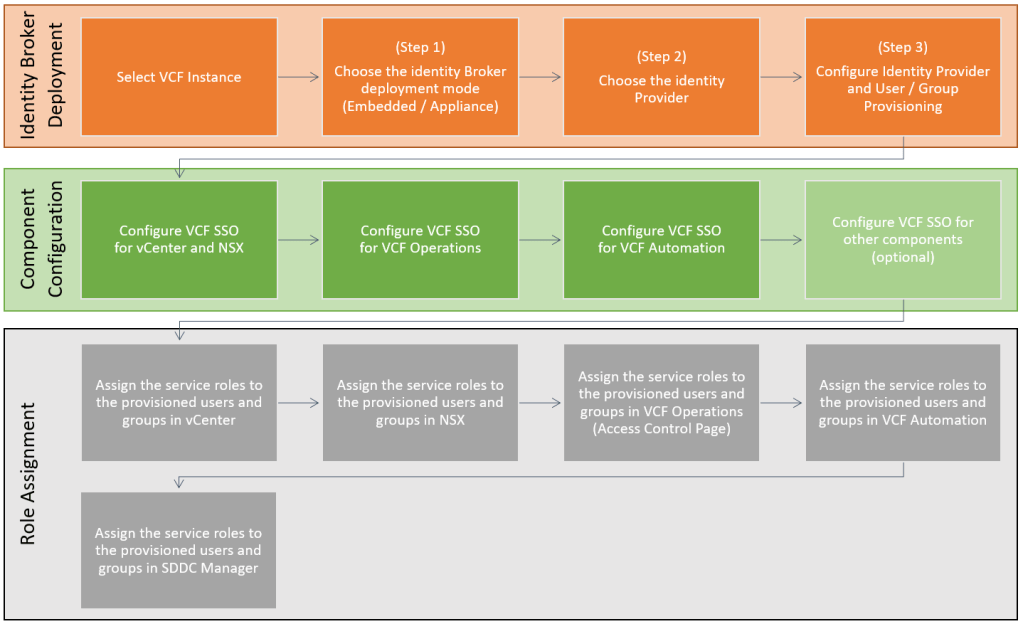
Phase 3: Role Assignment
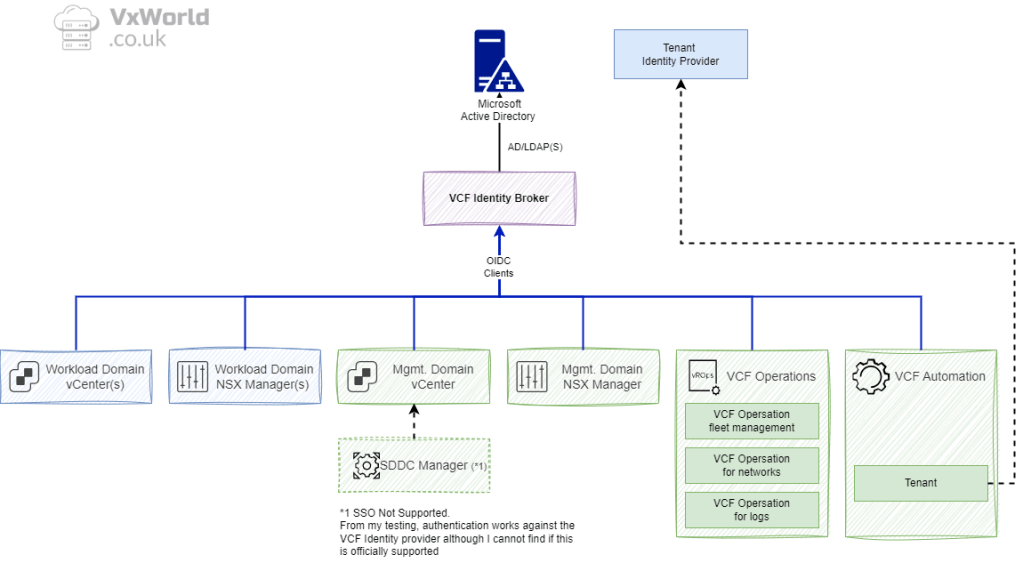
We now need to log in as a local admin to each VCF component. Then, assign service roles to provisioned users/groups.
- Management vCenter
- Management NSX Managers
- VCF Operations
- VCF Automation
- SDDC Manager
Assign the service roles in vCenter
Assign the necessary service roles to the provisioned users and groups in vCenter.
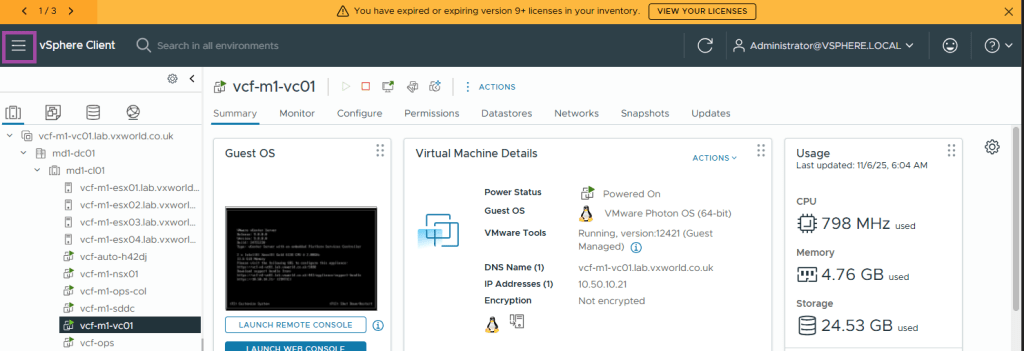
Browse to your Management Domain vCenter and log in using the vCenter SSO domain (e.g. administrator@vsphere.local)
Click the Hamburger Menu in the top left
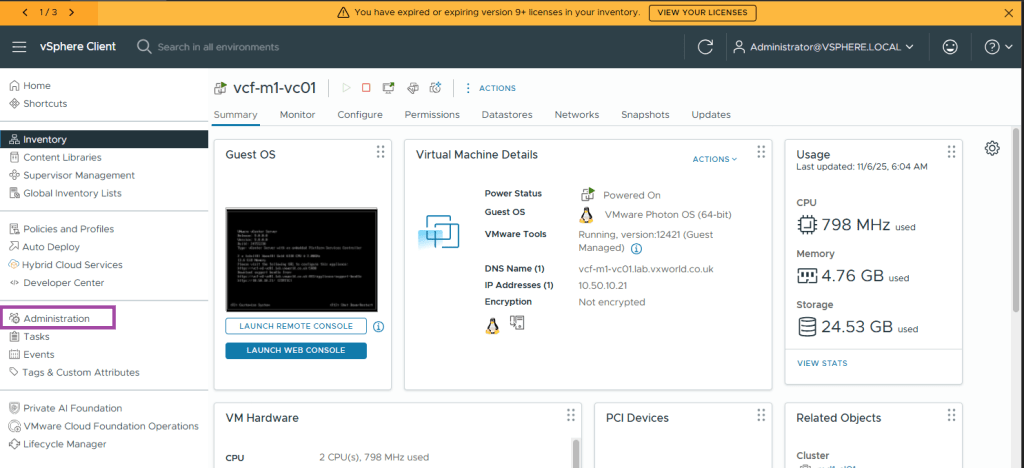
Click Administration
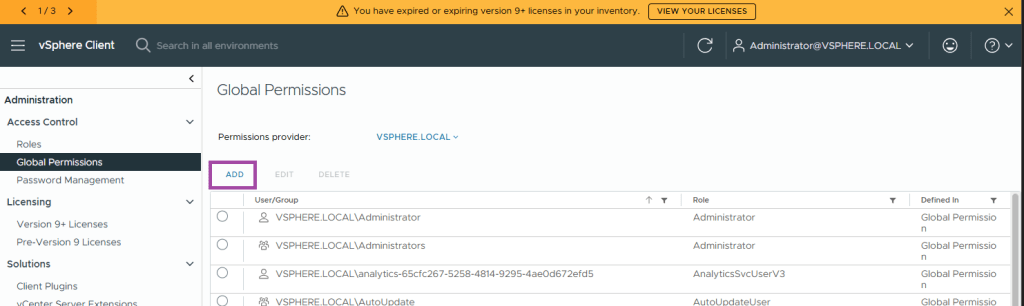
Under Administration -> Access Control -> Global Permissions
Click ADD
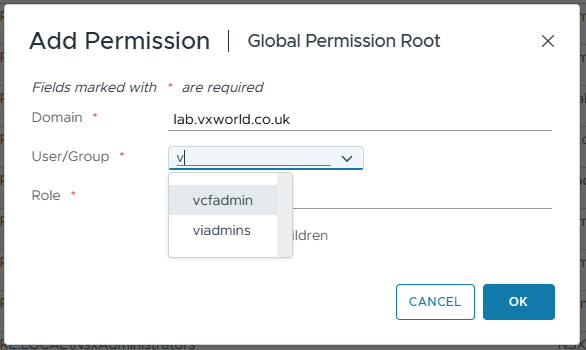
Change the Domain field to the domain you configured as your identity source in VCF Identity Broker
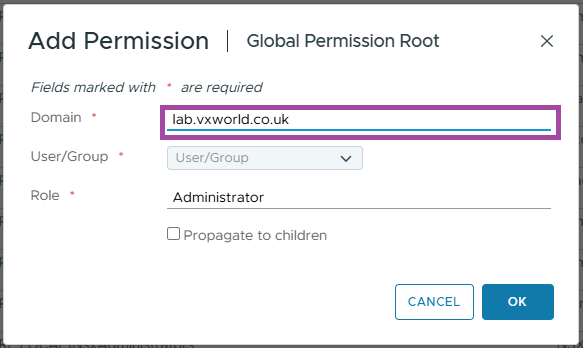
Enter the group or user you want to add. These must be one of the ones your provisioned within VCF Identity Broker.
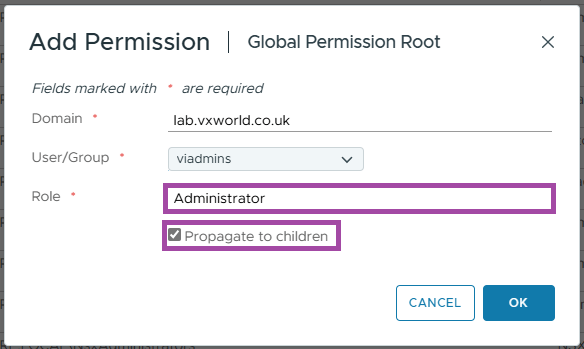
Select the vCenter Role and if you want to propagate to children. Click OK
Repeat for any other role assignments you need in your environment.
NOTE
In my lab, I am only assigning permissions to the VIAdmin group. In production, you will have several groups to roles you need to assign. Assign permissions not just at the Global Permissions level. Also, assign permissions down to individual objects within vCenter. These include Resource Groups, vCenter, Networks, etc.
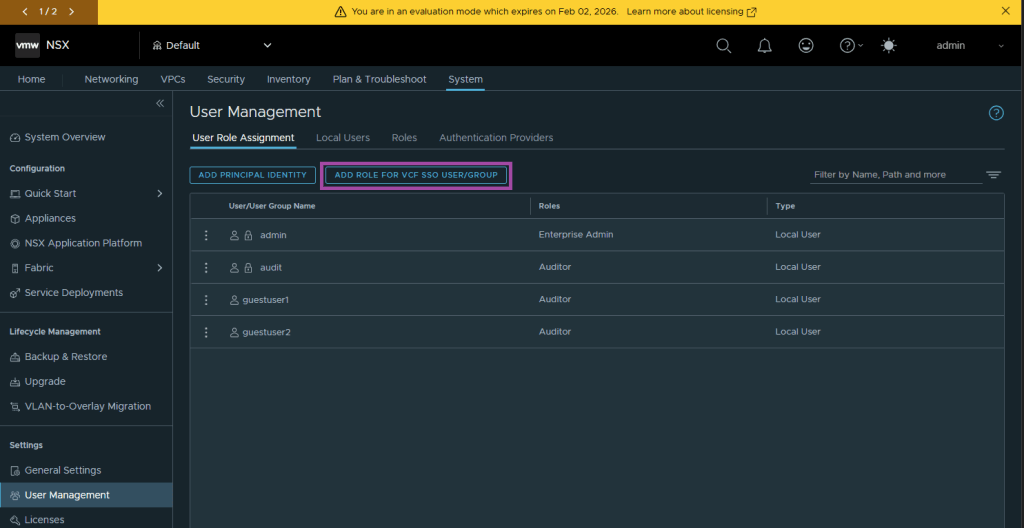
Assign the service roles in NSX
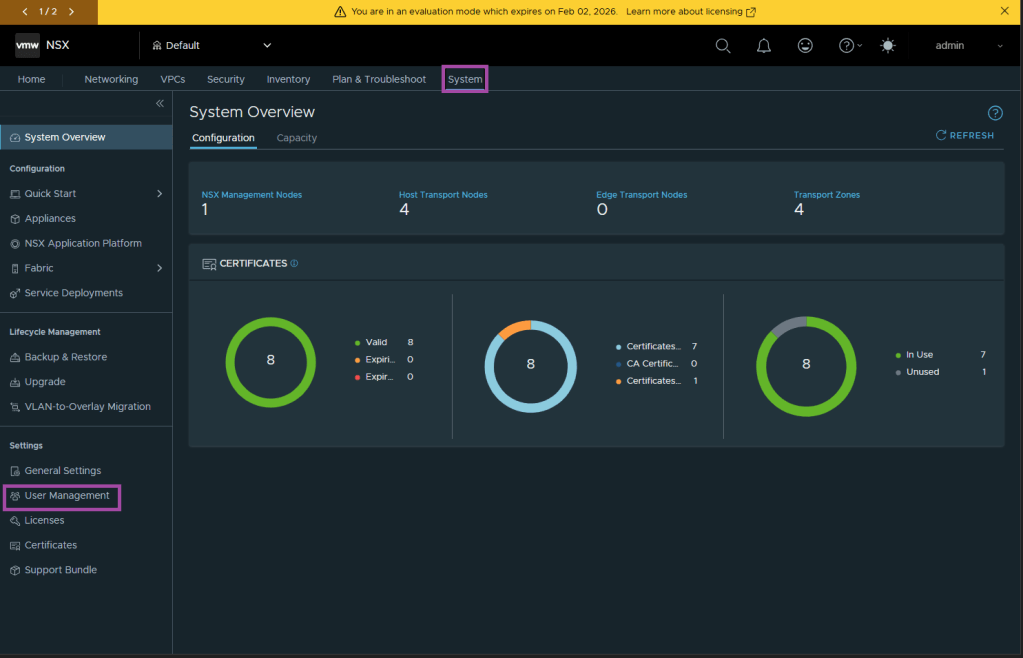
Assign the necessary service roles to the provisioned users and groups in NSX. This will be done using the System -> Settings -> User Management -> User Role Assignment page.
Browse to your Management NSX Managers VIP and log in using the NSX ‘Local Account’ (e.g. admin)
Click System and under Settings, User Management
Click ADD ROLE FOR VCF SSO USER/GROUP
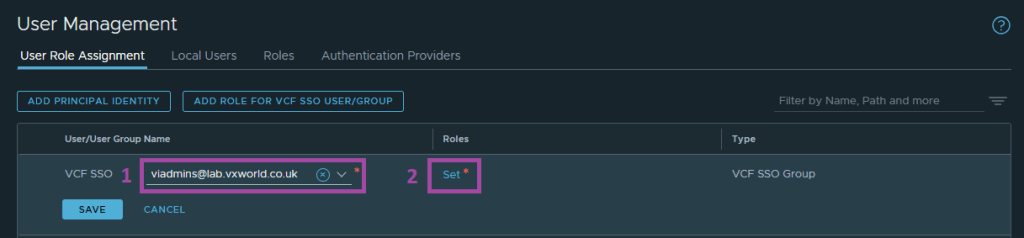
Search for the user or group then click Set under Roles
Click ADD ROLE and select the role you want to assign
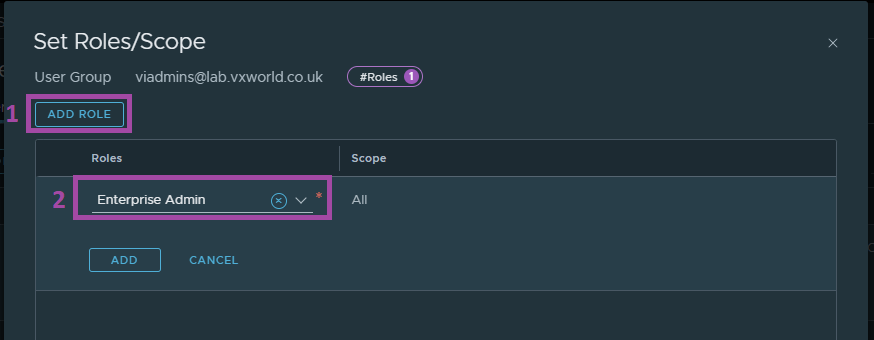
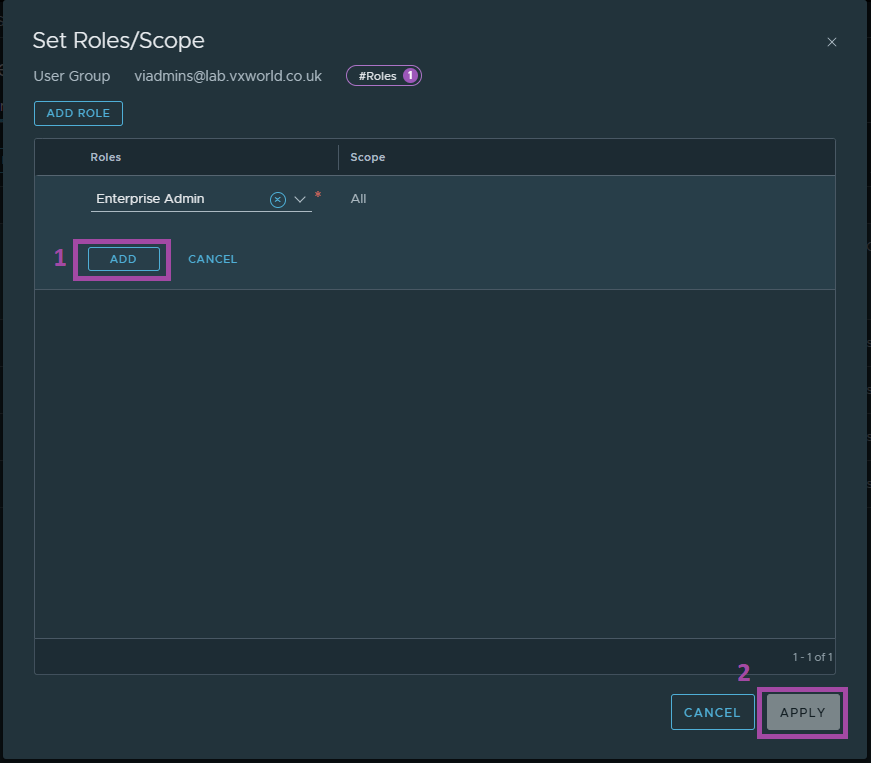
Click ADD and then APPLY
Click SAVE
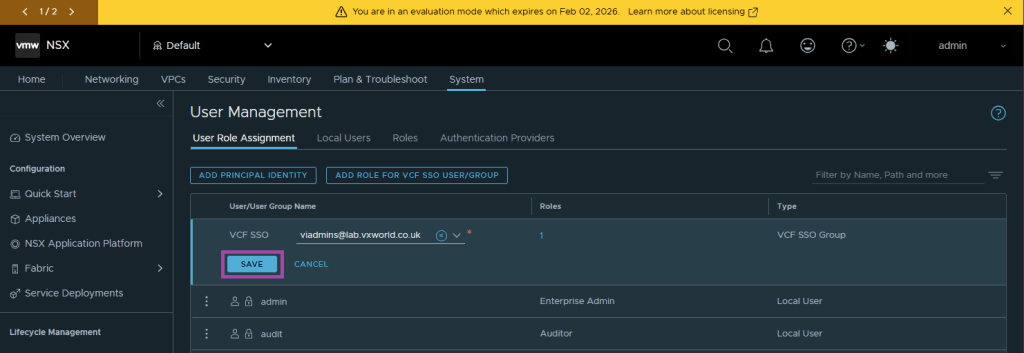
You should see an Added Successfully message
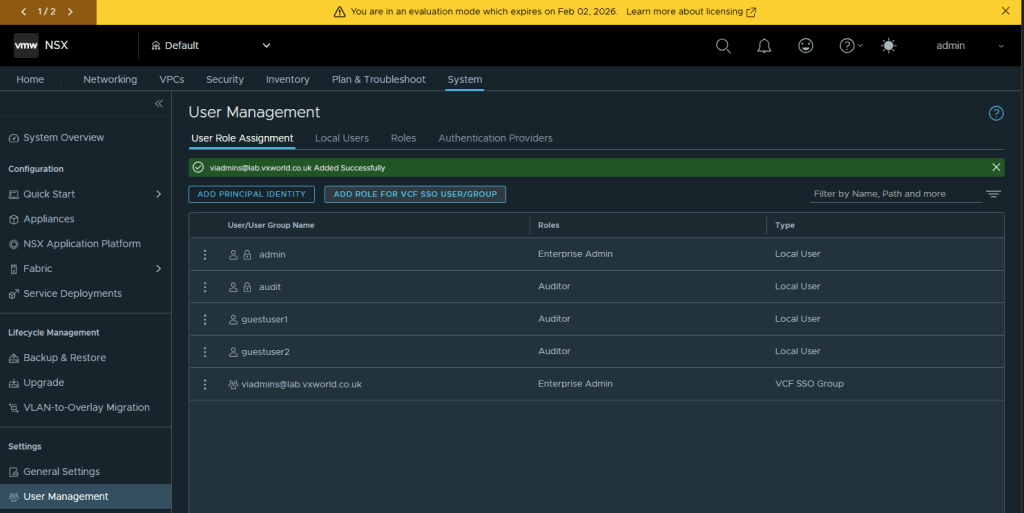
Repeat for any other role assignments you need in your environment.
NOTE
In my lab, I am only assigning permissions to the VIAdmin group. In production, you will have several group to roles you need to assign.
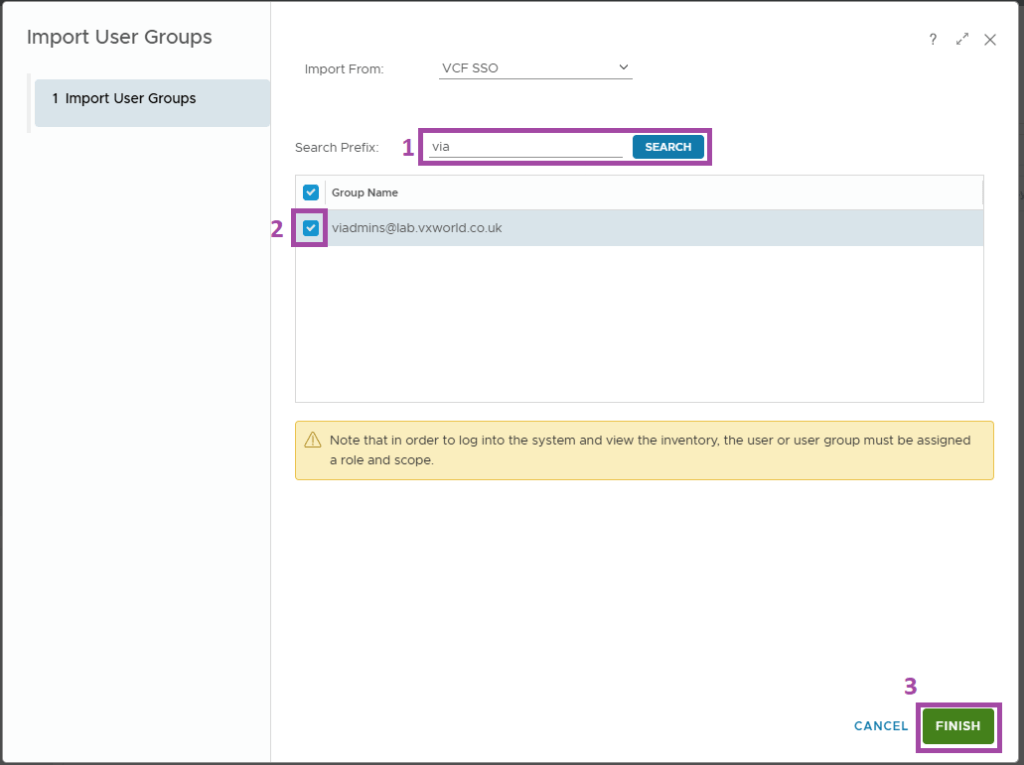
Assign the service roles in VCF Operations
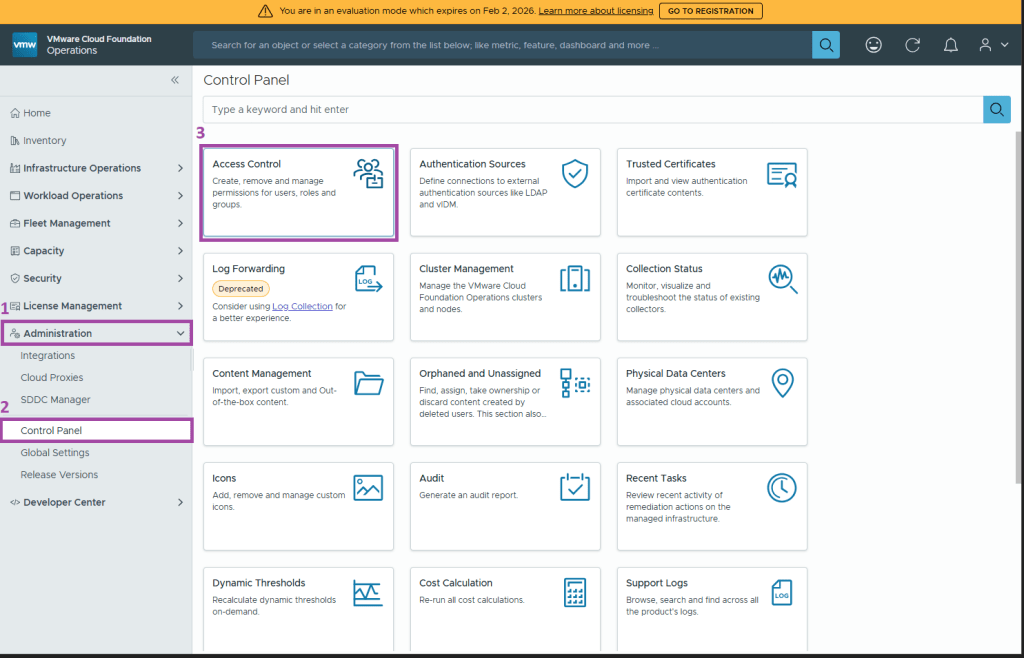
Assign the necessary service roles to the provisioned users and groups in VCF Operations. This will be done using the Administration -> Control Panel -> Access Control page.
Browse to your VCF Operations and log in using the ‘Local Account’ (e.g. admin)
Browse to Click Administration -> Control Panel -> Access Control
Browse to the User Groups tab
Click the three dots and Import from Source
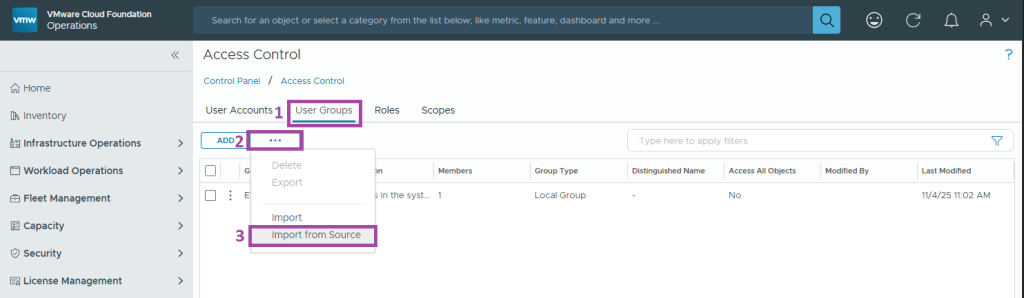
Enter a Search Prefix and click SEARCH.
Select the groups and click FINISH
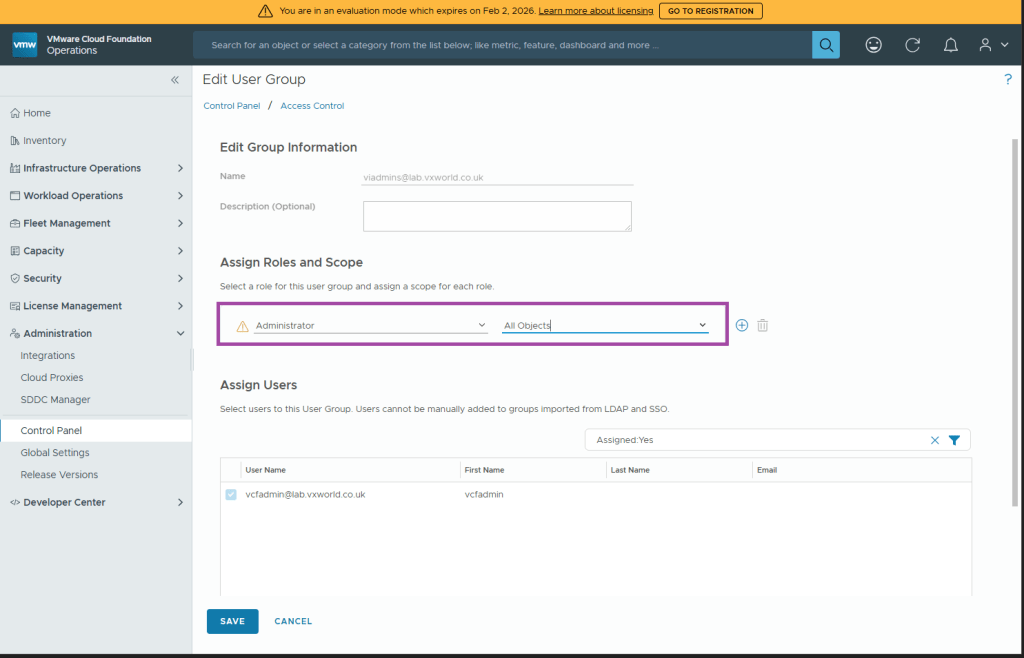
Click the three dots next to the group you imported and click Edit
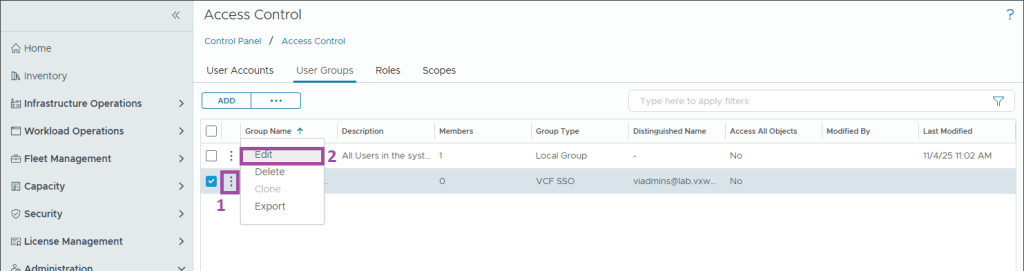
Assign the required role and scope. You can add multiple roles and scope to the single group using the plus (+) button. Once done, click SAVE
Repeat for any other role assignments you need in your environment.
NOTE
In my lab, I am only assigning permissions to the VIAdmin group. In production, you would have several group to roles you need to assign.
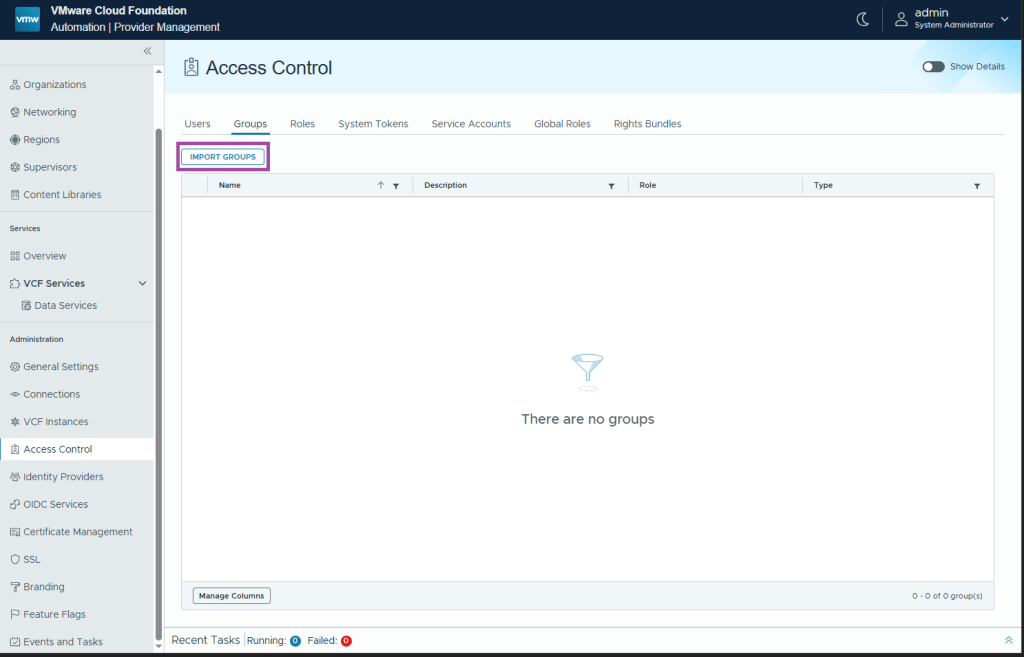
Assign the service roles in VCF Automation
Assign the necessary service roles to the provisioned users and groups in VCF Automation.
Browse to your VCF Automation and log in to the ‘system’ organisation using the ‘Log in with local account’ option (e.g. admin)

Browse to Click Administration -> Access Control
Browse to the User Groups tab
Click IMPORT GROUPS
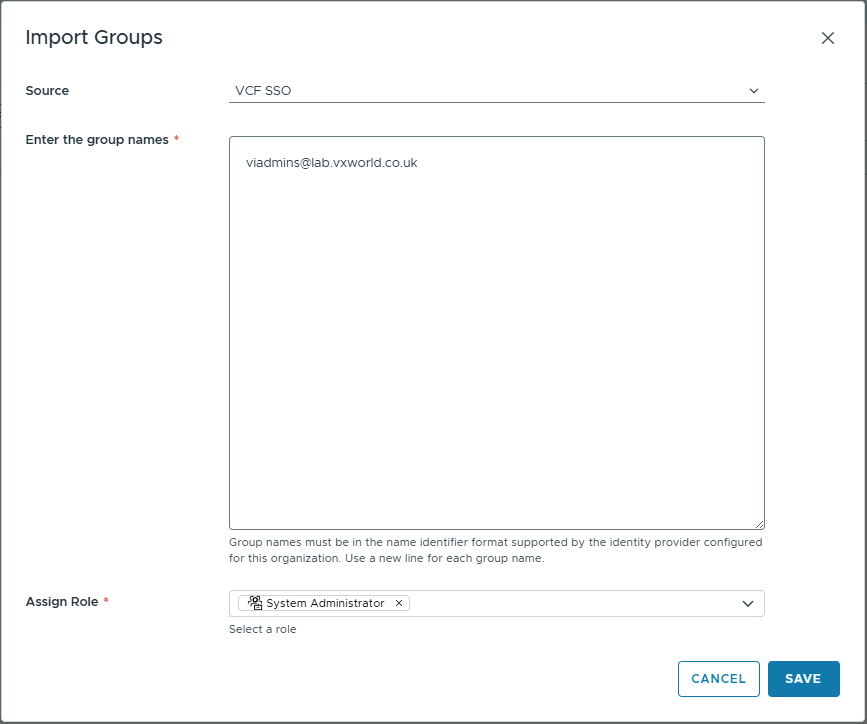
Select VCF SSO as the source
Enter the group names (if using LDAP/AD, enter the group name in the format group@domain)
Assign the desired Role
Click SAVE
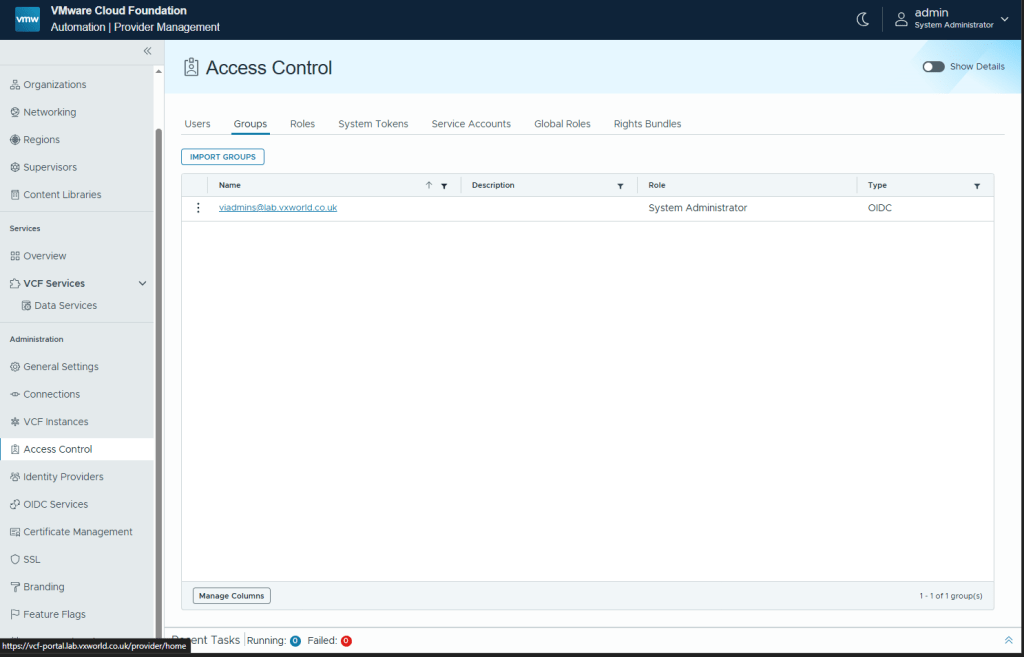
Your group should be listed
Repeat for any other role assignments you need in your environment.
NOTE
In my lab, I am only assigning permissions to the VIAdmin group. In production, you would have several group to roles you need to assign.
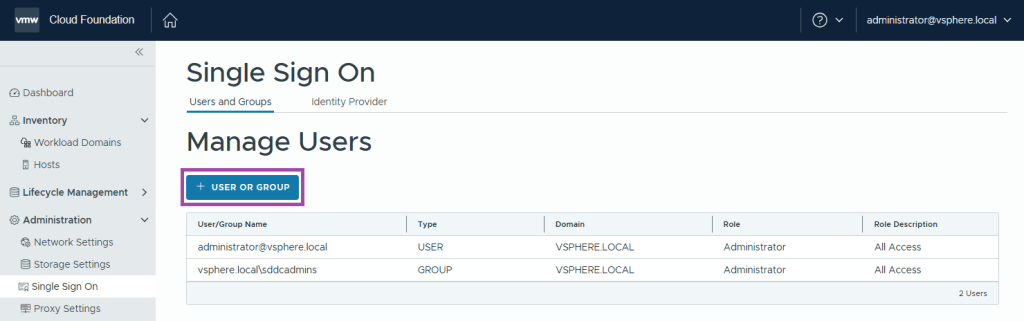
Assign the service roles in SDDC Manager
Assign the necessary service roles to the provisioned users and groups in VCF Automation.
NOTE
SDDC Manager does not support SSO with the VCF identity provider. However, it can be used indirectly to authenticate users to SDDC Manager via the Management Domain vCenter SSO domain.
Browse to your SDDC Manager and log in using a management domain vCenter Local Account (e.g. administrator@vsphere.local)
Browse to Click Administration -> Single Sign-On
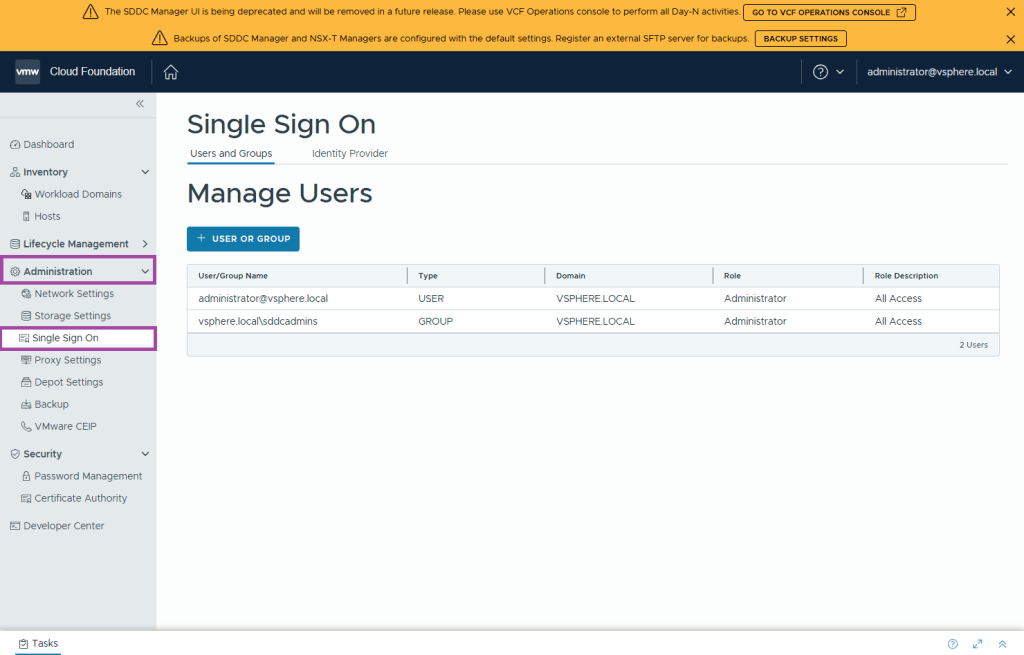
Click + USER OR GROUP
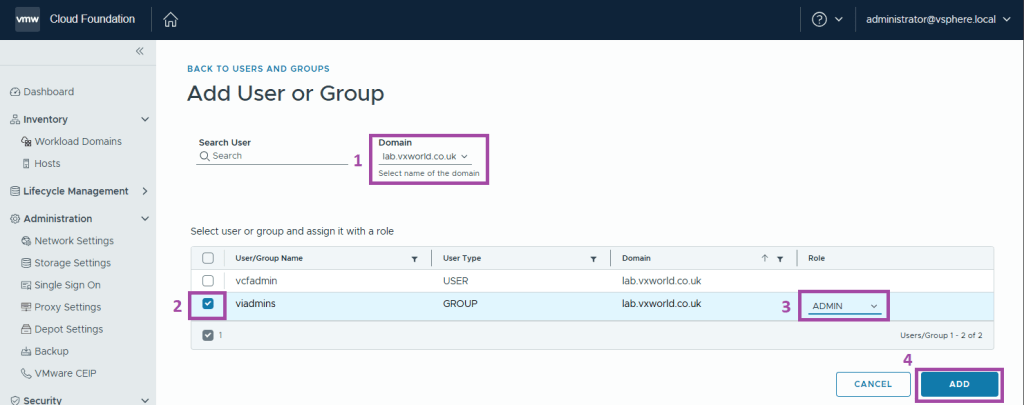
- Change the Domain to your identity source.
- Select the users and groups you want to assign roles to.
- Select the desired Role
- Click ADD
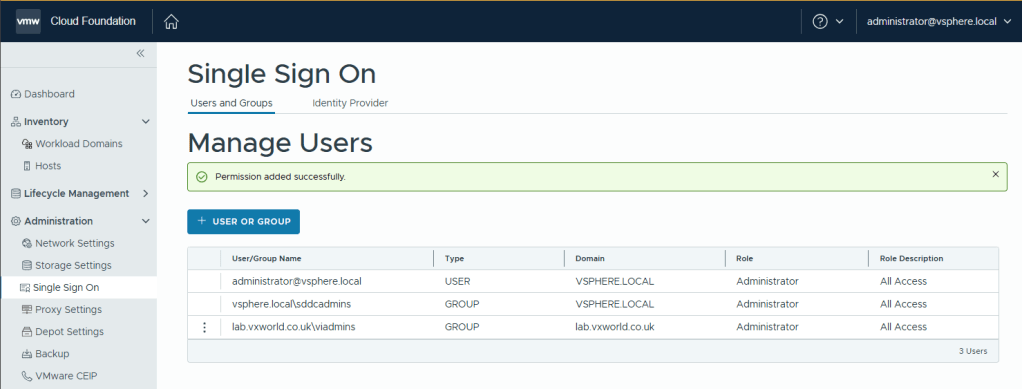
You should see an Permission added successfully message
Validation
Validation checklist (minimum tests)
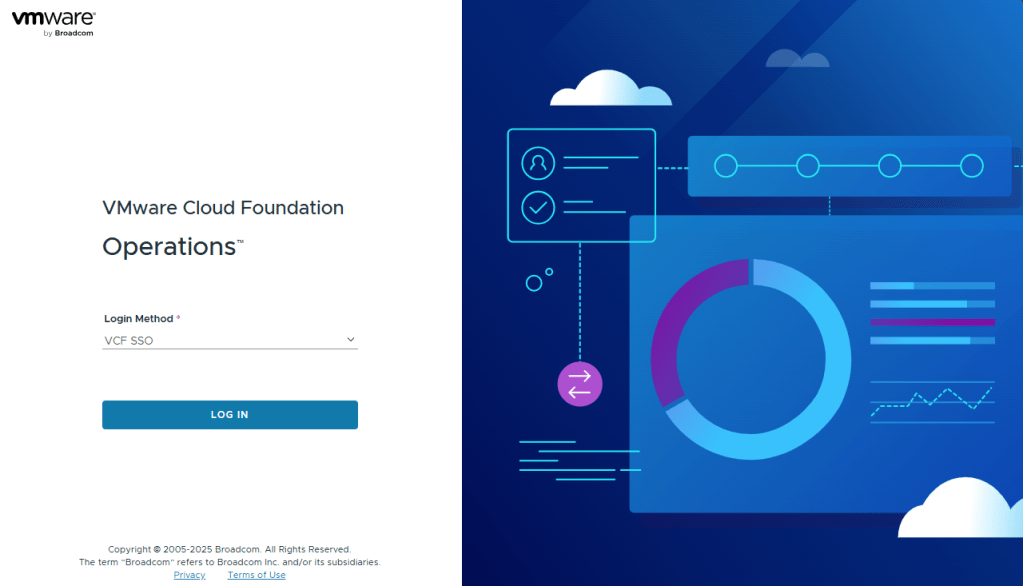
- Login to VCF Operations with an IdP user (choose VCF SSO as the login method) and confirm access.
- From VCF Operations, open vCenter and verify SSO passes you through (no additional prompt).
- Open NSX and VCF Automation — confirm SSO is working.
- Open SDDC Manager — SSO for the UI will not work; verify you can still authenticate using the local vCenter SSO domain or local accounts as required.
It is recommended you perform more thorough validation than I demonstrate below. You should confirm the role assignment provides the expected permissions for each of your provisioned users and groups.
VCF Operations
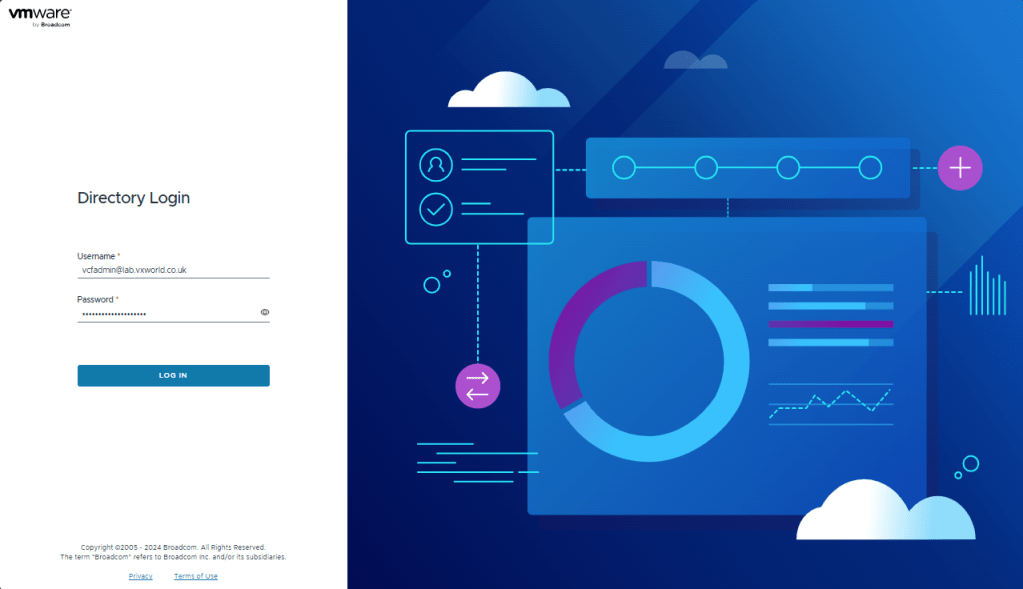
Browse to VCF Operations and select VCF SSO as the Login Method
Authenticate using AD Account
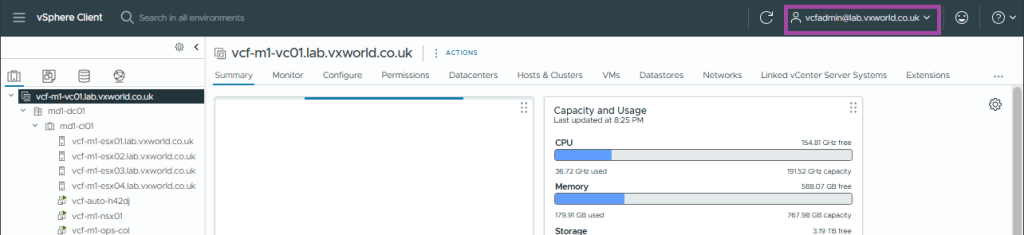
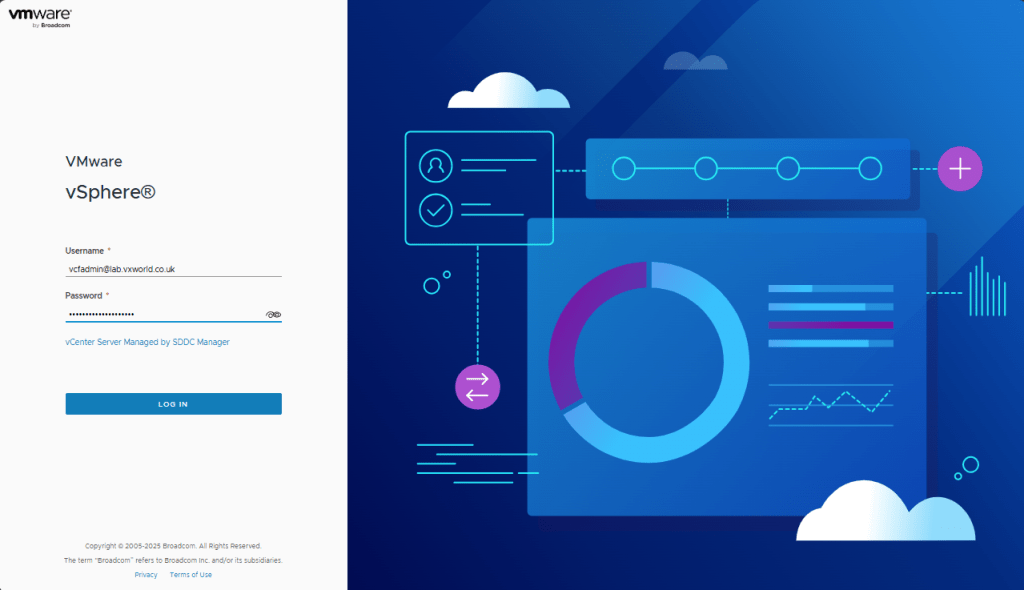
vCenter
Browses to vCenter, it should automatically sign you in with the AD account used to log into VCF Ops
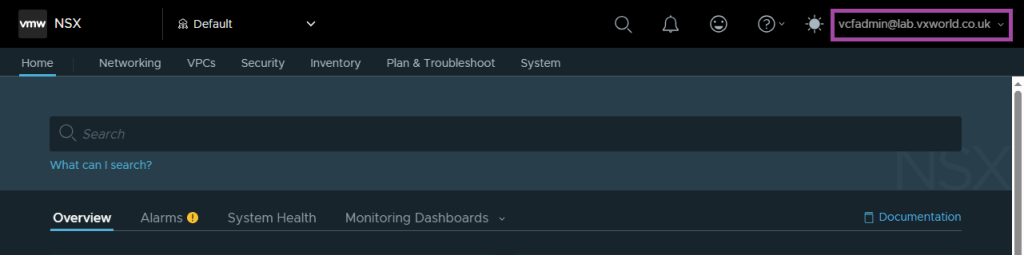
NSX
Browses to NSX, it should automatically sign you in with the AD account used to log into VCF Ops
VCF Automation
Browses to VCF Automation.
Enter the Organization name (in my case, ‘system’) and click CONTINUE
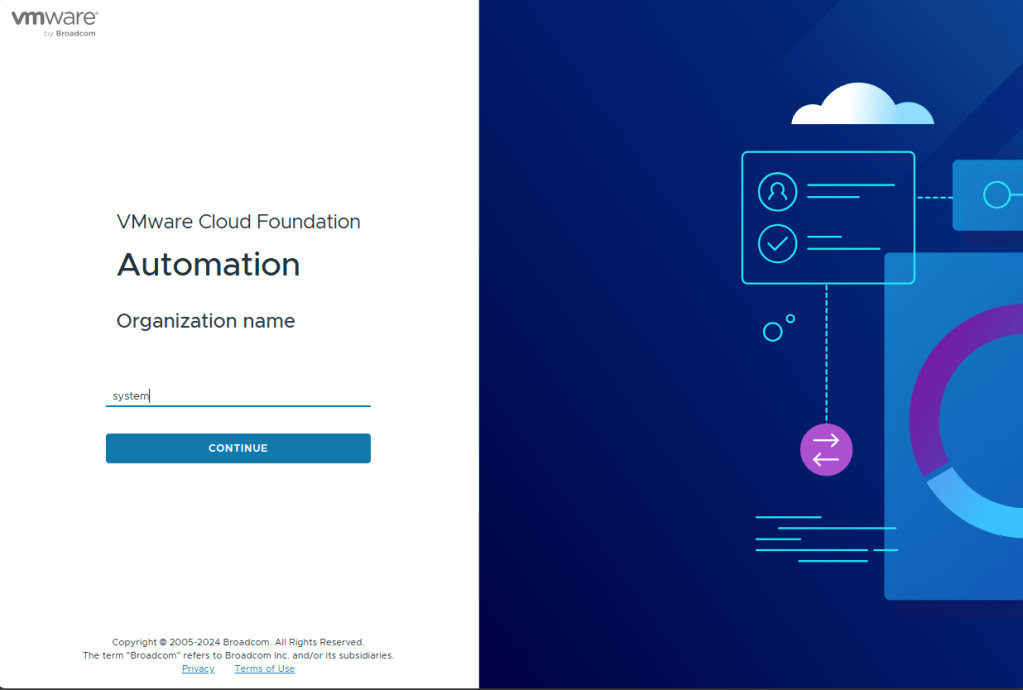
Wait for the the redirect timer (or click LOG IN)
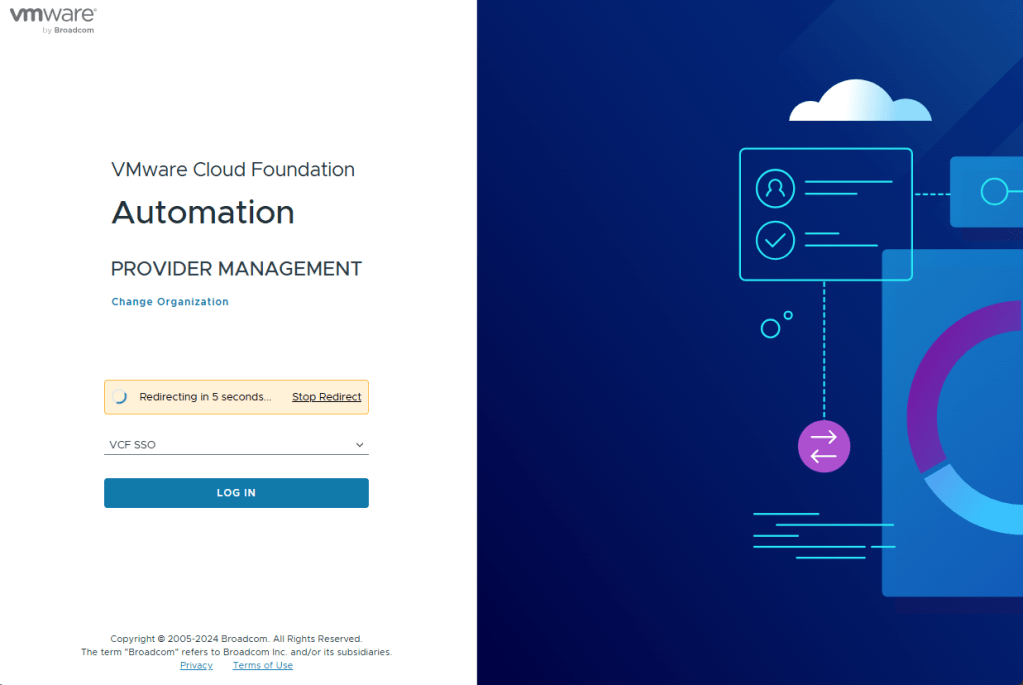
It should automatically sign you in with the AD account used to log into VCF Ops
SDDC Manager
Browses to SDDC Manager. It will not automatically sign you, but you should be able to log in with the AD account.
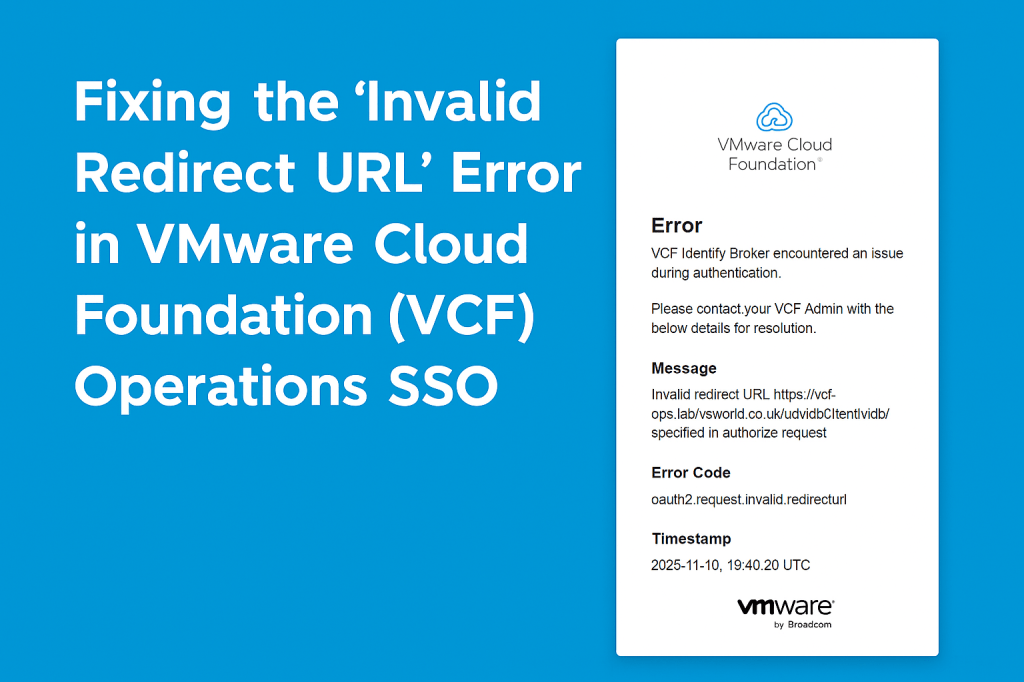
Troubleshooting
Fixing the “Invalid Redirect URL” Error in VMware Cloud Foundation (VCF) Operations SSO
Conclusion
Your Identity Broker deployment is now complete: the broker is in place, roles have been assigned, validation steps performed. With SSO operational across the VCF stack, you now benefit from unified access and easier identity management.


Leave a comment