VMware relies on several supporting services, which vary depending on the components you are deploying. However, at a minimum, DNS and NTP are essential.
Deploying a Windows Active Directory Domain Controller provides both a DNS service and an authoritative NTP source. Additionally, it enables you to integrate ESXi, vCenter, or any other products that support LDAP with Active Directory for streamlined authentication and authorization.
If you’ve never built a Windows Active Directory Domain Controller before, this guide will walk you through the process step by step. While we won’t dive deep into the broader concepts of Active Directory (a vast topic), we’ll cover the essentials required to get it up and running to support a homelab environment.
This guide is divided into the following sections:
- Initial Server Deployment
- Basic server configuration
- Configure Authoritative NTP
- Promote the server to a Domain Controller
- Configure the DNS Server
- Summary
- References
Initial Server Deployment
I am going to be creating this Domain Conteler as a VM initially running on the one ESXi host I built in VMware GPU Homelab: Part 3 – Installing ESXi Step by Step. Later on in another post, I will build the second ESXi host and add it to a cluster. Once this has been done, my Domain Controller will benefit from VMware HA.
To get things started, I am going to create a VM to install Windows Server Standard 2022 onto, then install Windows and install VMware Tools.
- Open a web browser and enter https://ipaddressyouset, using the IP address you set when configuring your ESXi host
- Press Enter
- You should see the login screen as pictured below.
- In the User name field, enter root
- In the Password field, enter the password you set during installation
- Click LOGIN
- Browse to Virtual Machines
- Click Create / Register VM
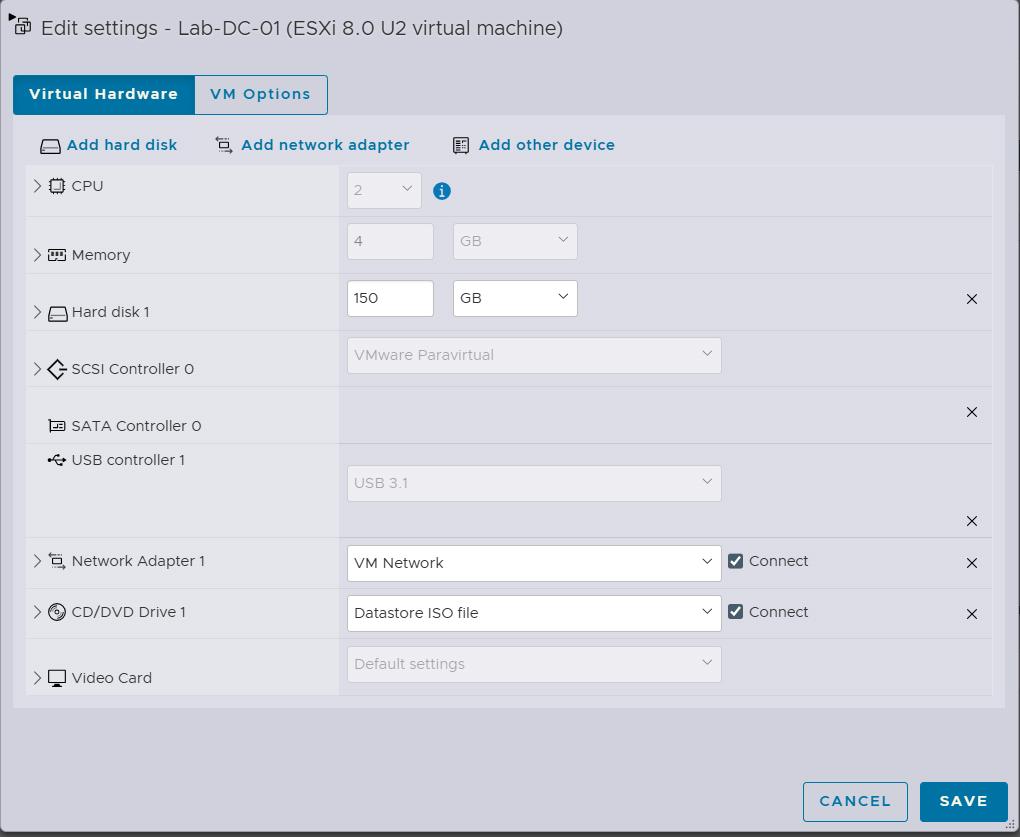
- Create a VM with the specs below. Note: I create the disk as thin provisioned as I have limited storage resources on my home lab.
- Make sure you connect the CD/DVD drive to the Windows Server ISO
- Boot the VM and follow the onscreen instructions to Install Windows Server with Desktop Experience (there are lots of blogs on installing Windows Sever if you need step by step)
- Install VMware Tools
- Select the VM
- Actions -> Guest OS -> Install VMware Tools
- Follow the onscreen instructions within the VM
Basic server configuration
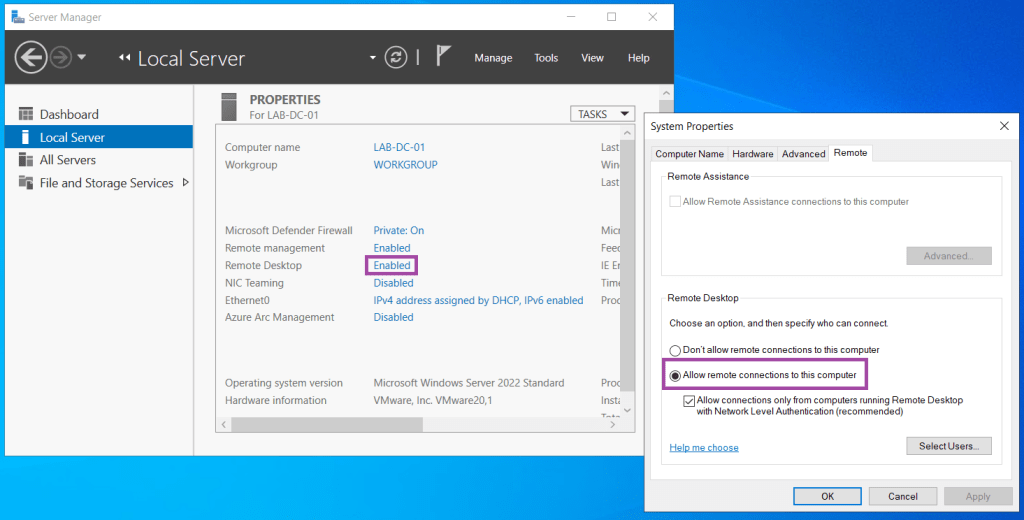
- Enable Remote Desktop
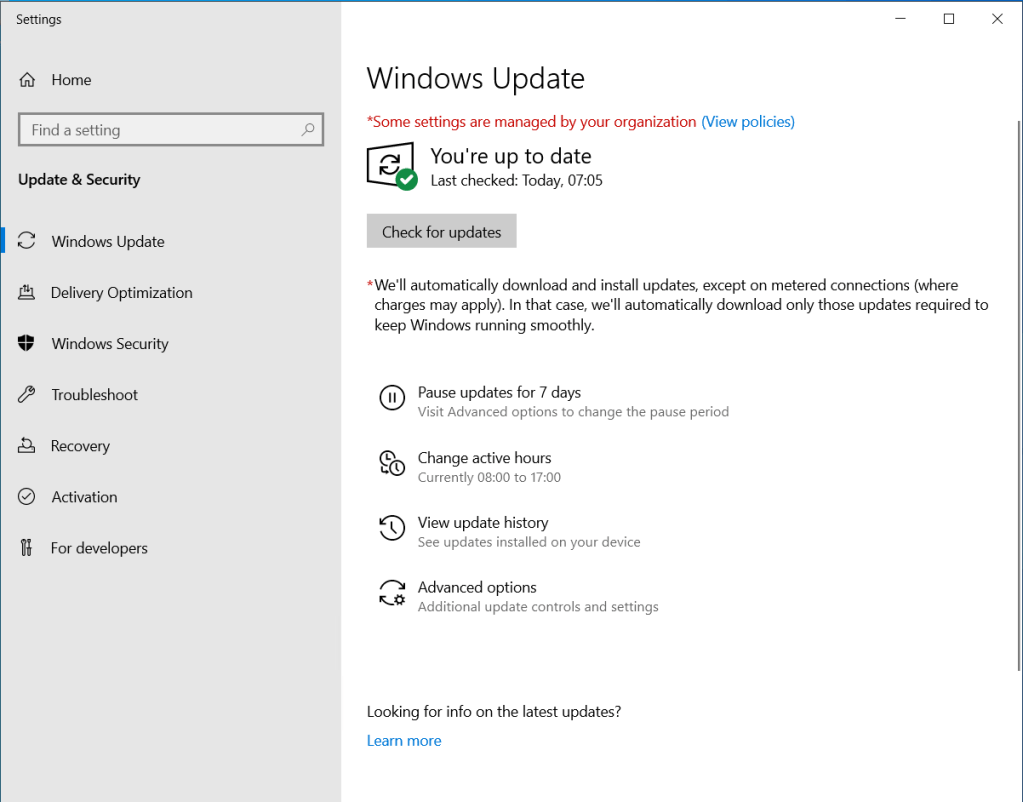
- Perform Windows Update to ensure it has the latest updates
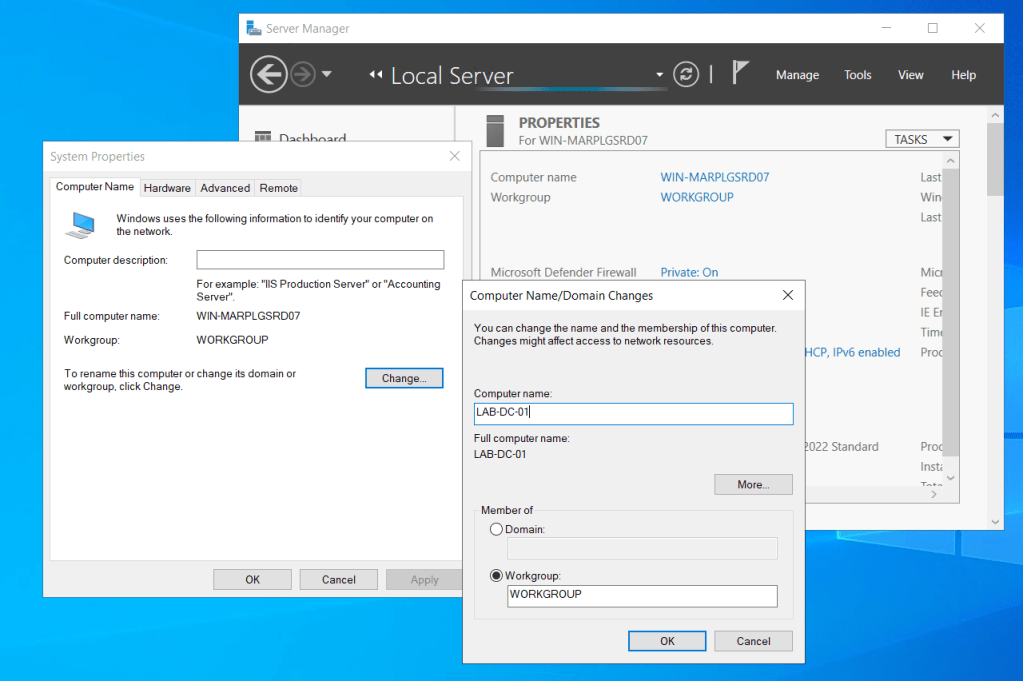
- Set the server name by clicking the Computer name in Server Manager, then Change
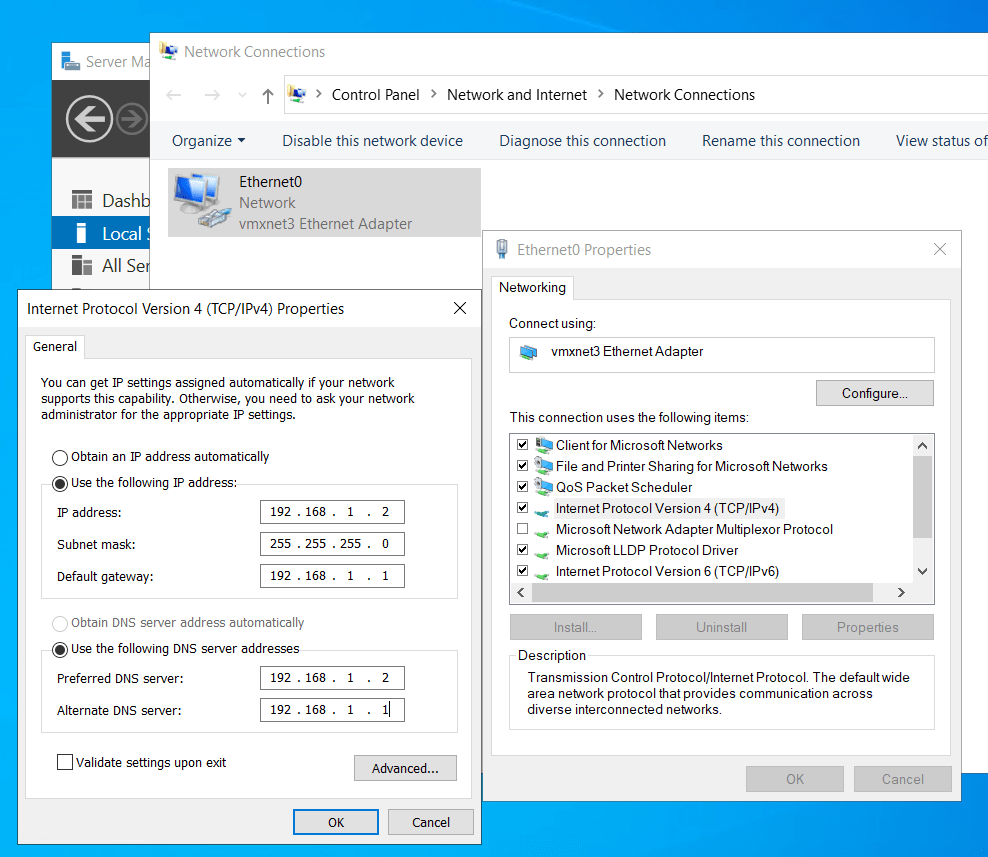
- Open Network Connections and set the static IP address for the Domain Controller
Configure Authoritative NTP
The Network Time Protocol (NTP) is important as we want all VMware components and supporting infrastructure to have a constant time. This becomes critical when Kerberos authentication is used between components.
Below are the step to step instructions to make this domain controller sync with an external NTP pool on the internet and become authoritative for the time within your lab.
- Open an elevated Command Prompt
- Stop the time service
net stop w32time- Set the manual peer list external servers
w32tm /config /syncfromflags:manual /manualpeerlist:"0.pool.ntp.org,1.pool.ntp.org,2.pool.ntp.org,3.pool.ntp.org"- Set the connection as reliable
w32tm /config /reliable:yes- Start the time service
net start w32time- Validate the configuration. Check the configured NTP servers are listed and Type is NTP
w32tm /query /configuration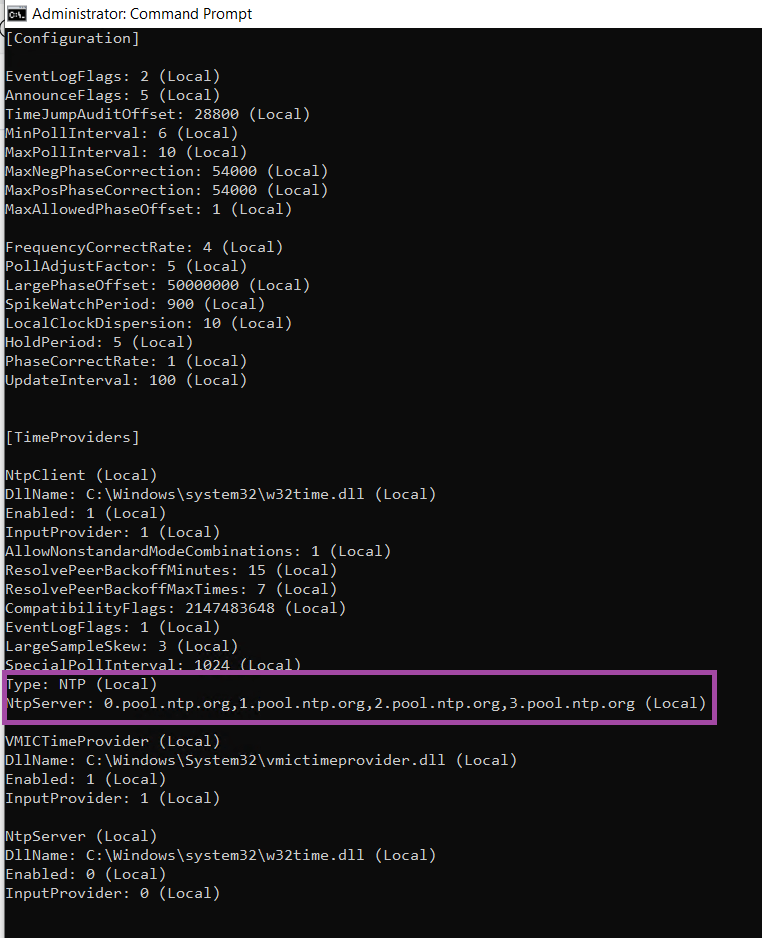
- Force w32 to resync. This should force it to get the time from the configured NTP servers.
w32tm /resync- Check the status. The status should show a Last Successful Sync Time along with the Source (the source should match the NTP servers you set)
w32tm /query /status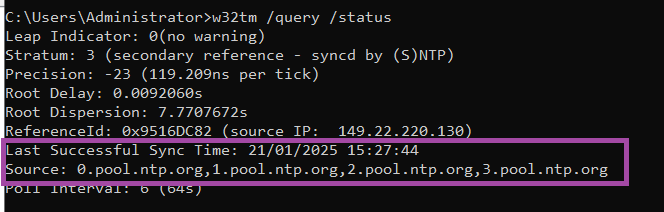
- Finlay, you can use stripchart to check the time difference between this server and your target NTP server. Check the asterisk (*) is in the centre of the brackets, if it is to the left of right, that denotes the time off-set.
w32tm /stripchart /computer:0.pool.ntp.org /samples:5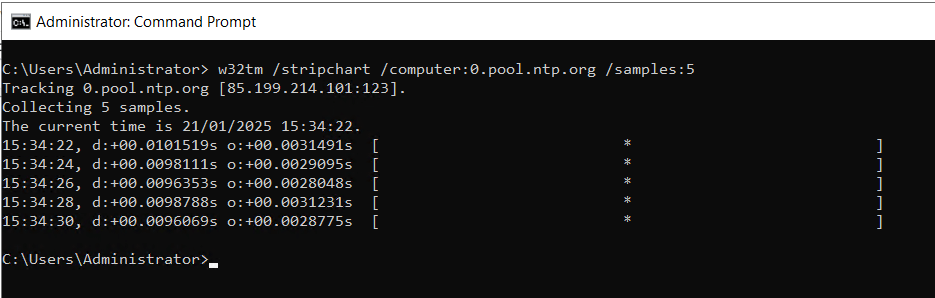
Promote the server to a Domain Controller
For this server to become a Domain Controller we need to promote it (from member server). As this is a new lab, the step by step instructions below will create a new Domain within a new Forest. If you are trying to add a domain controller to an existing domain, do not follow this process.
- Open an elevated PowerShell window
- Install the the Active Directory Binaries and Management Tools using the command below
Install-WindowsFeature -Name AD-Domain-Services -IncludeManagementTools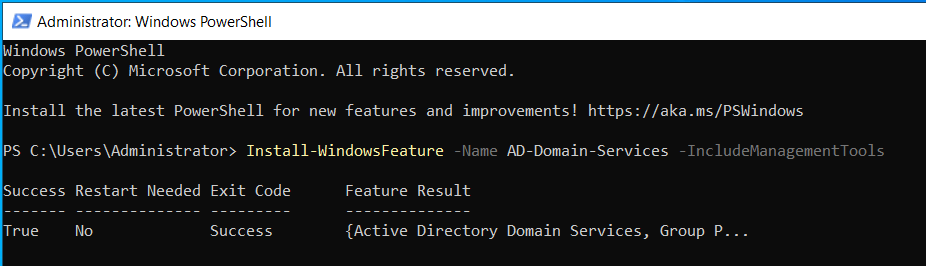
- Promote the Server to a Domain Controller using the following script. Replace the DomainName value with your domain.
Import-Module ADDSDeployment
Install-ADDSForest -DomainName "lab.vxworld.co.uk" -InstallDNS- Enter a password to be as the Safe Mode Administrator (this is used if you need to enter Directory Services Restore Mode (DSRM))
- Press Y to confirm you want to promote the server to a Domain Controller
- The server will be promoted and reboot
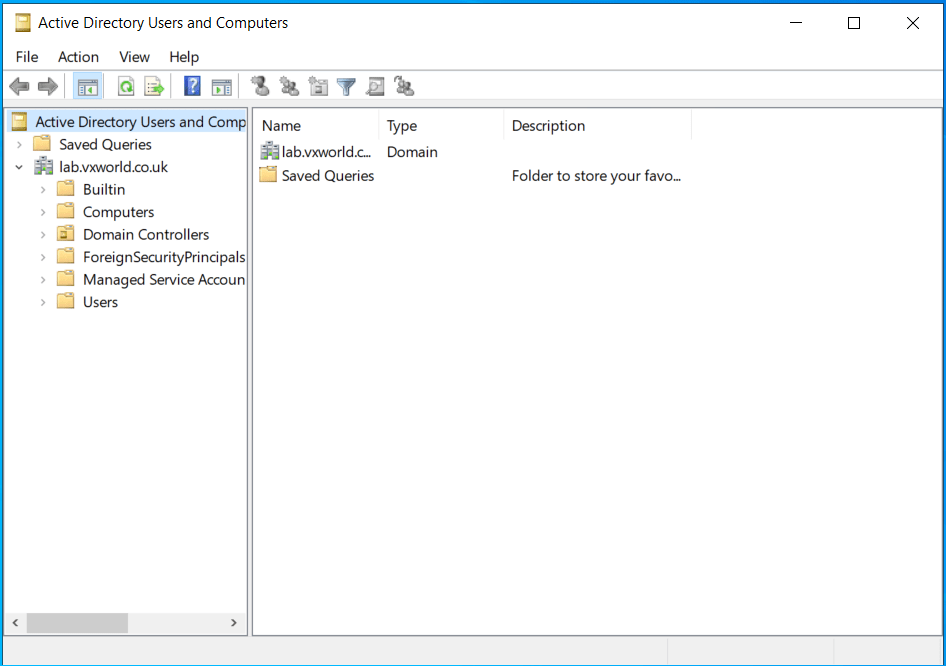
- Once it has rebooted, you should have access to Active Directory Users and Computers
- Open Active Directory Users and Computers from Server Manager
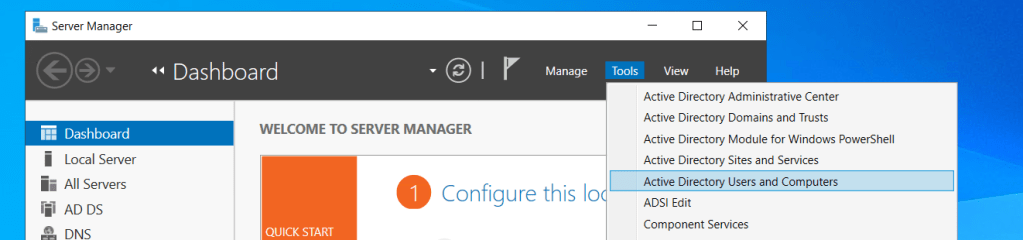
- At this stage, we are just checking it loads and looks like the screenshot below. For those who are not familiar with Active Directory, this provides the central database of users, groups and computers (inc. servers) for authentication within your domain.

- The server is now a domain controller and ready to service your lab. Read the next section on configuring the DNS Server.
Configure the DNS Server
To support the Homelab, we need an operational DNS server that can resolve the ESXi hosts. In this section, we will create a reverse DNS Zone and the A and PRT records for the ESXi hosts within the lab.
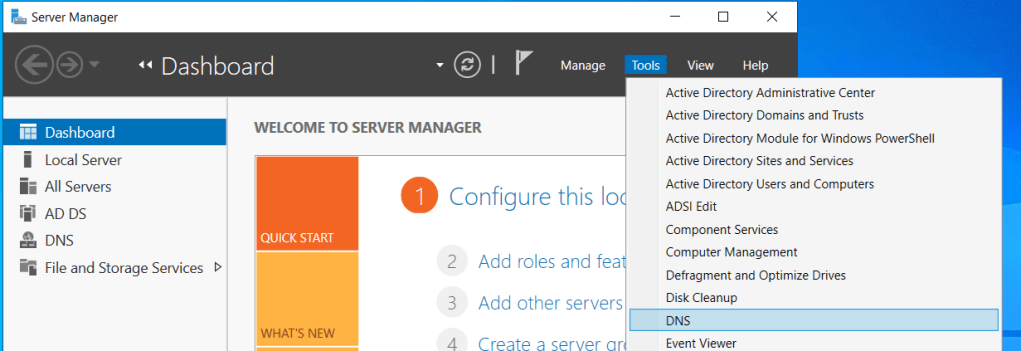
- Now, lets open the DNS Manager console from Server Manager
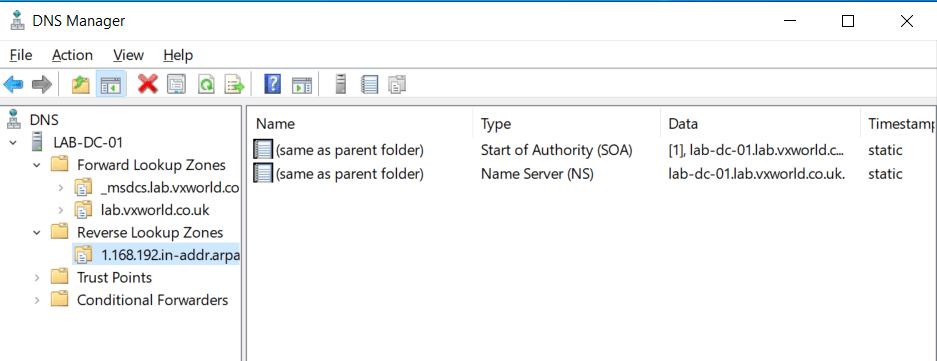
- The Forward Lookup Zone for the domain should have been automatically created by the AD installer. However, it is good practice (and required by VCF) to have a reverse lookup zone for every subnet.
- Therefore, we need to create one for the subnet we are using (192.168.1.0/24). If we had multiple subnets, we should create one for each.
Create Reverse Lookup Zone
A reverse lookup zone converts and IP address into an DNS name. A forward lookup zone converts a DNS name into an IP address.
To create the Reverse Lookup Zone. You can either follow the steps below or run the following PowerShell Command
Add-DnsServerPrimaryZone -NetworkID "192.168.1.0/24" -ReplicationScope Domain -DynamicUpdate Secure- Right click on Reverse Lookup Zone and click New Zone…

- Click Next
- Select Primary Zone
- Click Next
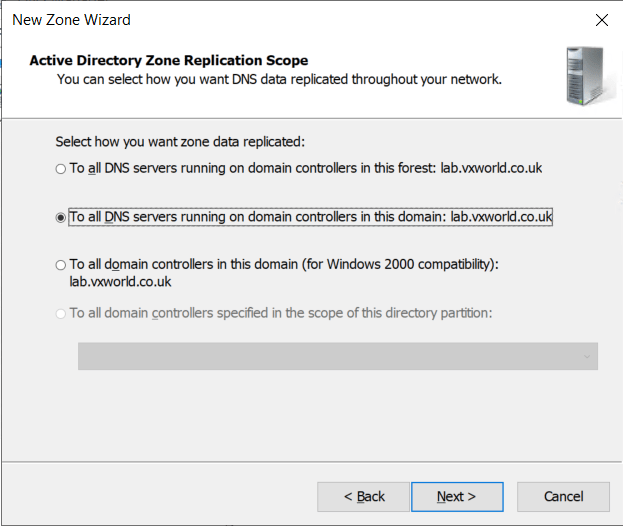
- Select To all DNS Servers running on the domain controllers running in this domain:
- Click Next
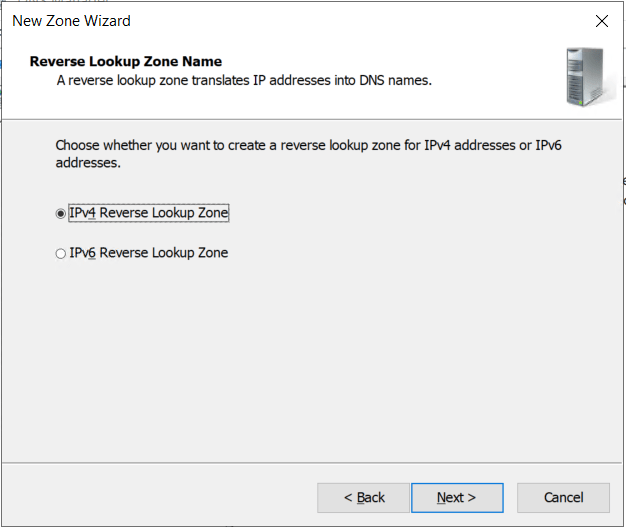
- Select IPv4 Reverse Lookup Zone
- Click Next
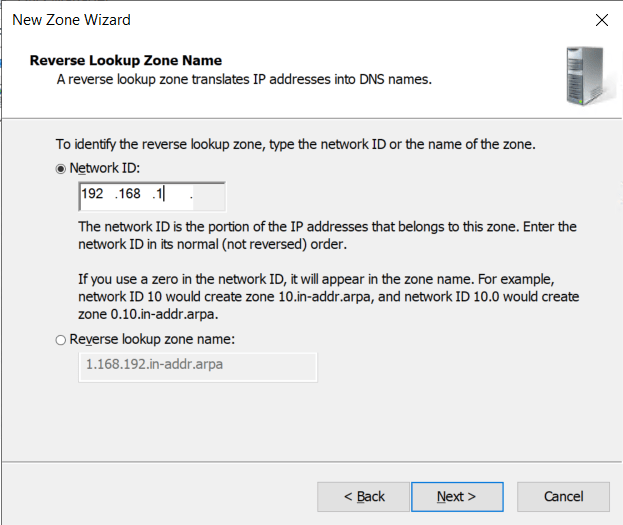
- Enter the Network ID. In my case, this is the first three octets of the IP range I am using. e.g. 192.168.1
- Click Next
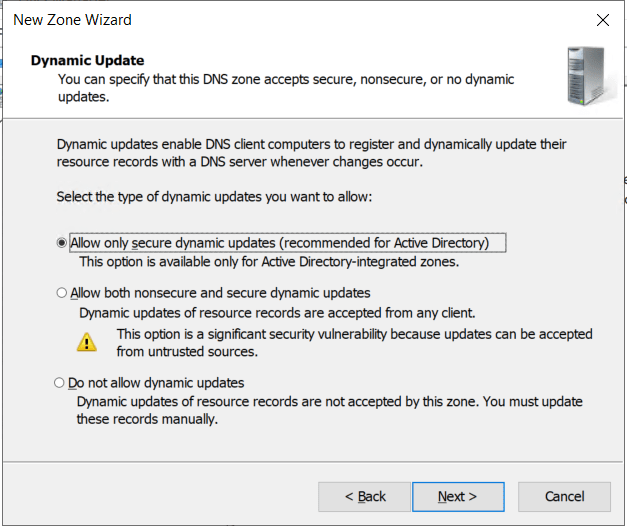
- Select Allow only secure dynamic updates (recommended for Active Directory)
- Click Next
- Click Finish
- You should now see the reverse DNS Zone you created. If you have other networks in your lab, add these now by repeating the process.
Create DNS Entries
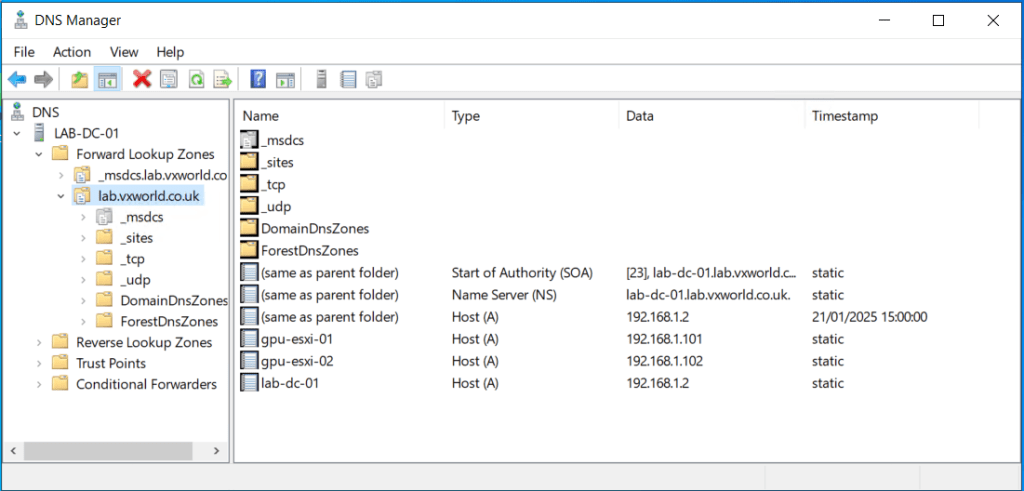
- Next we are going to create the DNS entries (both forward and reverse for the ESXi hosts)
- Open an elevated PowerShell window
- Run the commands below to create the DNS A and PRT records for each of the two hosts in the cluster. Note: substitute the Name, ZoneName and IPv4Address values that I am using in my Homelab for your own
Add-DnsServerResourceRecordA -Name "gpu-esxi-01" -ZoneName "lab.vxworld.co.uk" -IPv4Address "192.168.1.101" -CreatePtr

Add-DnsServerResourceRecordA -Name "gpu-esxi-02" -ZoneName "lab.vxworld.co.uk" -IPv4Address "192.168.1.102" -CreatePtr
- Within DNS Manager, you should see the newly created A records for the ESXi hosts. TIP: If you cannot see the records and you already had DNS Manager Open, press F5 to refresh.
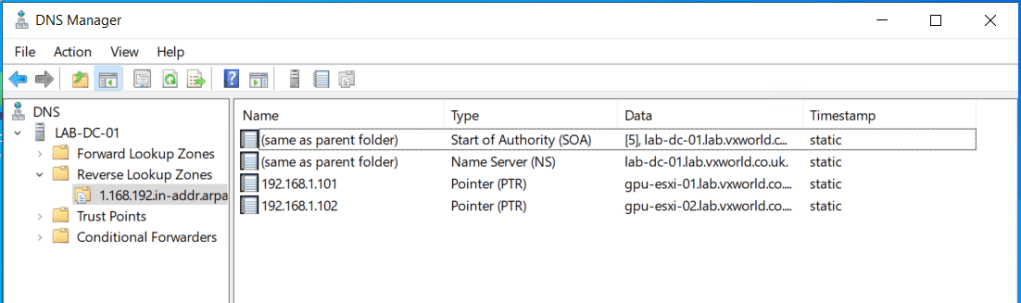
- Within DNS Manager, you should see the newly created PTR (reverse) records for the ESXi hosts. TIP: If you cannot see the records and you already had DNS Manager Open, press F5 to refresh.
Test name resolution
- The final check we will do is to confirm our newly created DNS server can resolve public internet addresses.
- Open a Command Prompt
- Enter the following command
nslookup www.google.com- Confirm you get a authoritative answer (i.e. not an error e.g. ‘DNS timeout’ or ‘can’t find’)
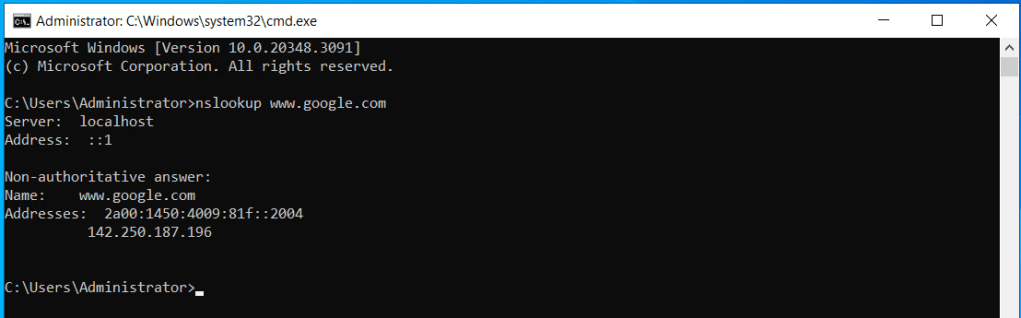
- The DNS server should now be ready to service your lab
Summary
This post outlined the process of building a Windows Server Active Directory Domain Controller to provide essential infrastructure services for your homelab. The server now delivers DNS for name resolution and NTP for time synchronization. Additionally, we created DNS records to enable both forward and reverse resolution of your ESXi hosts.
Looking ahead, this server also sets the foundation for integrating ESXi and vCenter with Active Directory for authentication and authorization. With this setup in place, you’re now well-prepared to deploy vCenter and add your ESXi hosts to it.
Stay tuned for the for the next post in the build of my VMware GPU Homelab where we will deploy vCenter.
In the next post we, Deploy the vCenter Server Appliance on a Single-Node vSAN ESA Cluster


Leave a comment