
In this post, I will take you though the step by step process of installing ESXi 8 U3 on one of the Dell Precision 5820 workstations I will be using for my GPU Homelab. This post has been split out into the following sections:
Creating ESXi USB Boot Disk
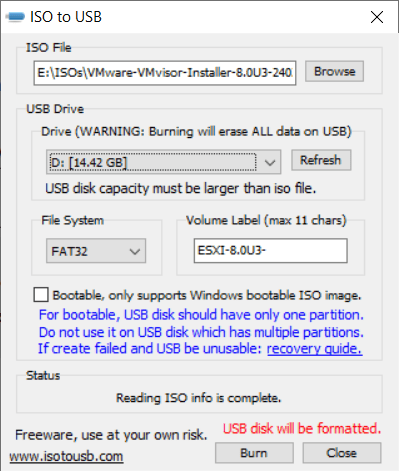
Before we can install ESXi, we need to download the latest version and copy it to removable media. This will be used to install from. Alternatively, you could write the ESXi installer ISO to a CD.
- Download the ESXi installer ISO from Broadcom’s website (e.g. VMware-VMvisor-Installer-8.0U3-24022510.x86_64.iso)
- Use the application of your choose to write the ESXi Installer to a USB memory stick
I personally used ISO to USB, however there are a number of utilities . Another populator one is Rufus
Installing ESXi
Now you have the ESXi Installer on a USB memory stick, it is time to install it onto the workstation (host).
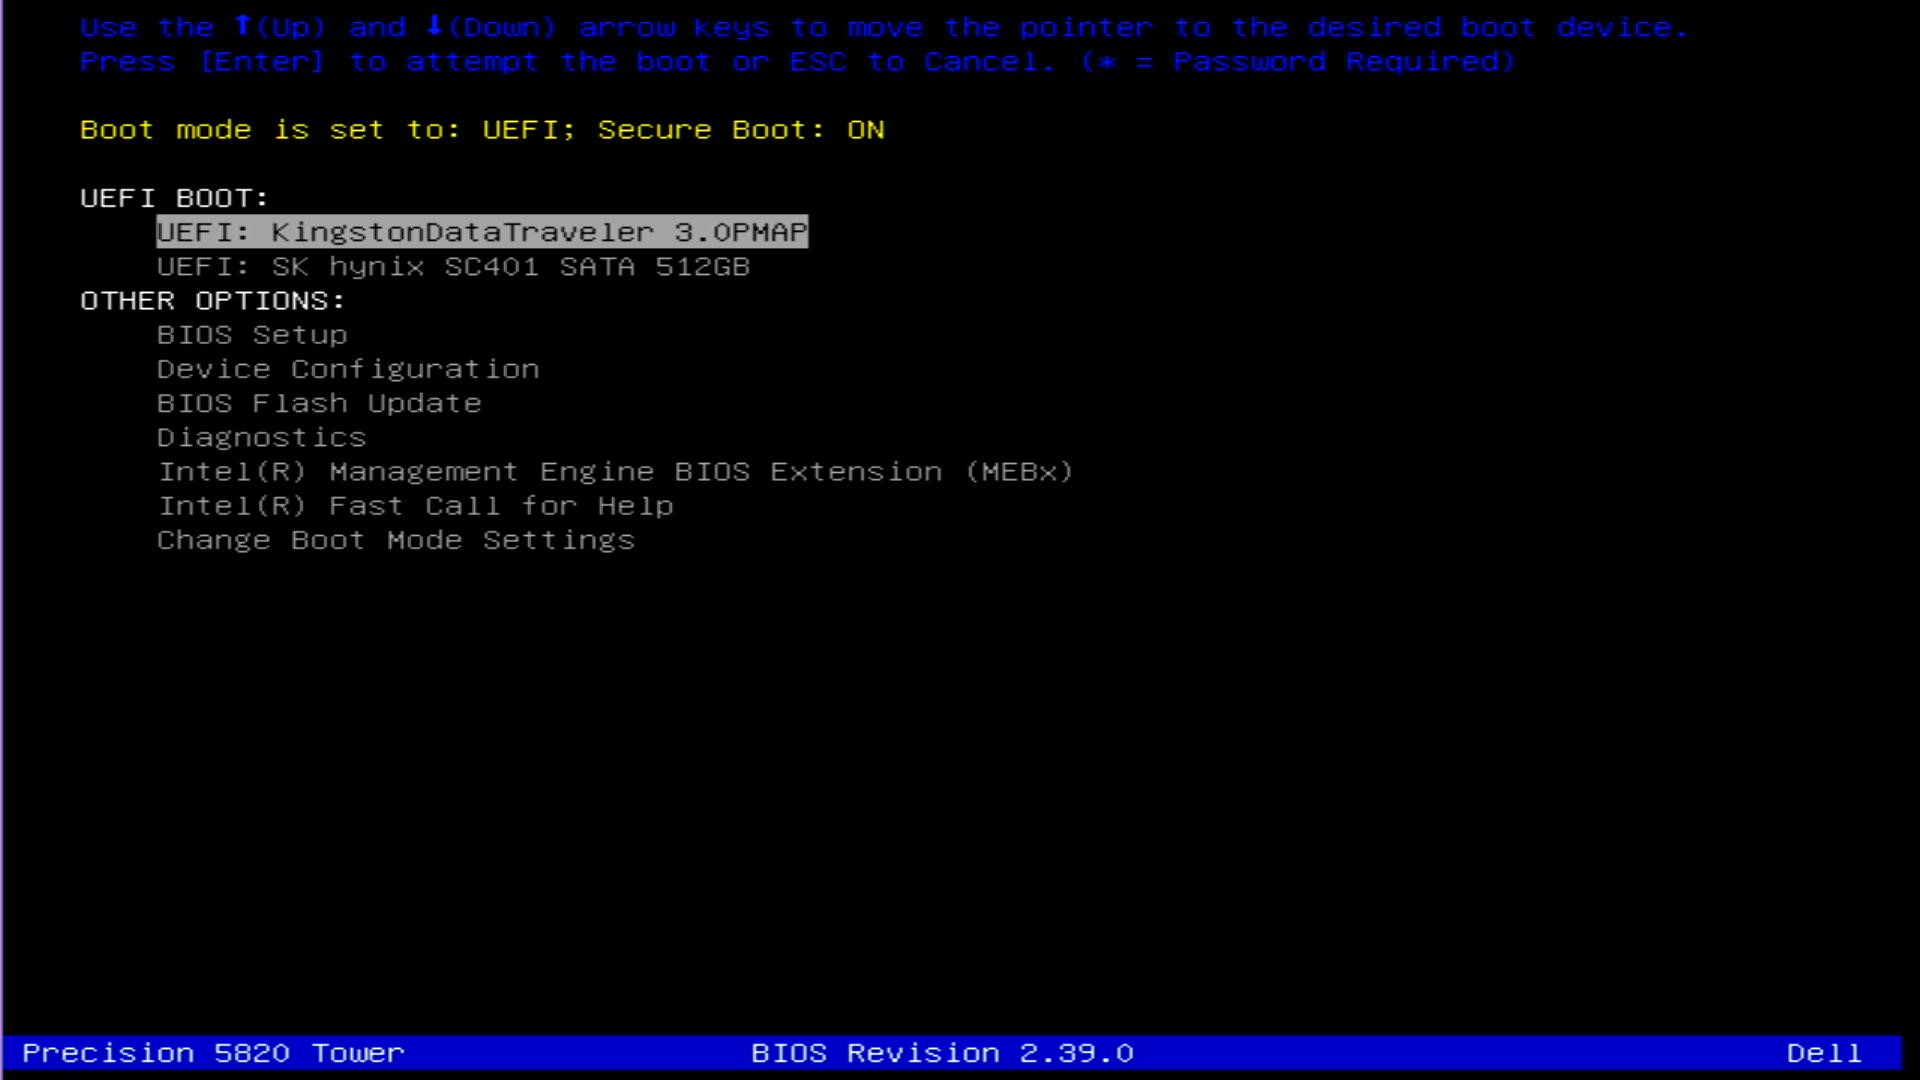
- When powering on the workstation, press F12 to enter the boot menu.
- Under UEFI BOOT, you should see the USB memory stick you copied the ESXi installer onto. In my example, this is the UEFI: KingstonDataTravler
- Use the arrows to select the USB memory stick
- Press Enter
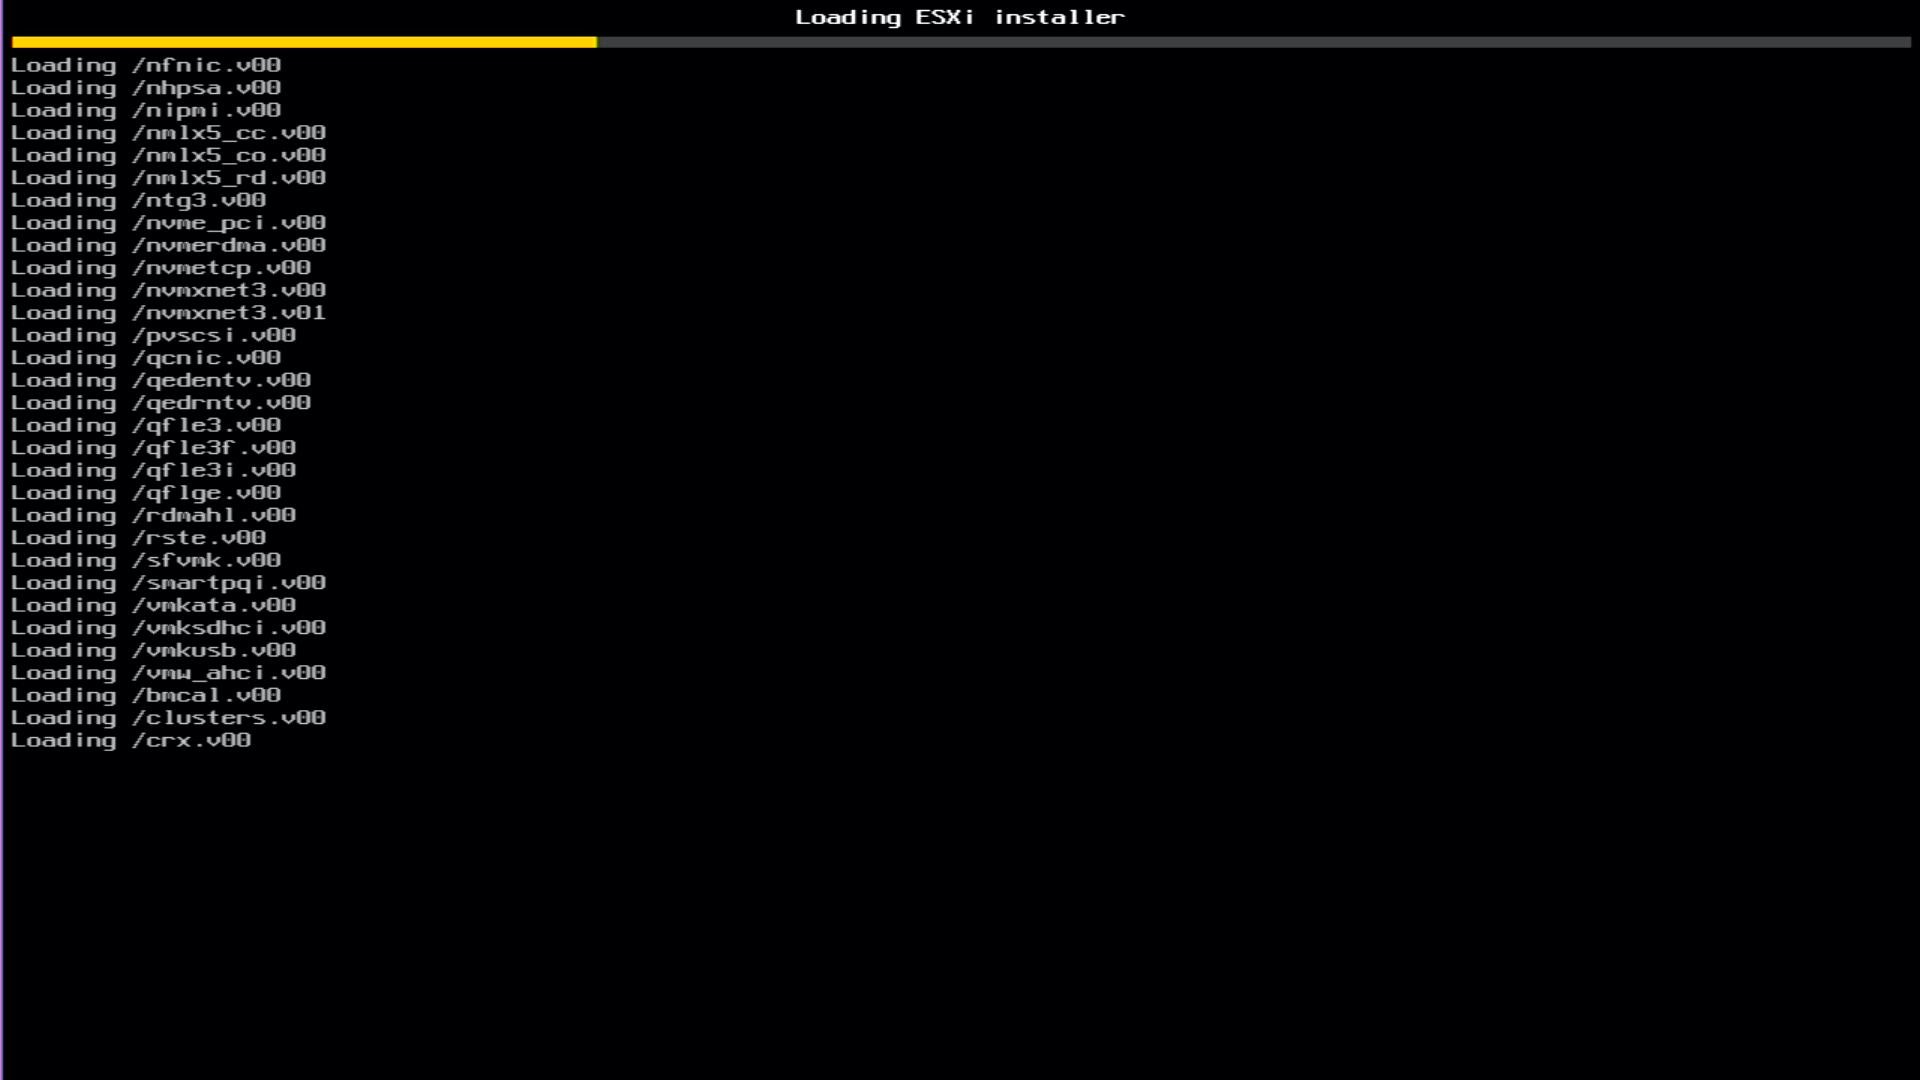
- Wait for the ESXi Installer to boot
- Once booted, press Enter to continue
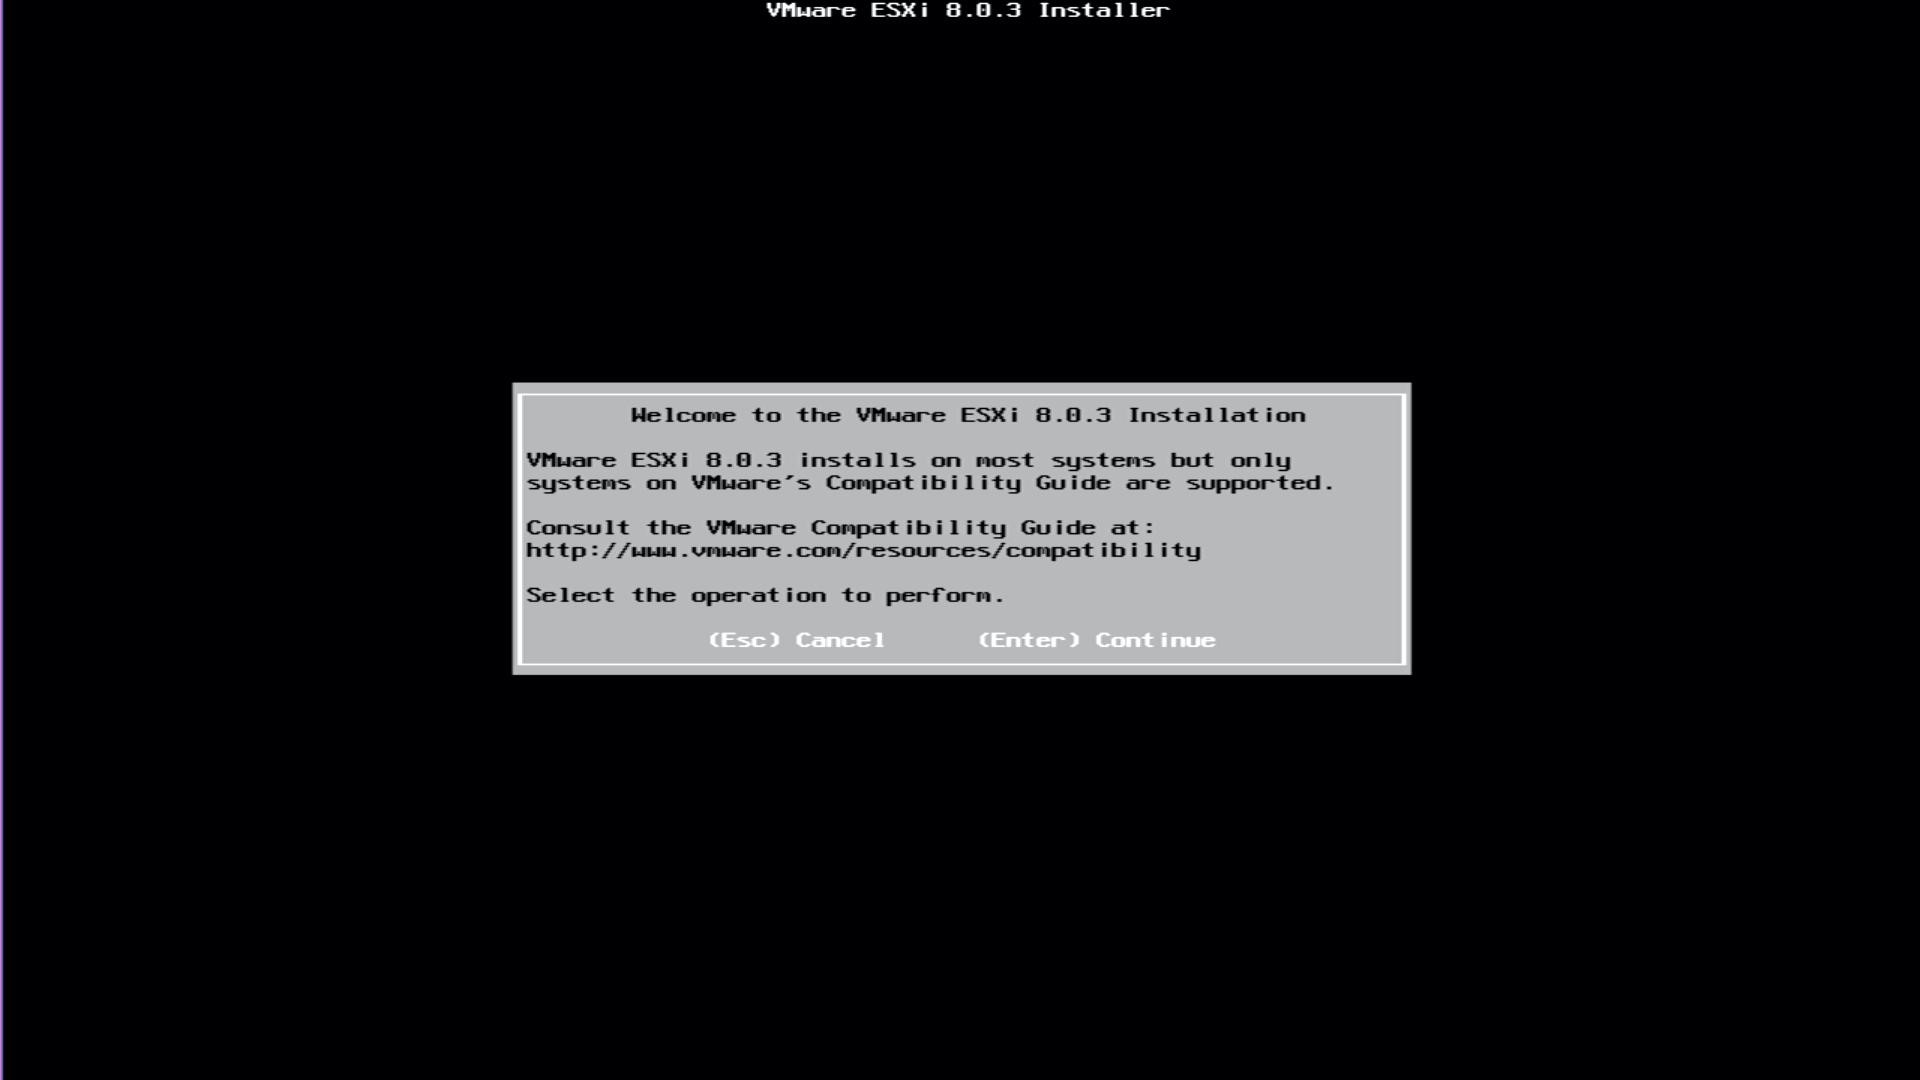
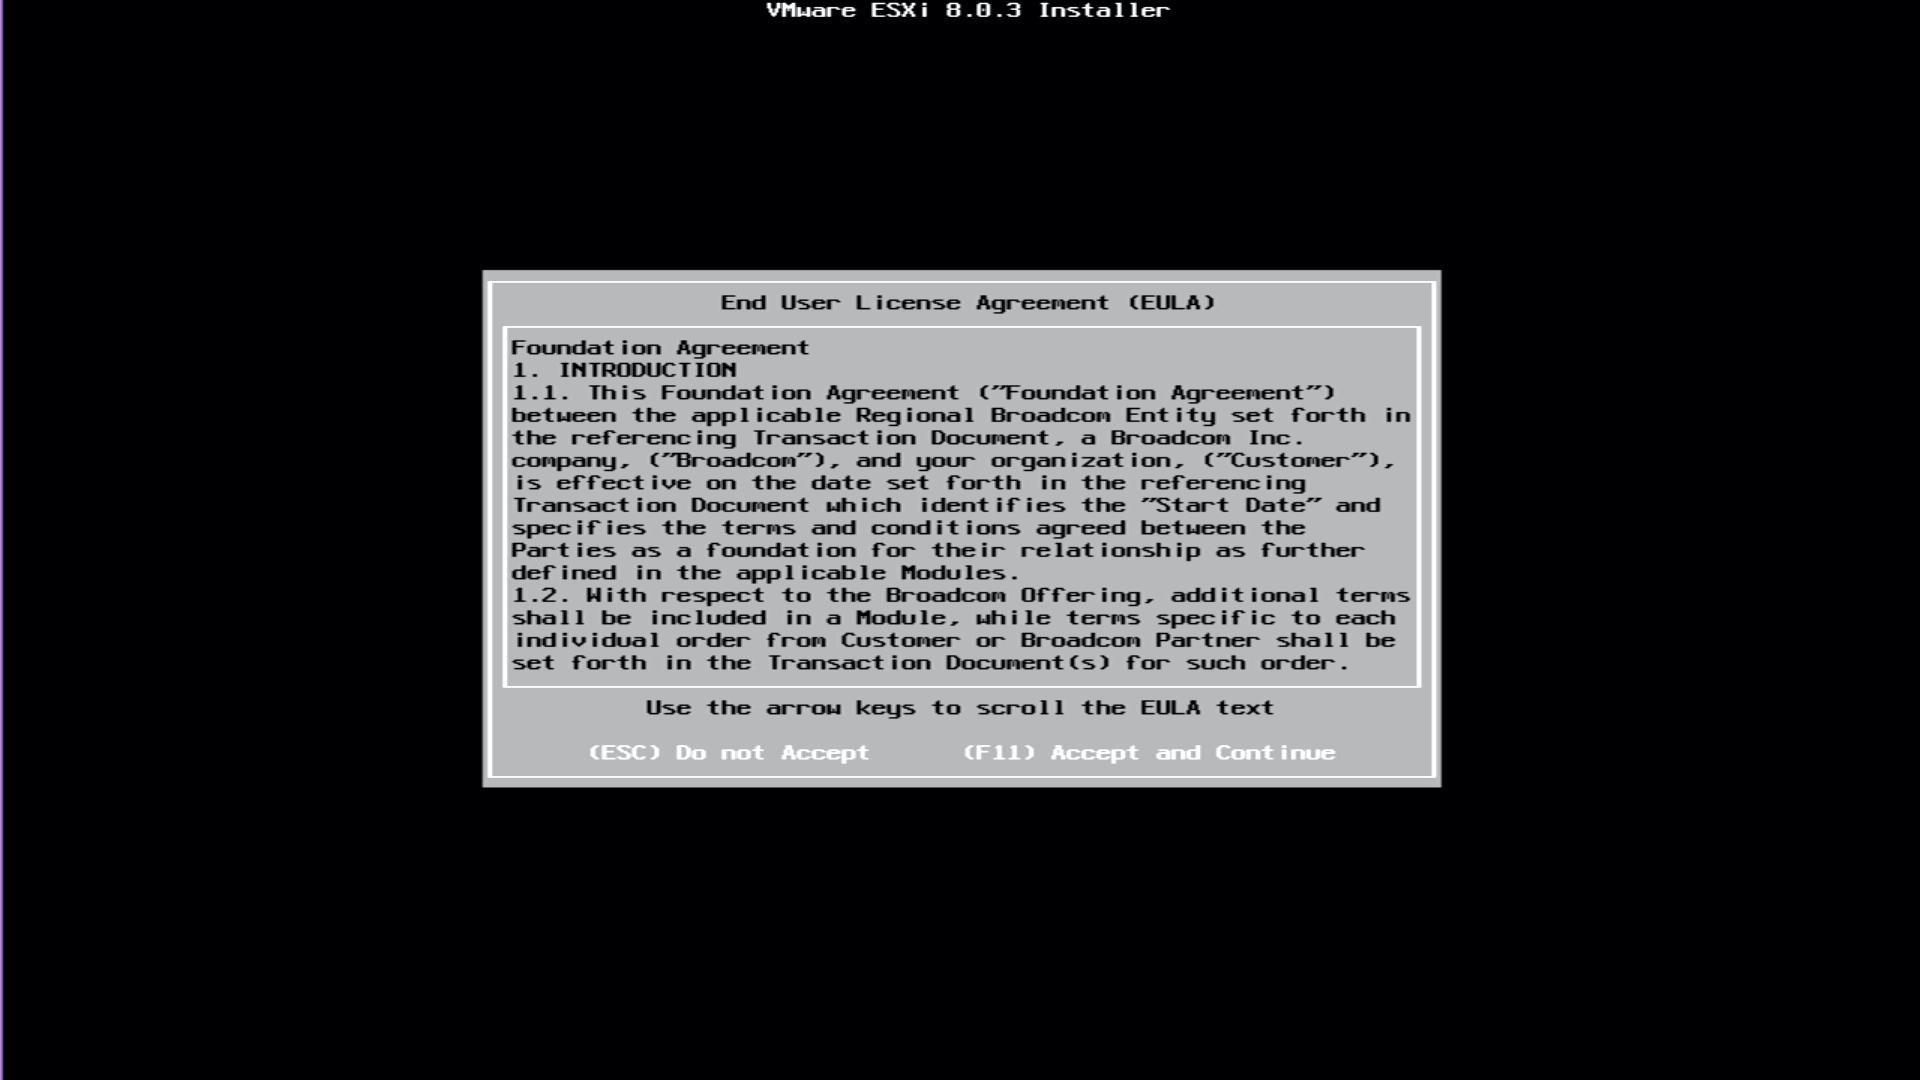
- If you are happy to accept the EULA, press F11
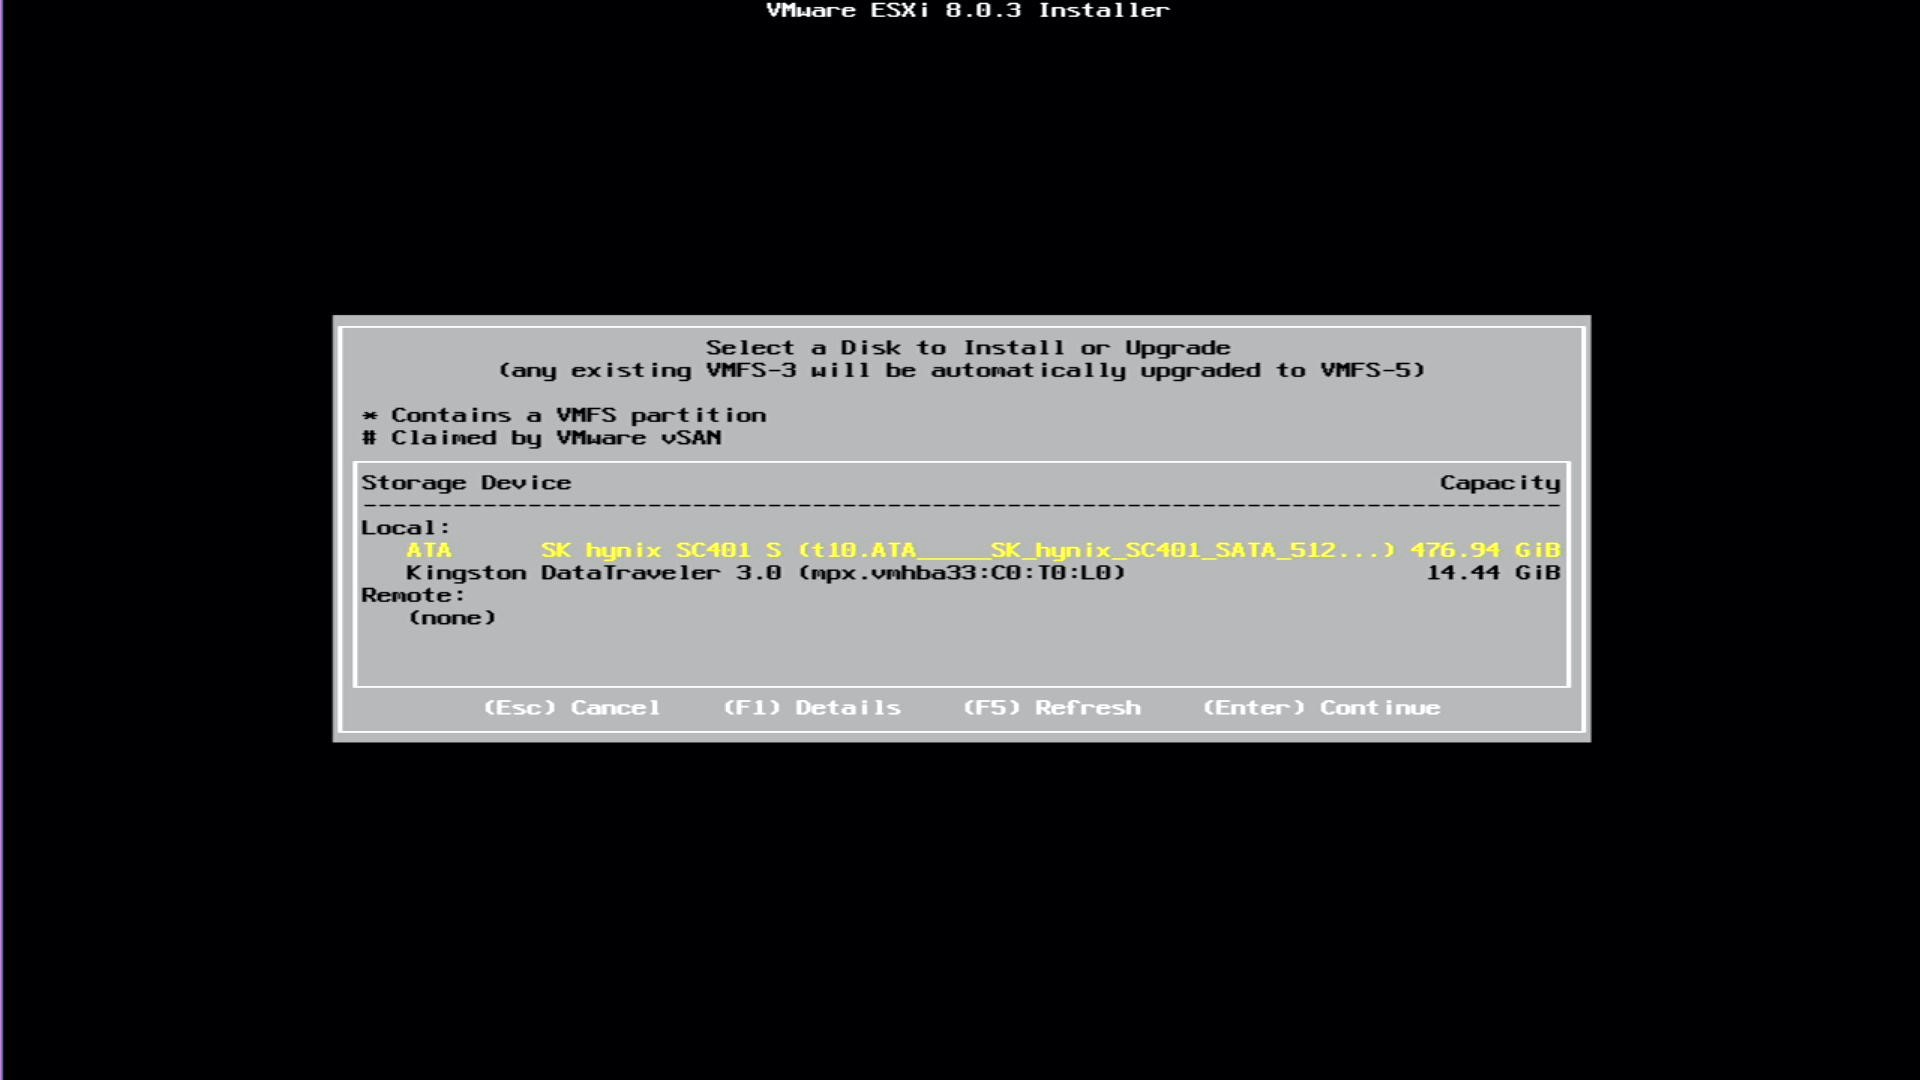
- Use the up/down arrows to select the storage device you want to install ESXi onto. In my example, I selected SK hynix…
- Press Enter
- If you are happy to erase the disk and proceed, press Enter
WARNING
If you have data on the disk, it will be destroyed!

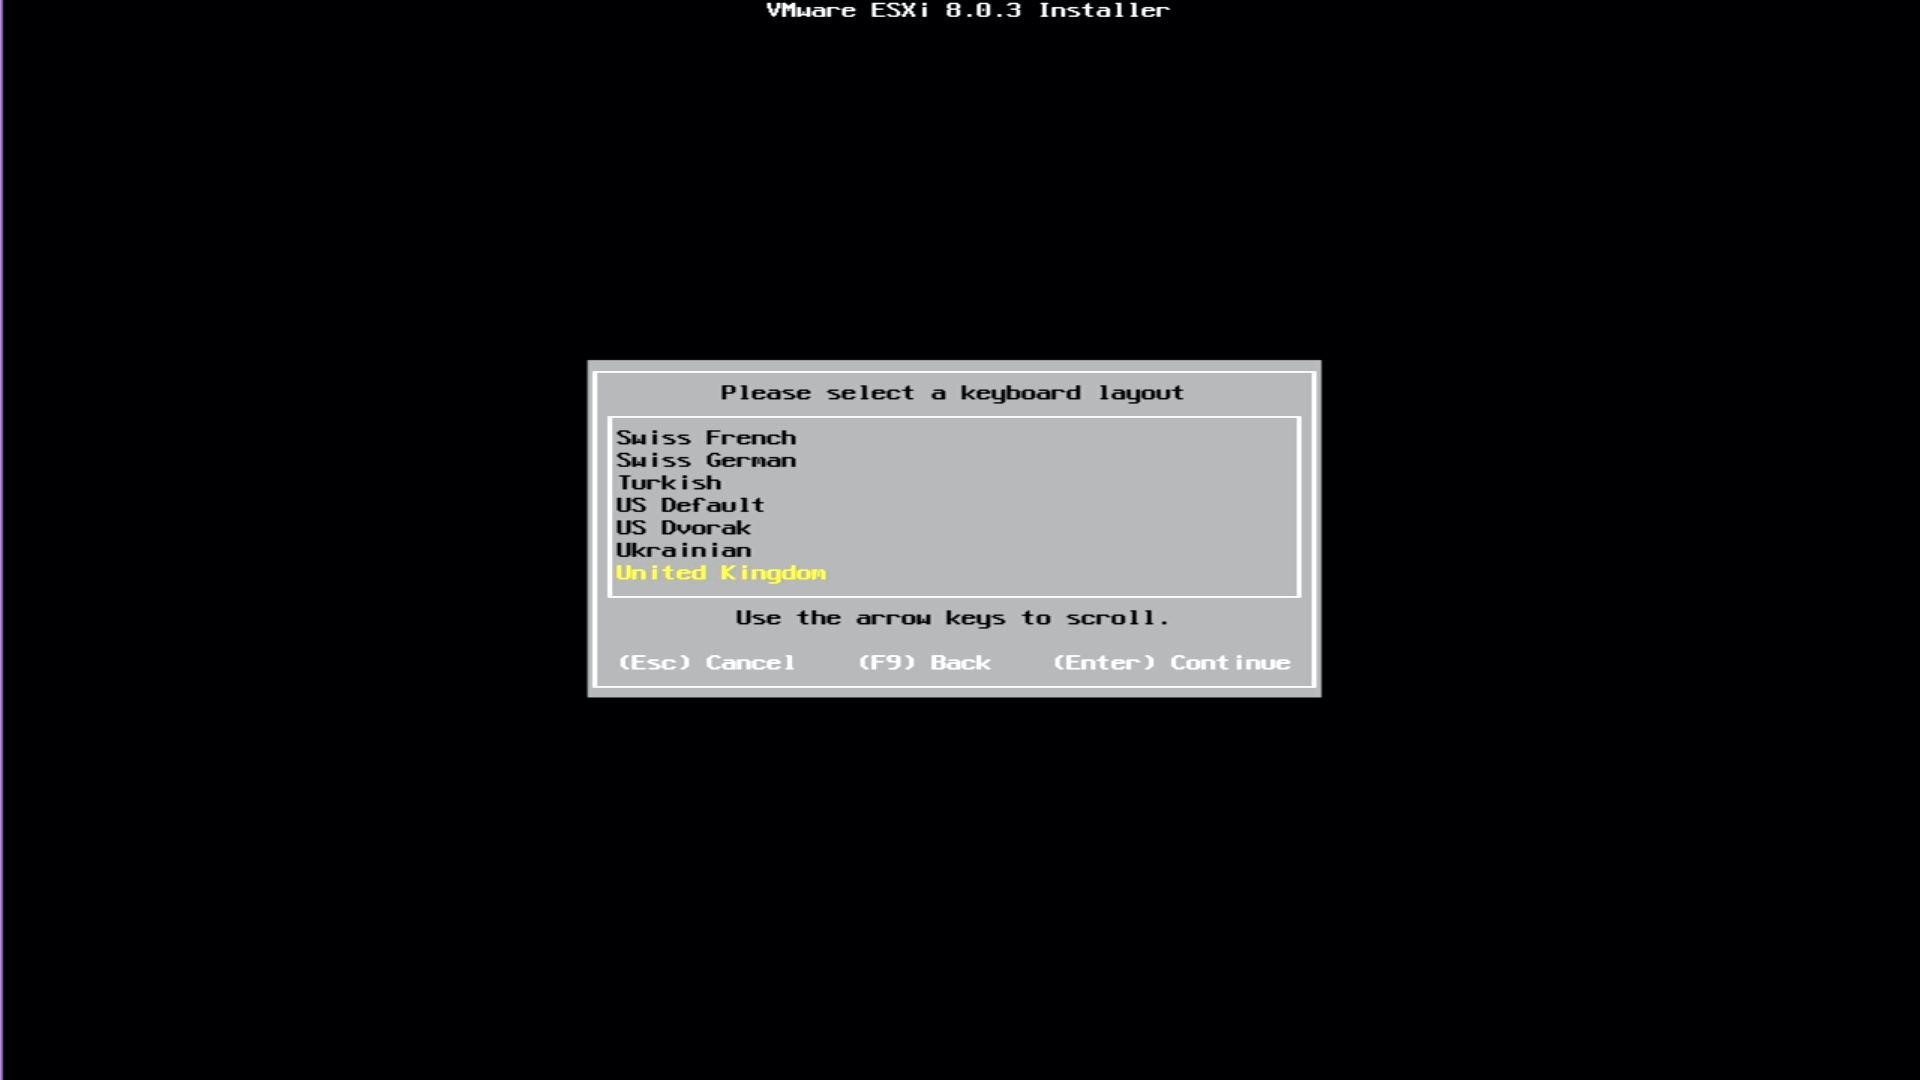
- Use the up/down arrows to select your keyboard. In my example, I selected United Kingdom
- Press Enter
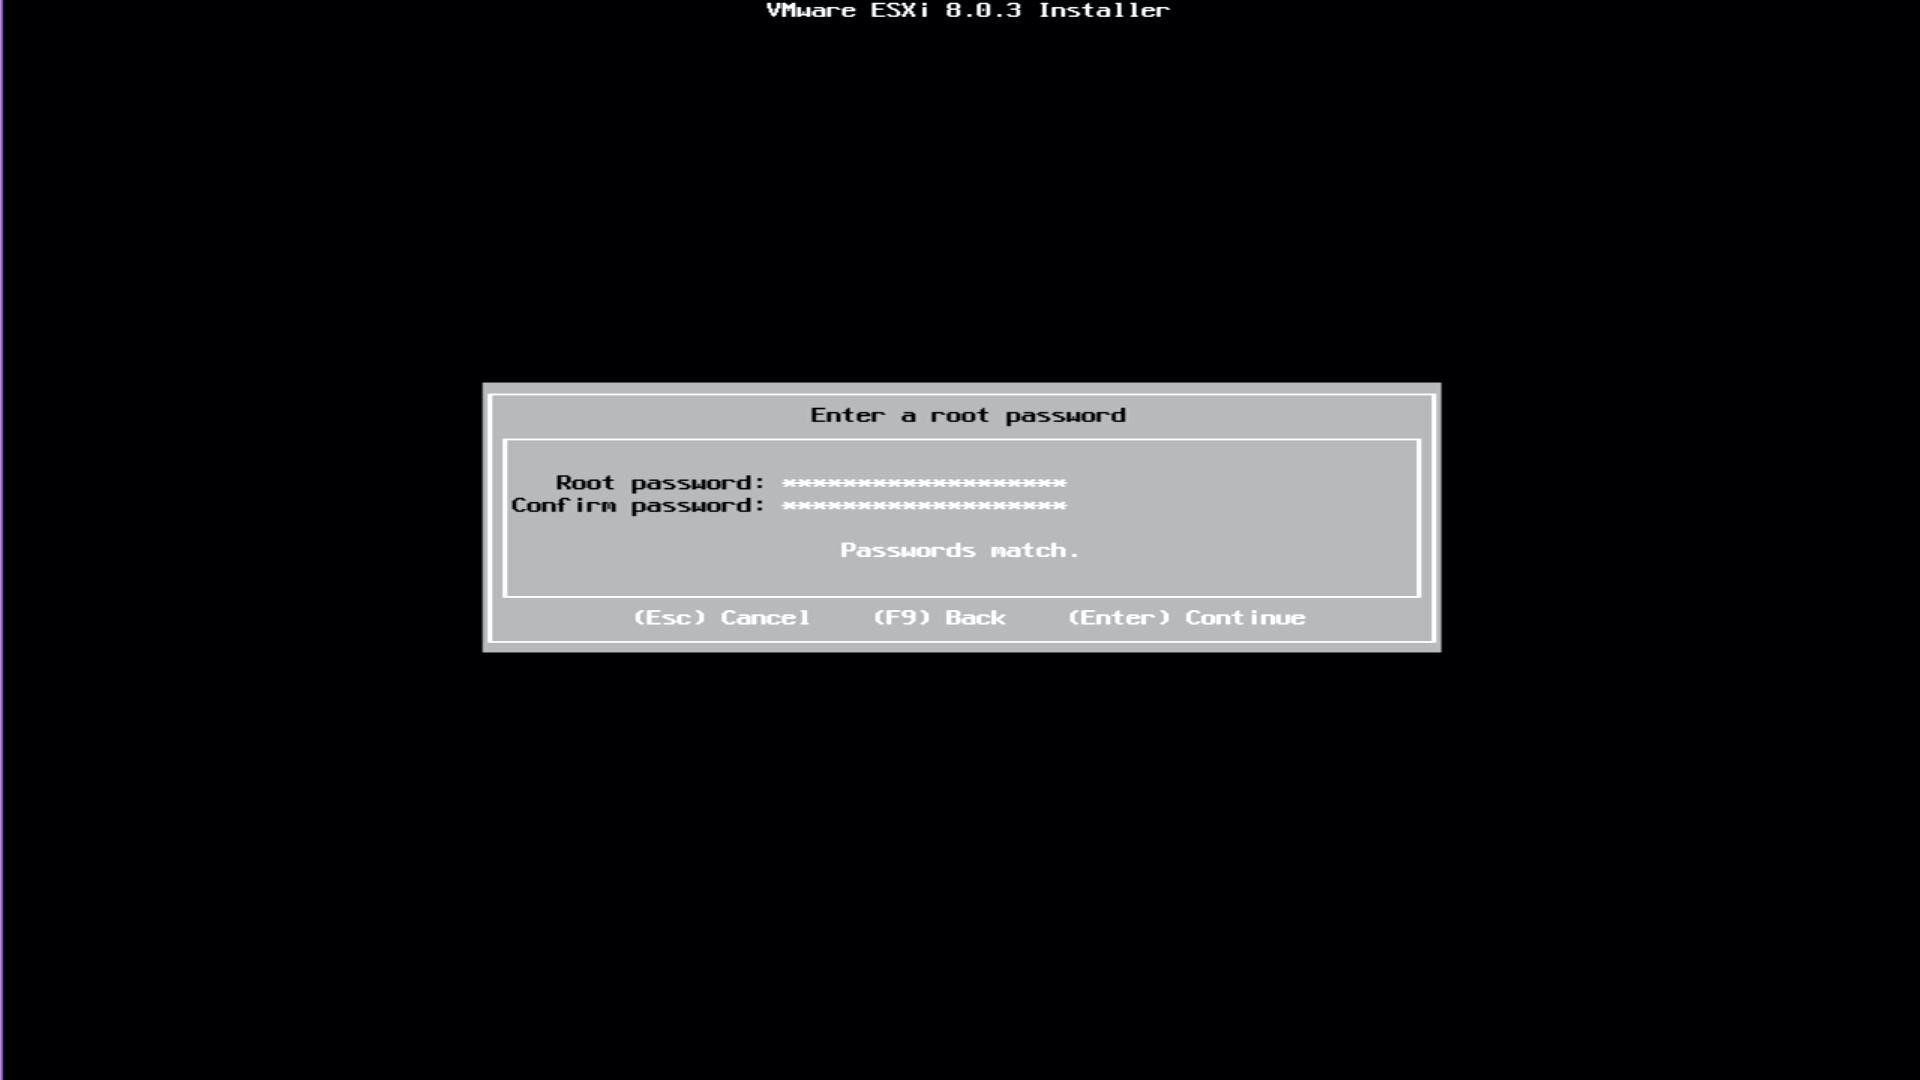
- Enter a root password (this is the password you will use to log into the console and web user interface after installation)
- Press Enter
As mentioned in VMware GPU Homelab: Part 1 – Introduction, The Dell Precision 5820 workstations I am using for my Homelab contain Intel w-21xx series CPUs. These are supported in ESXi 8, however they have been deprecated in the next release of ESXi, as per Broadcom’s CPU Support Deprecation and Discontinuation In vSphere Releases article. As expected, a warning to this effect is displayed during install.
- Press Enter to continue past this warning

- This is the final chance to abort the install. If you are happy to continue, press F11
WARNING
If you have data on the disk, it will be destroyed!

- You will now be prompted to remove the boot device. Remove the USB memory stick that contains the ESXi installer
- Press Enter
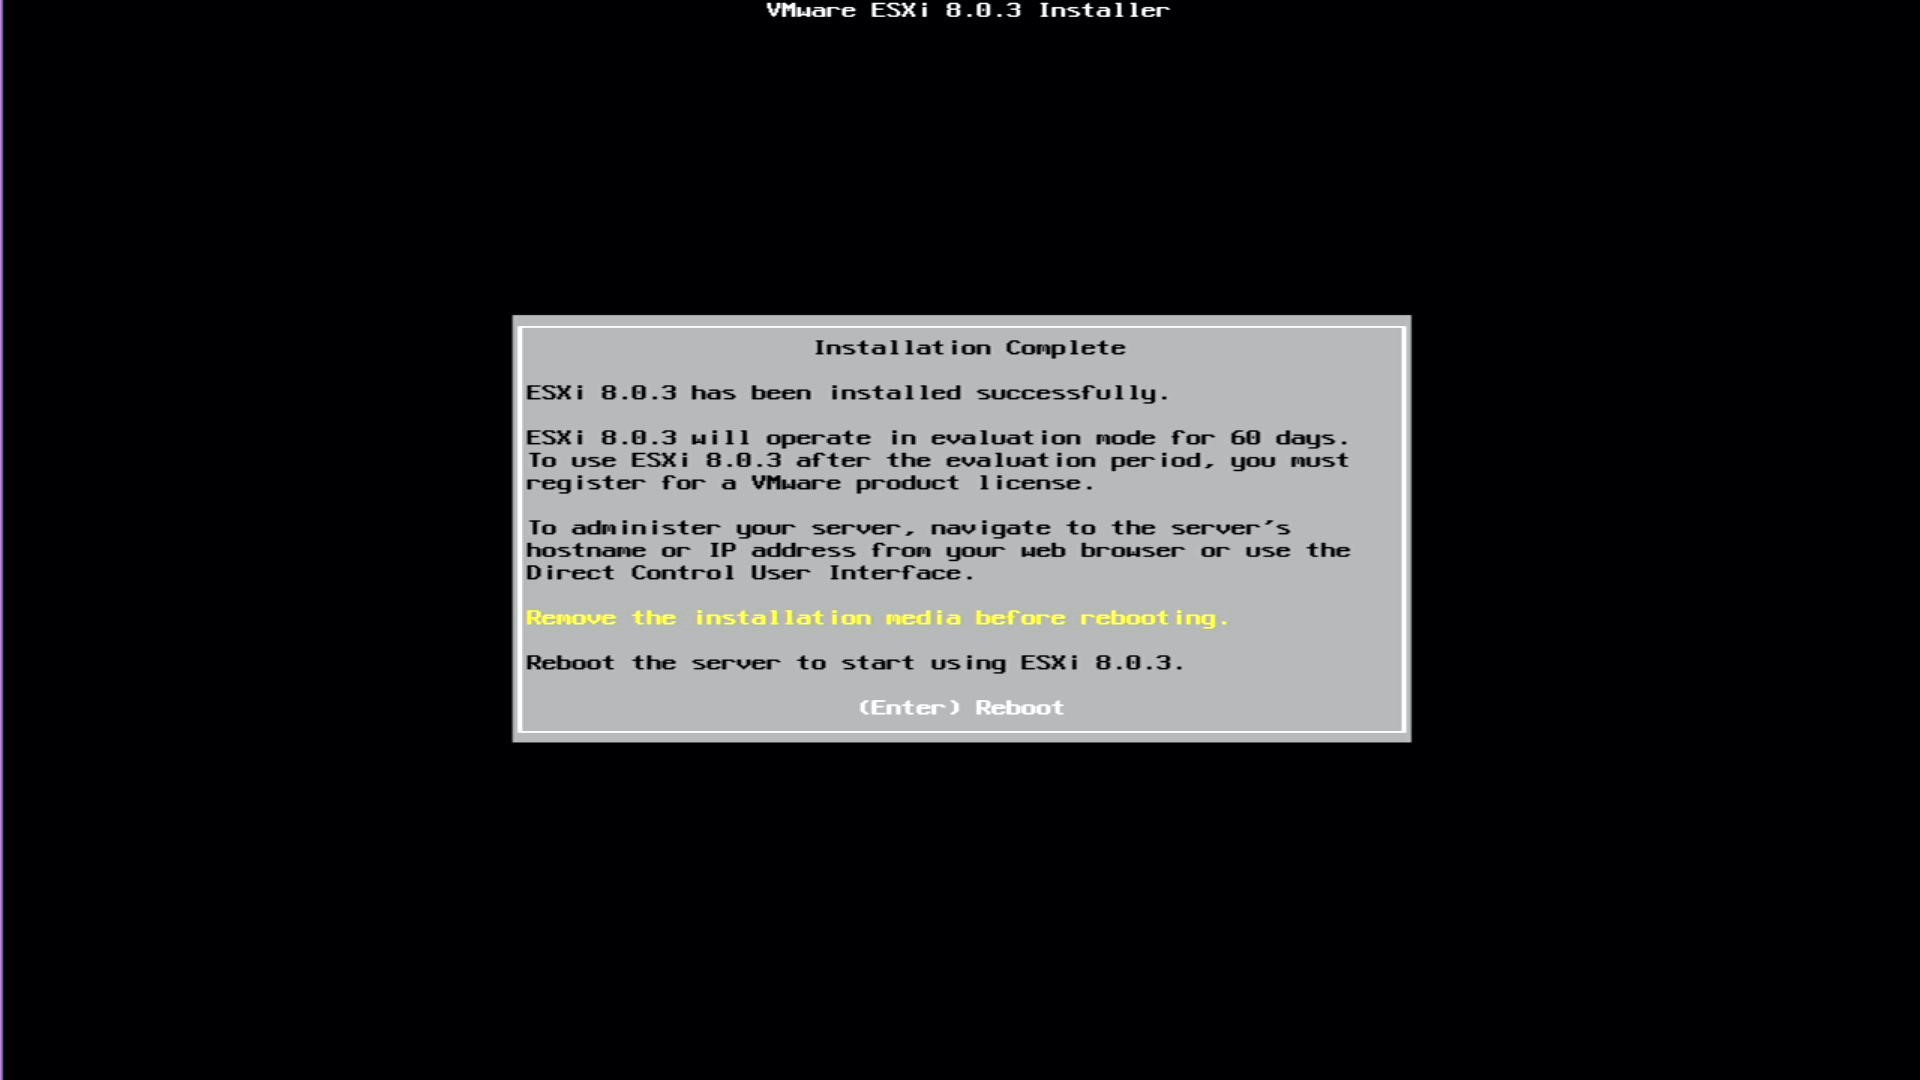
- Wait for the server to reboot
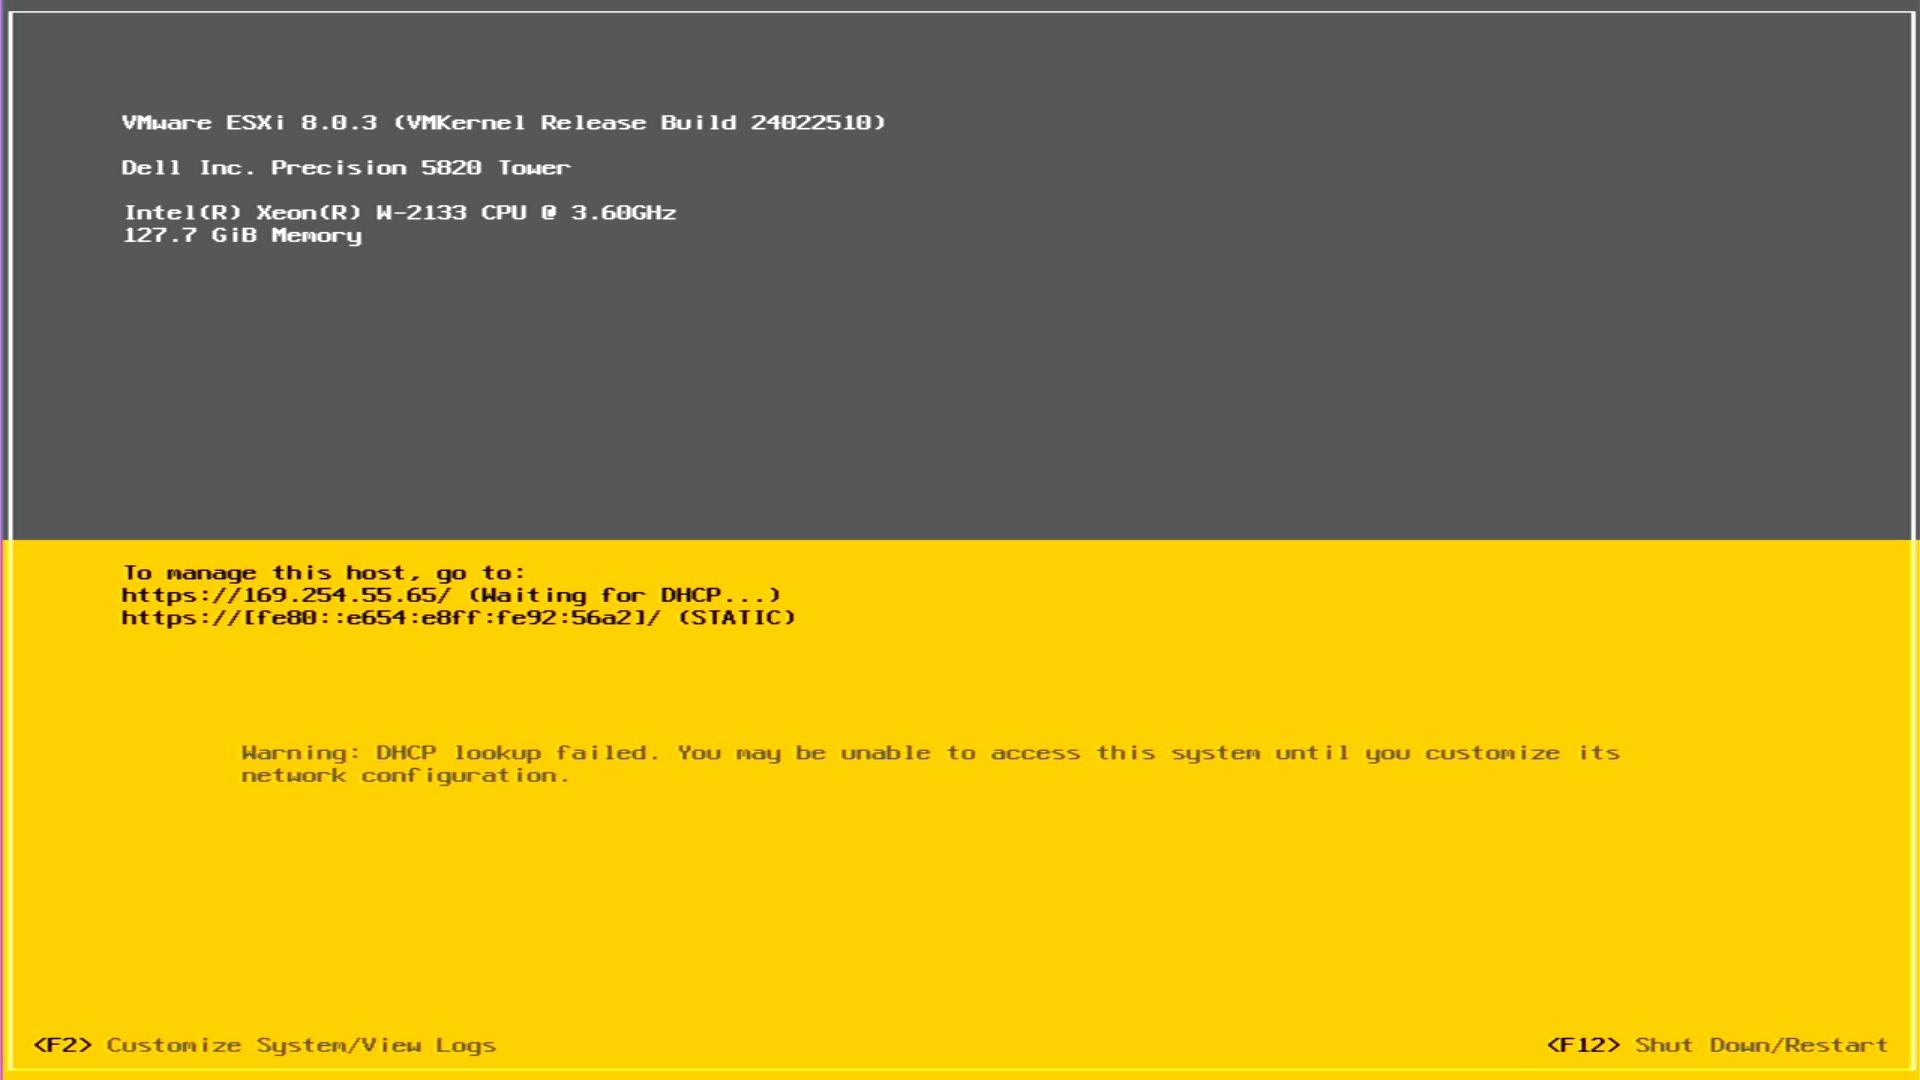
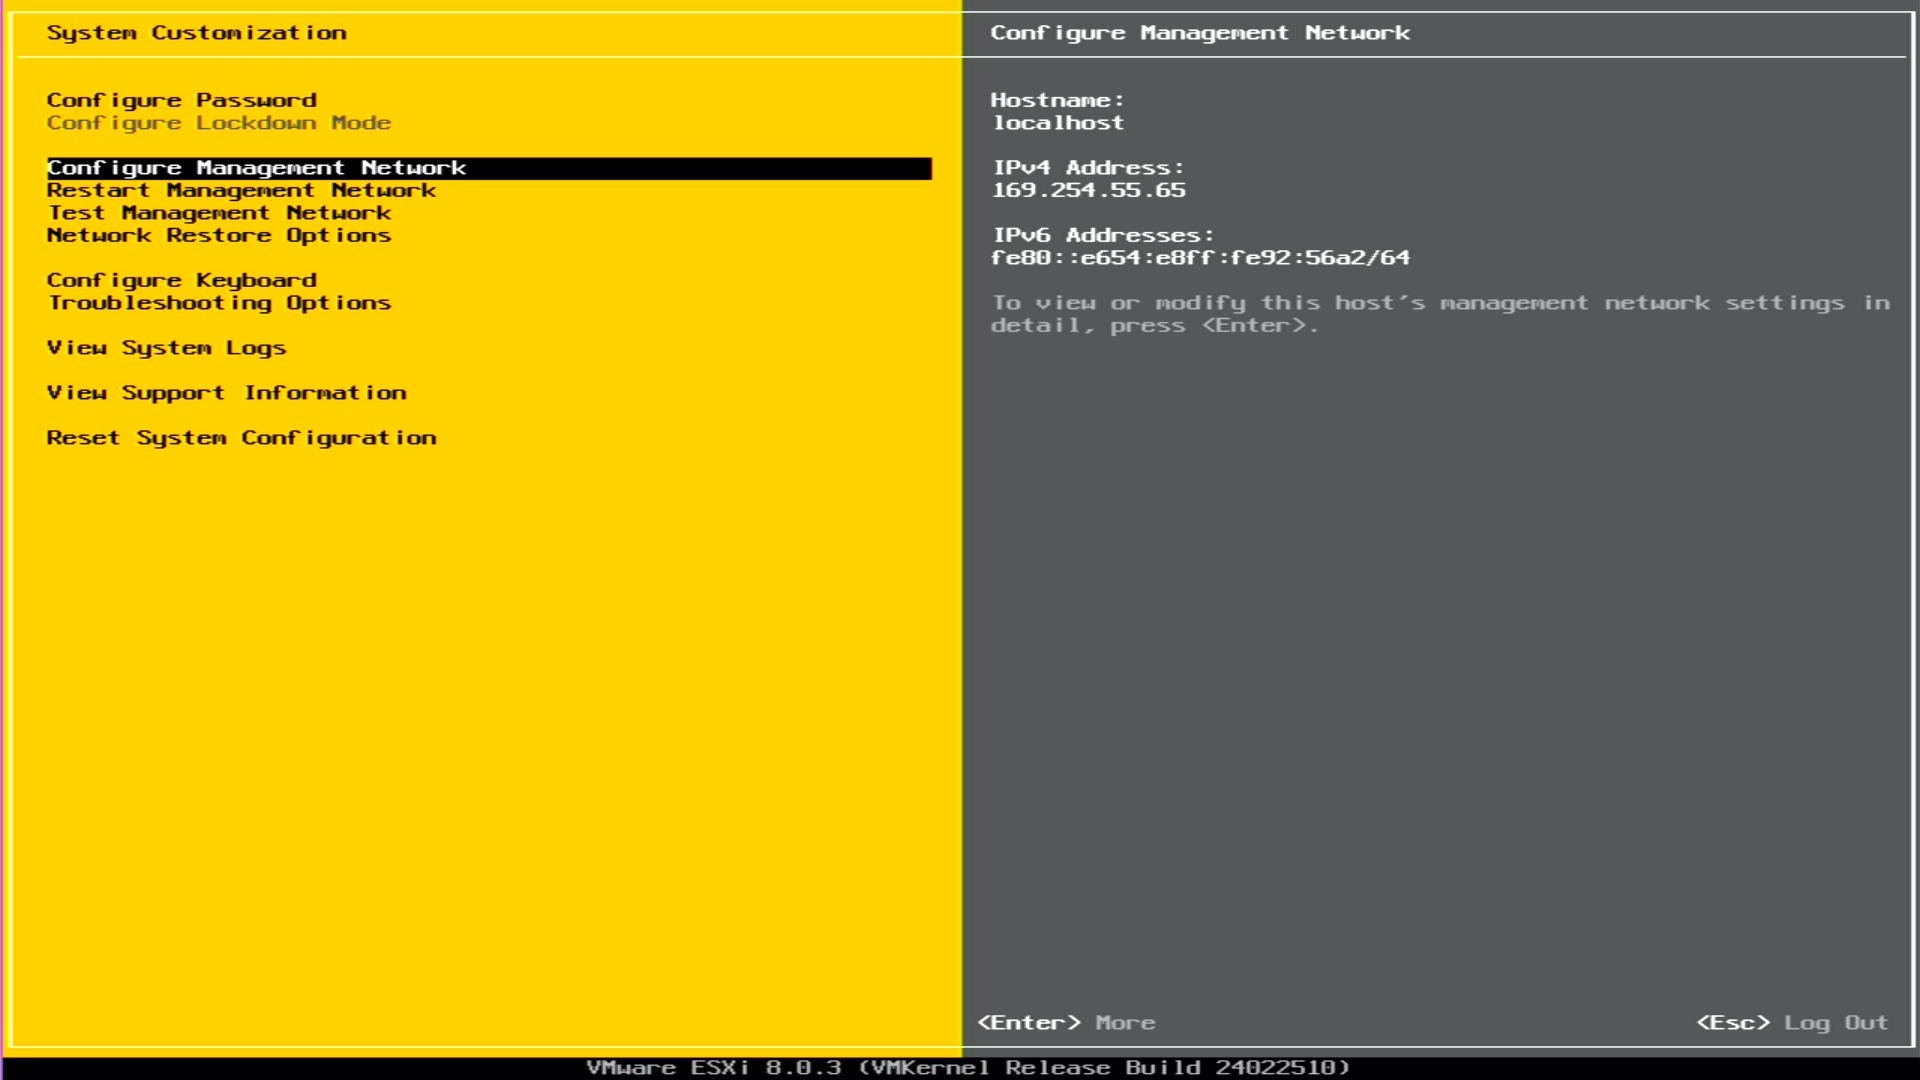
- Once booted, the Direct Console User Interface (DCUI) should look like the image below.
- Press F2 to enter the configuration menu
I do not have a DHCP server on the network this host is physically connected, we will login and set a static IP address.
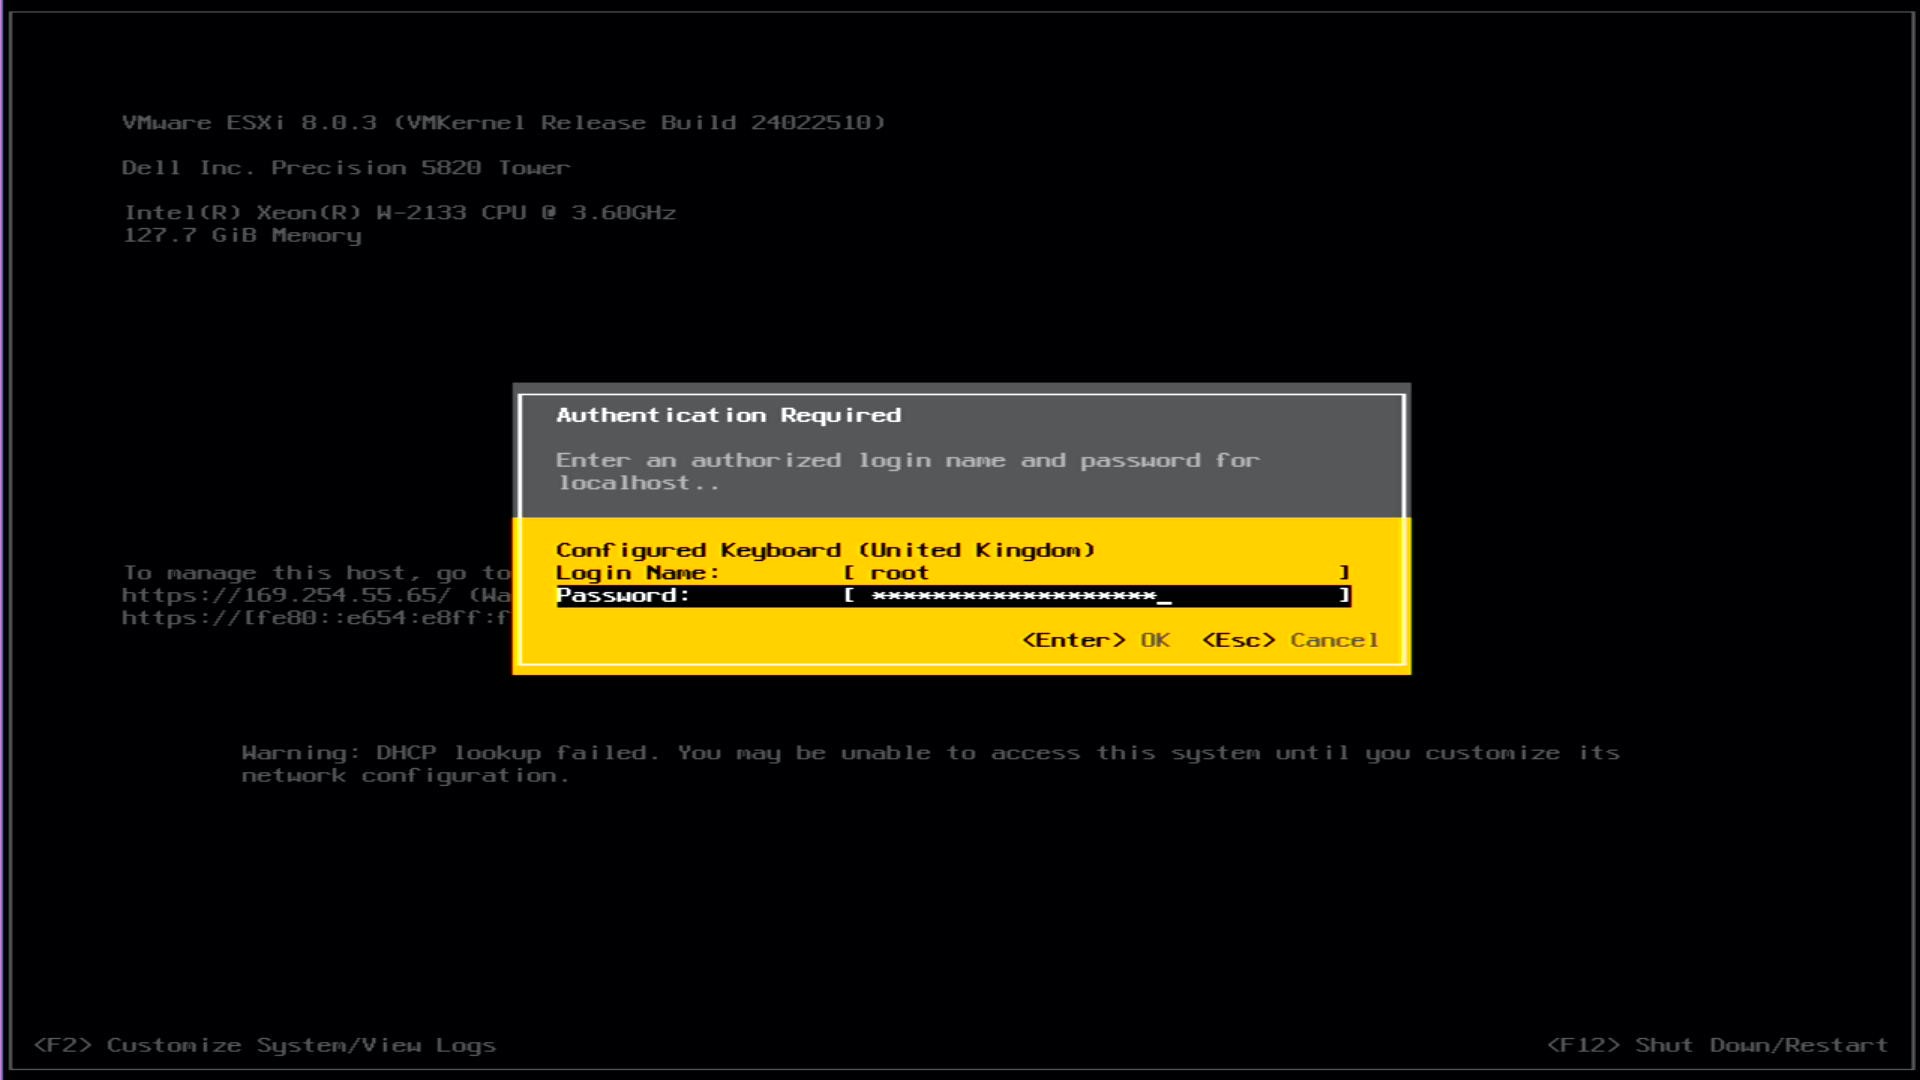
- Enter root as the Login Name
- Enter the password you set during the install
- Press Enter
- Use the up/down arrows to select Configure Management Network
- Press Enter
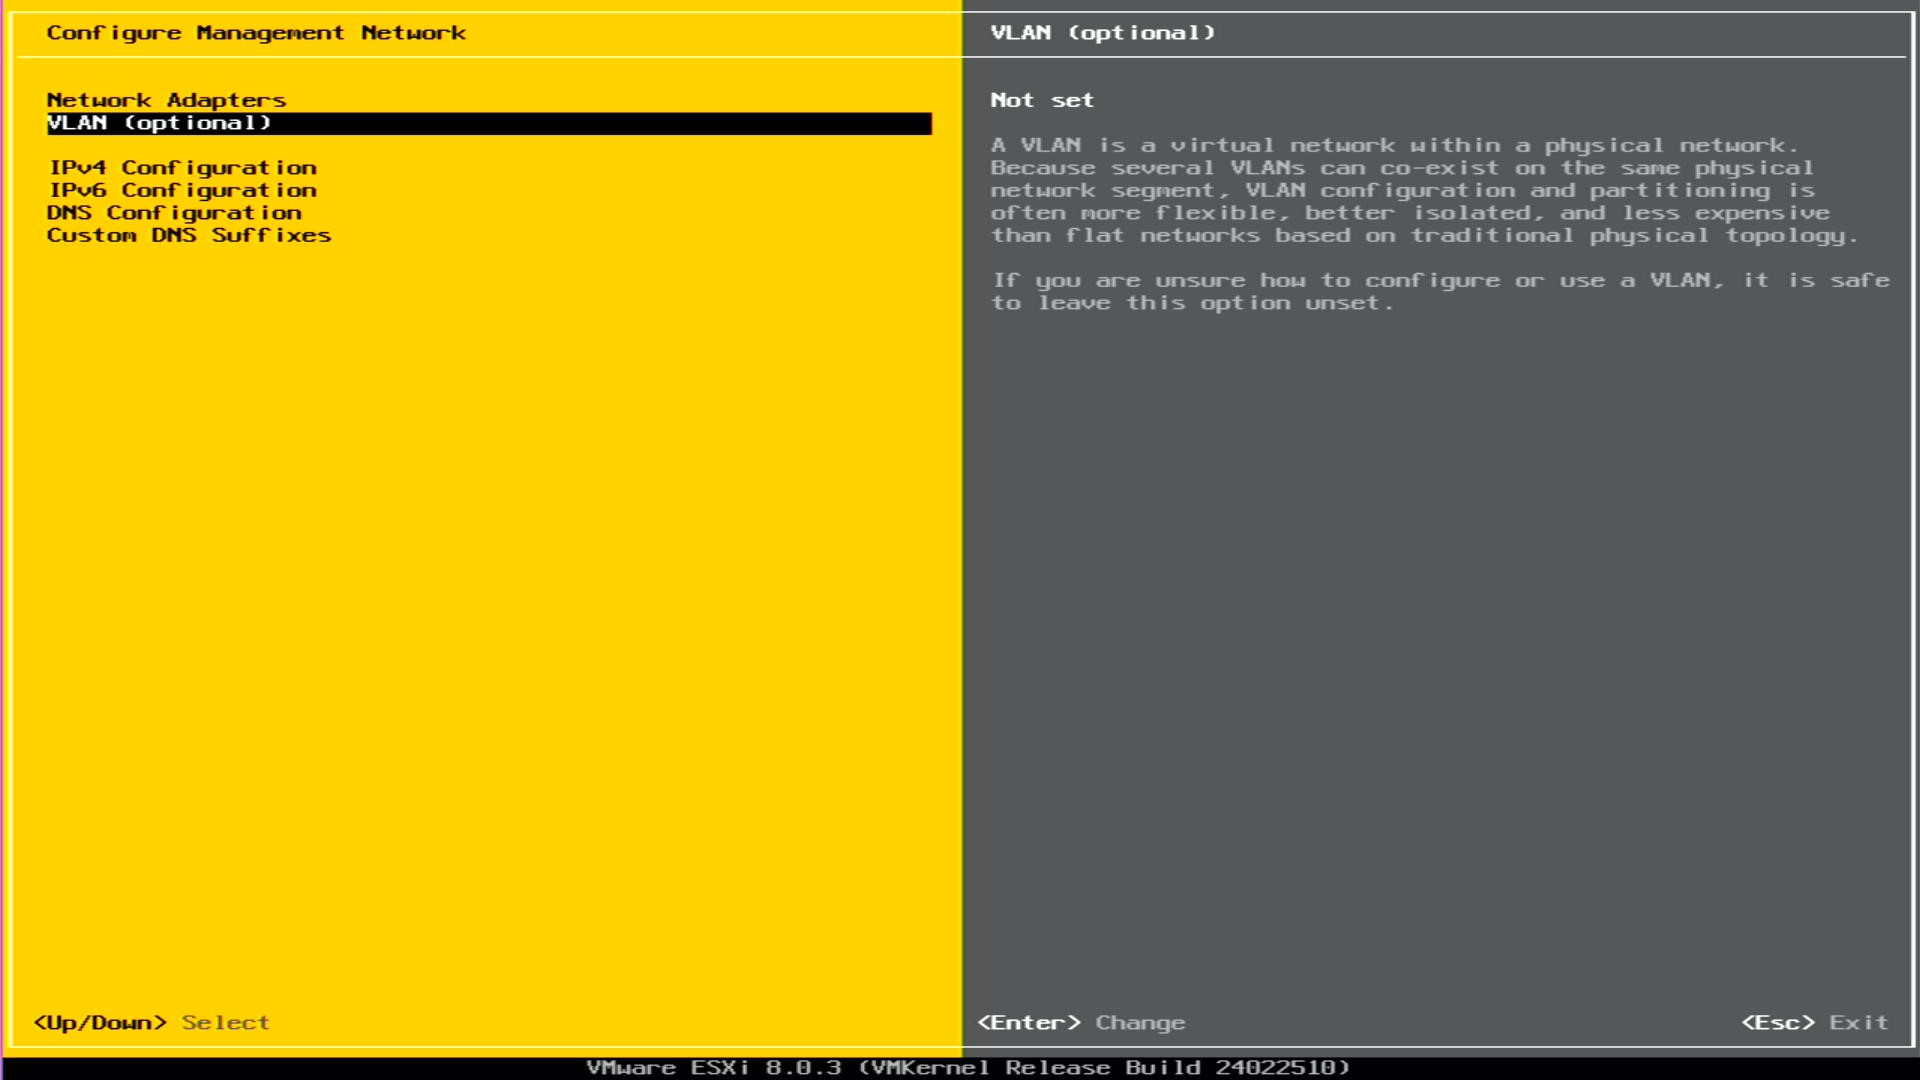
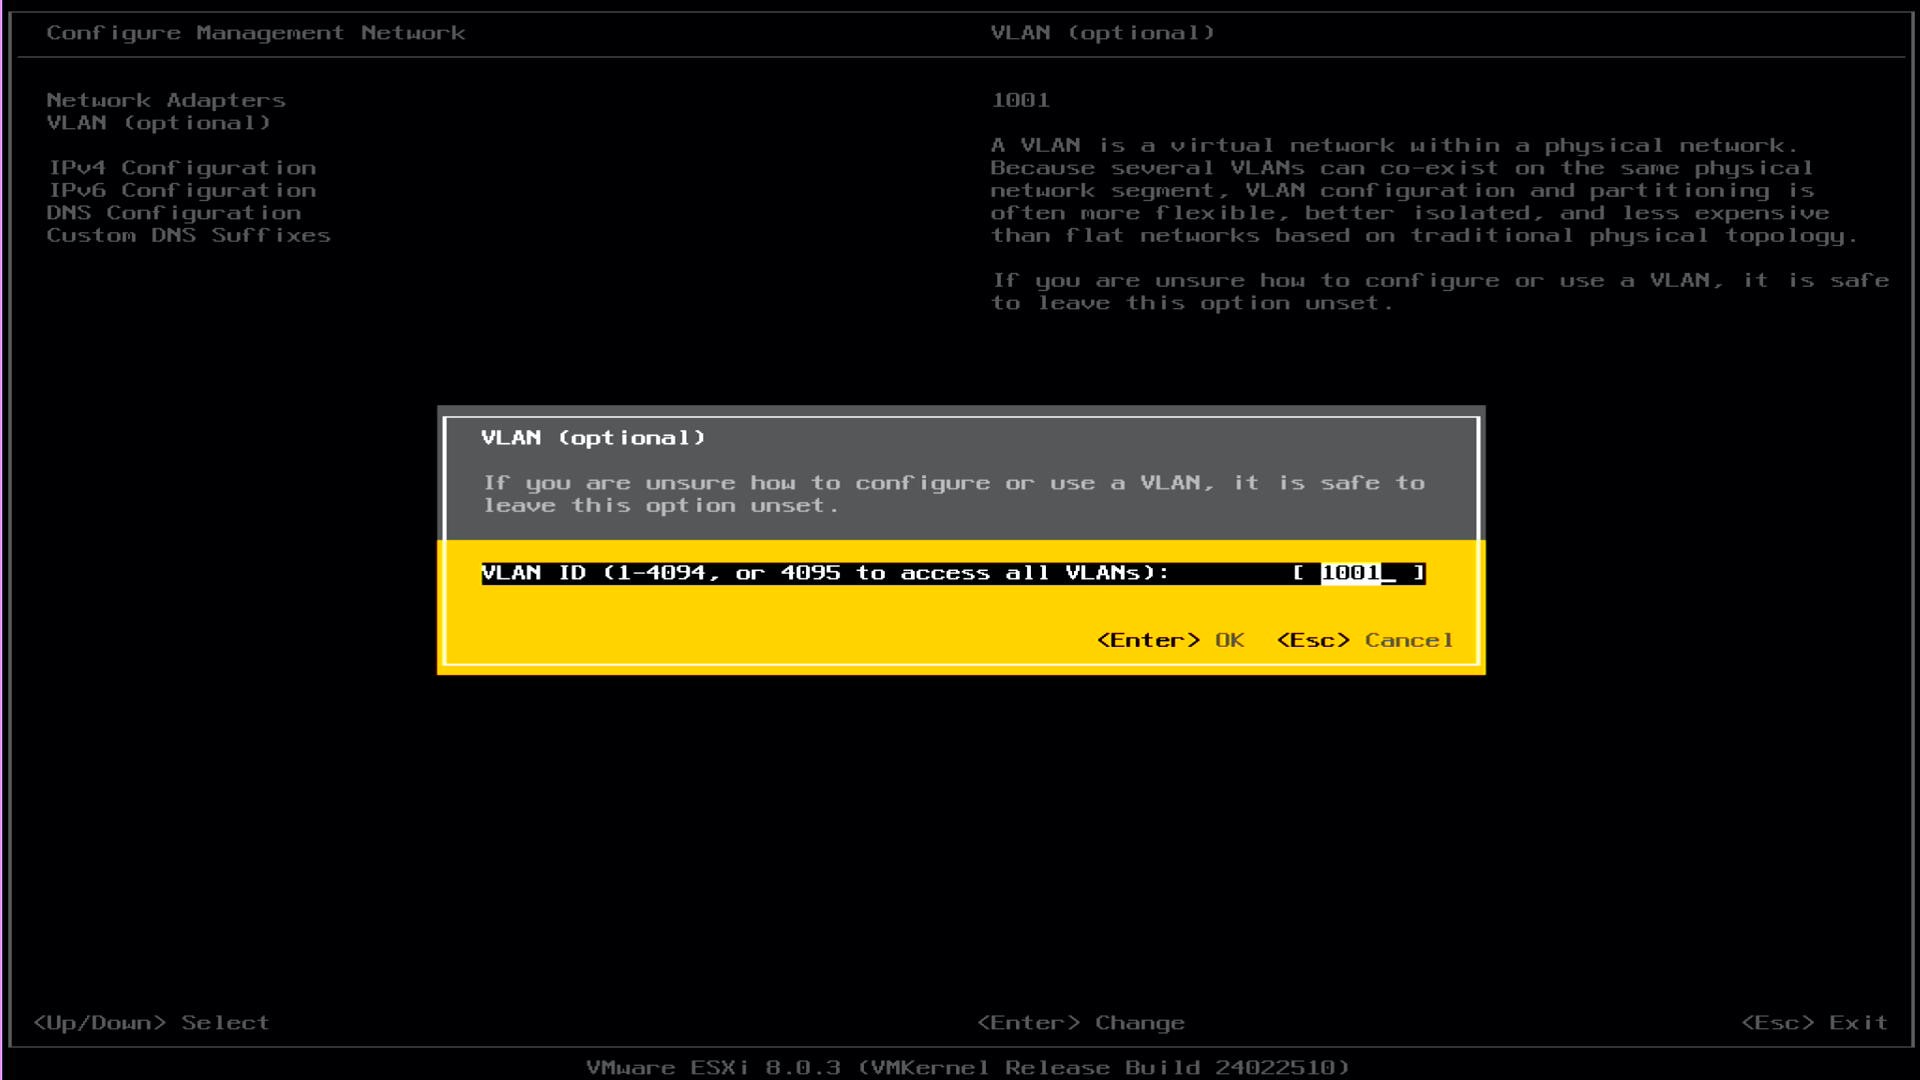
- If you need to set a VLAN for your management traffic, use the up/down arrows to select VLAN (optional)
- Press Enter
- Enter the VLAN number you are using for management traffic
- Press Enter
I will be setting a VLAN, so management traffic (i.e. traffic to/from ESXi) it tagged on the specified VLAN. However, if you want to use the access (native/untagged) VLAN configured on the switch, leave it blank.
As mentioned earlier, I do not have a DHCP server on the network this host is physically connected to. The next couple of steps will configure it to use a static IP.
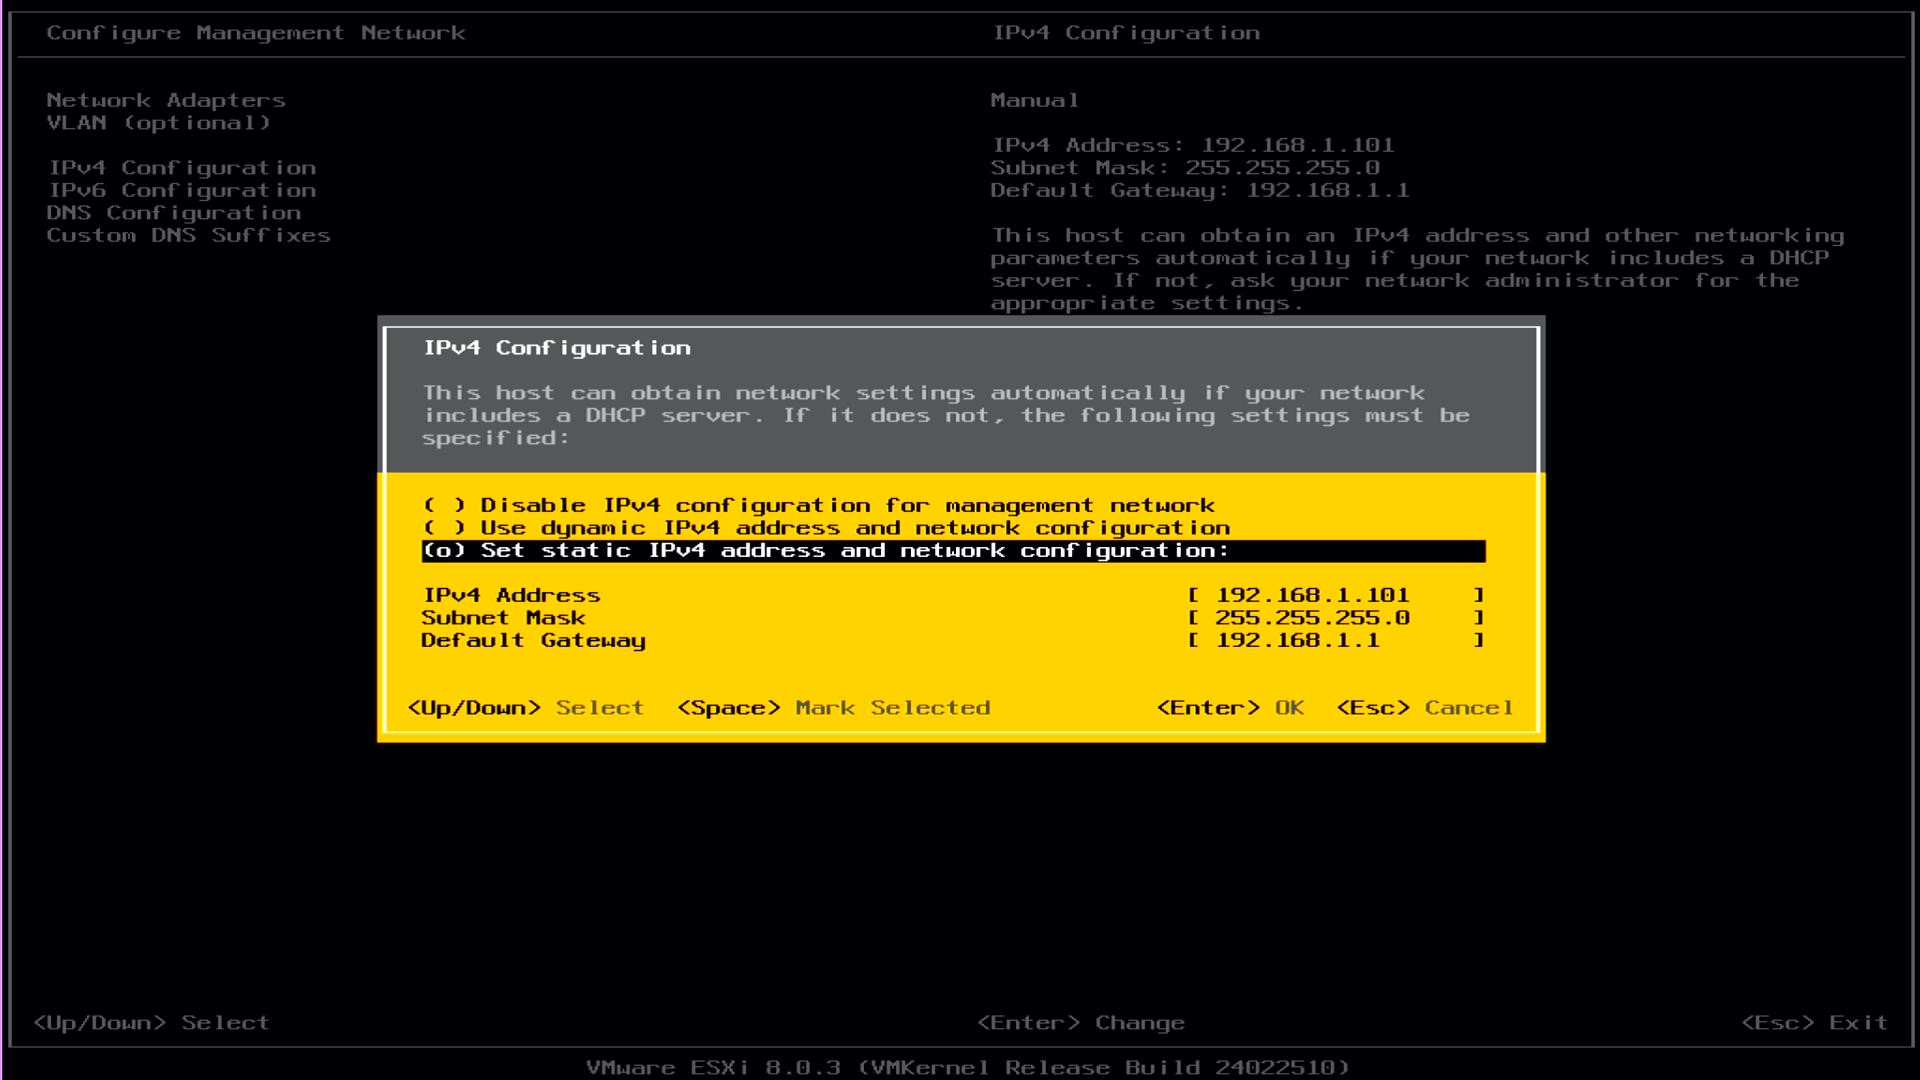
- Use the up/down arrows to select IPv4 Configuration
- Press Enter
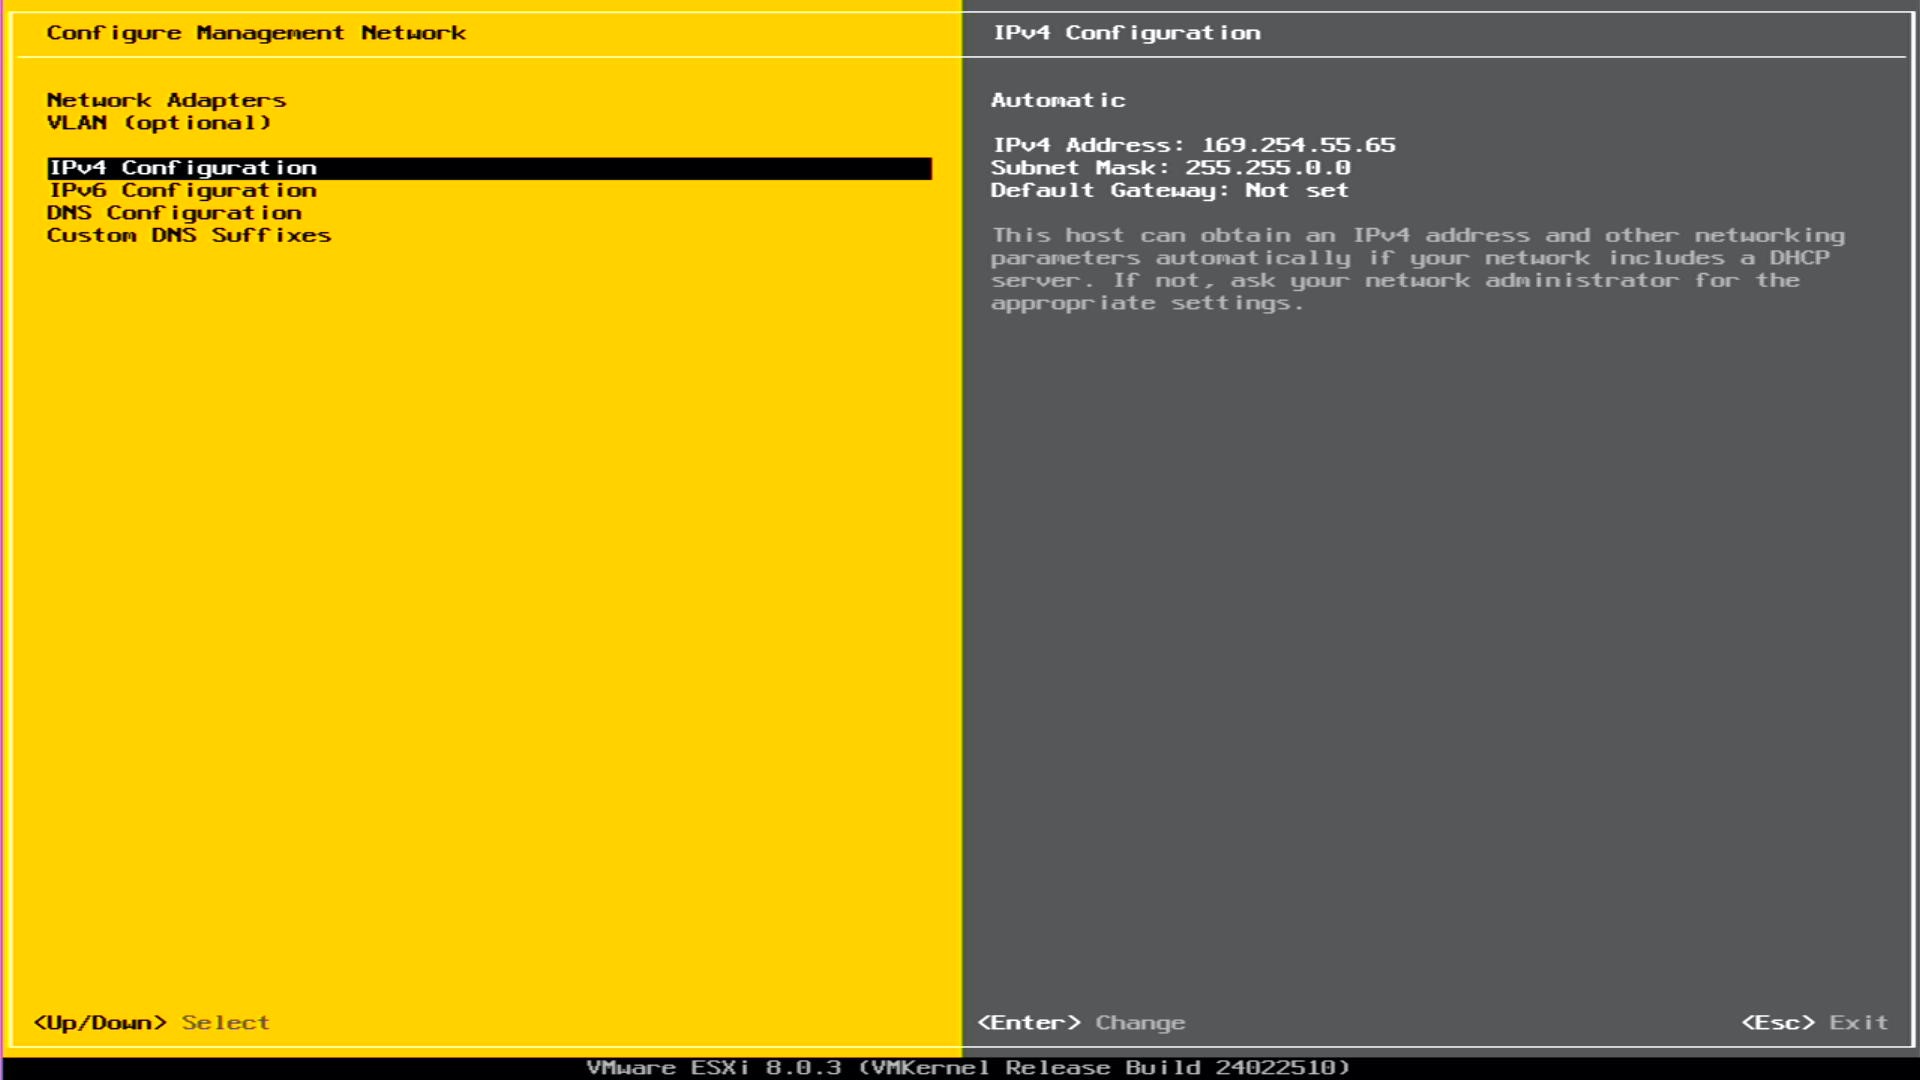
- Use the up/down arrows to select Set static IPv4 address and network configuration
- Press the Space (bar)
- Press the down arrow, enter the IPv4 Address
- Press the down arrow, enter the Subnet Mask
- Press the down arrow, enter the Default Gateway
- Press Enter
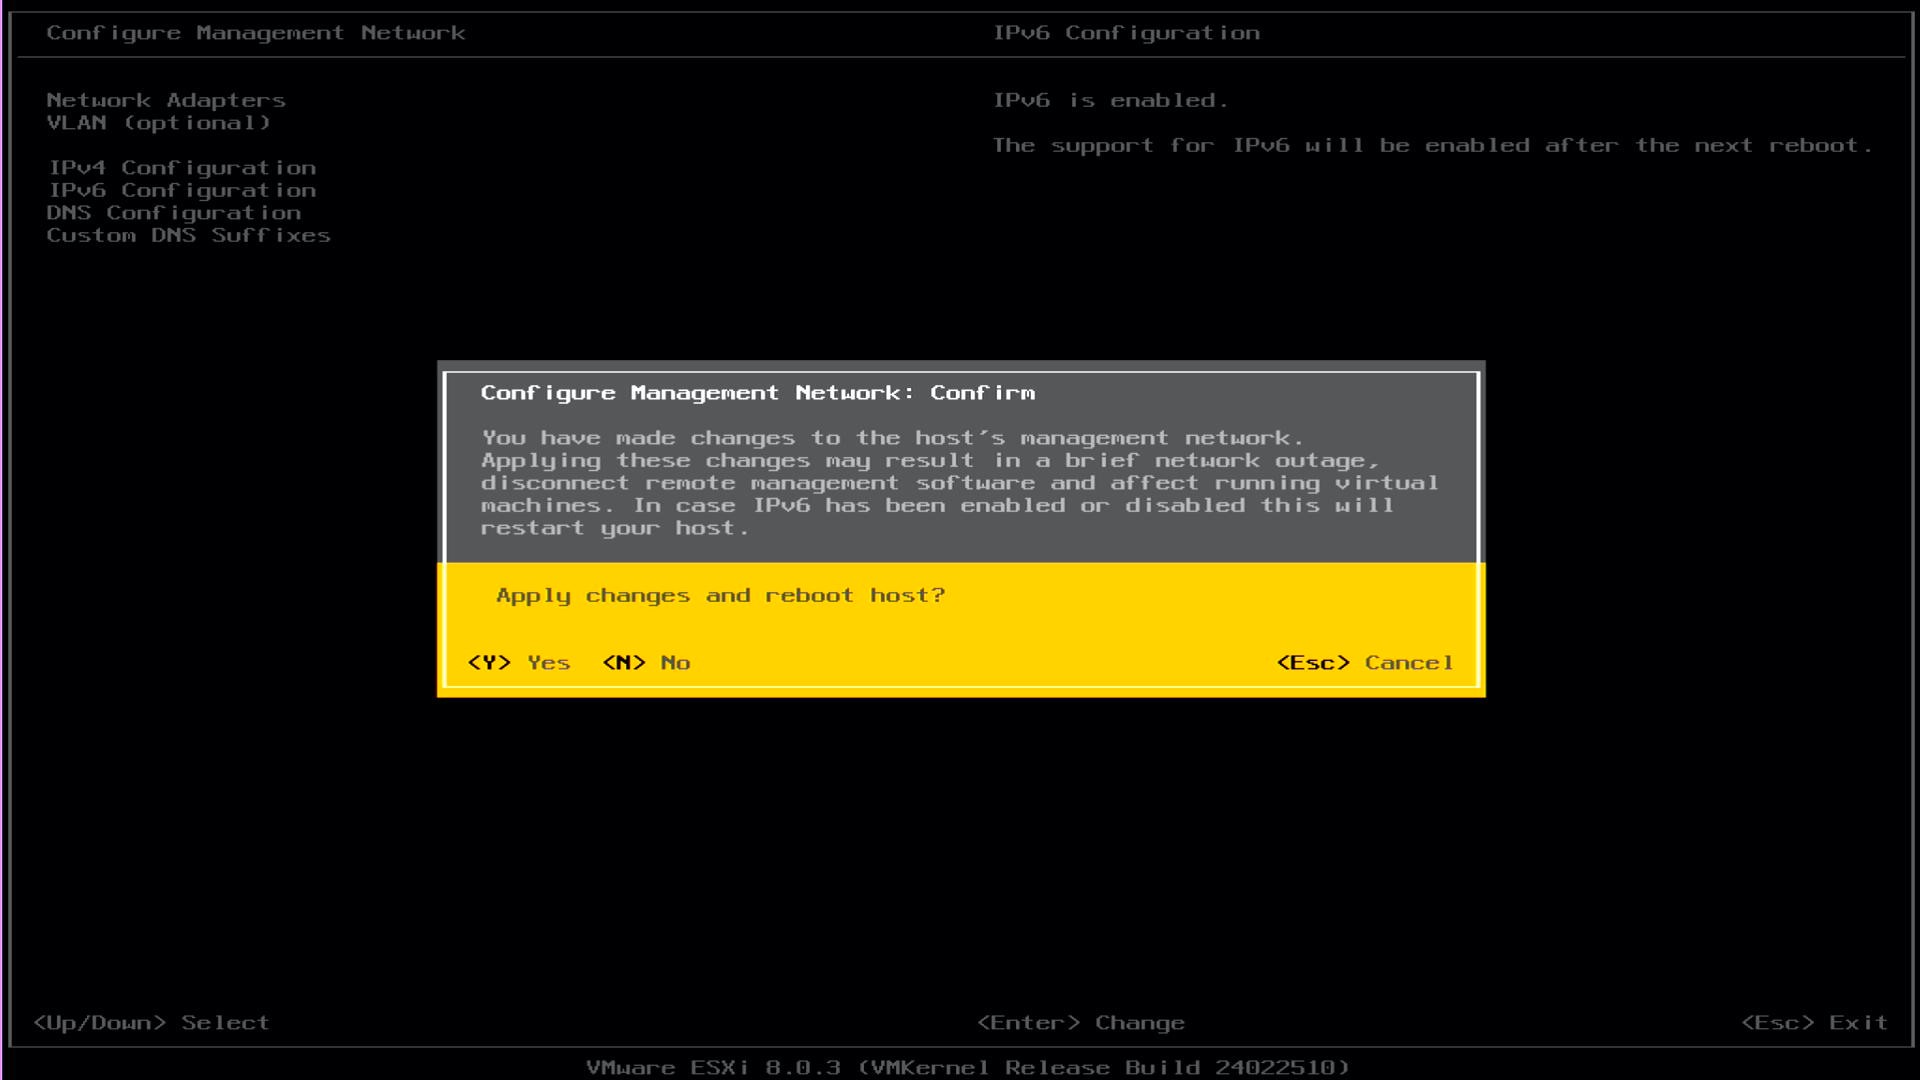
I will not be using IPv6, therefore I will disable IPv6 on this host.
If you are going to be using IPv6, you will need to adapt the instructions below to set the address rather than disabling it.
- Use the up/down arrows to select IPv6 Configuration
- Press Enter
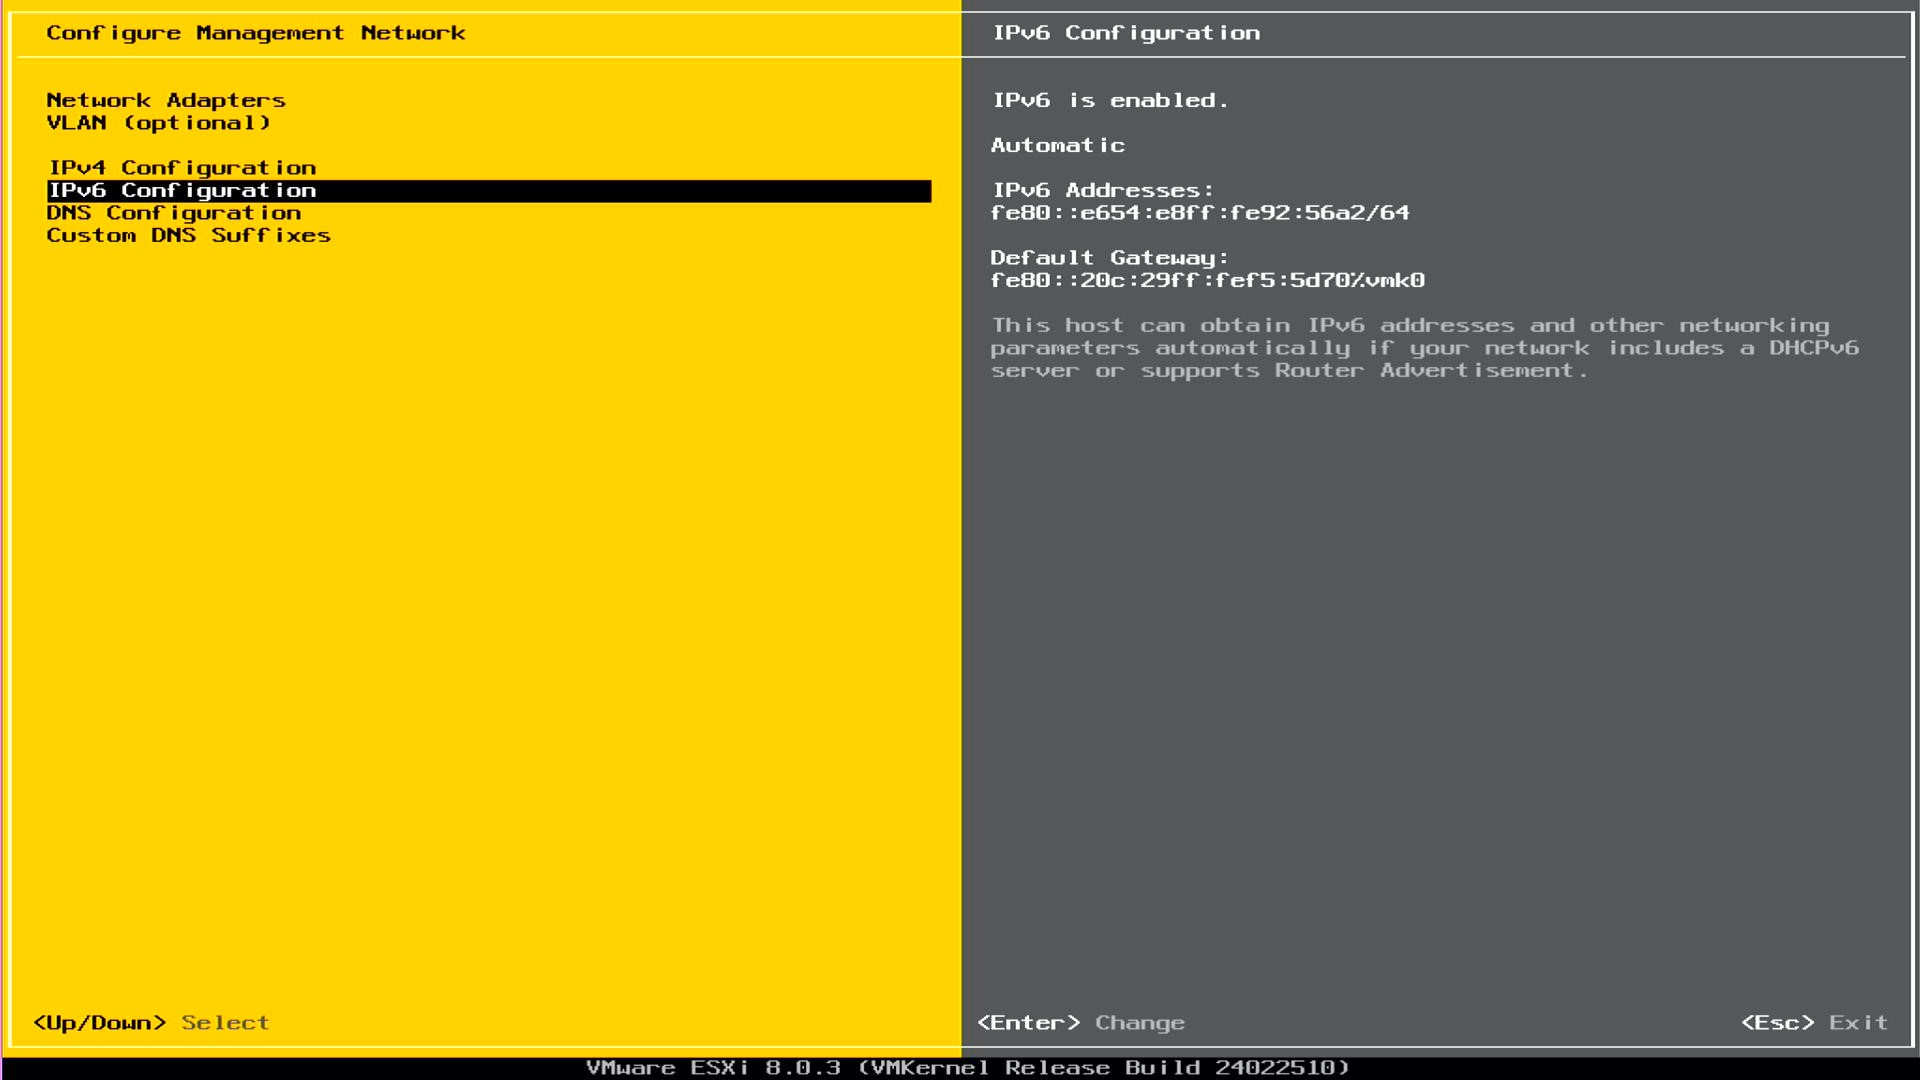
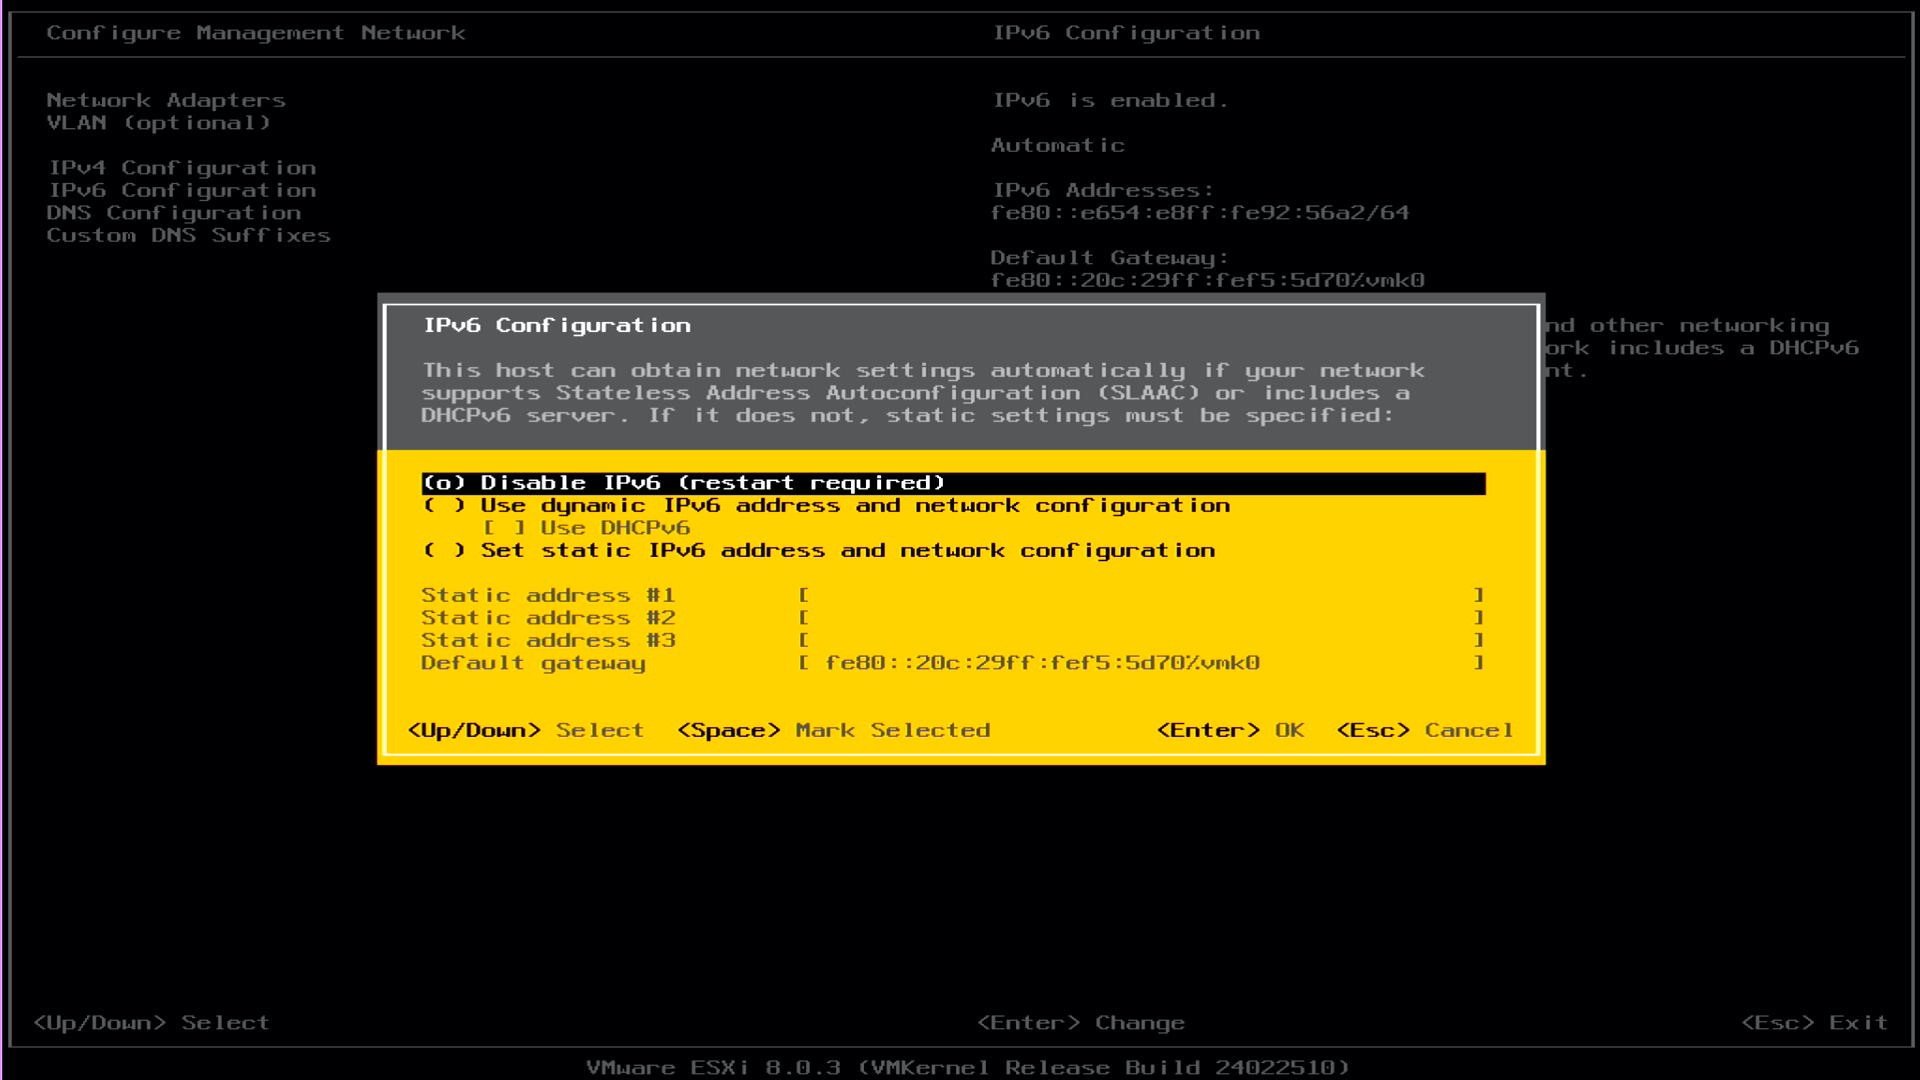
- Use the up/down arrows to select Disable IPv6 (restart required)
- Press the Space (bar)
- Press Enter
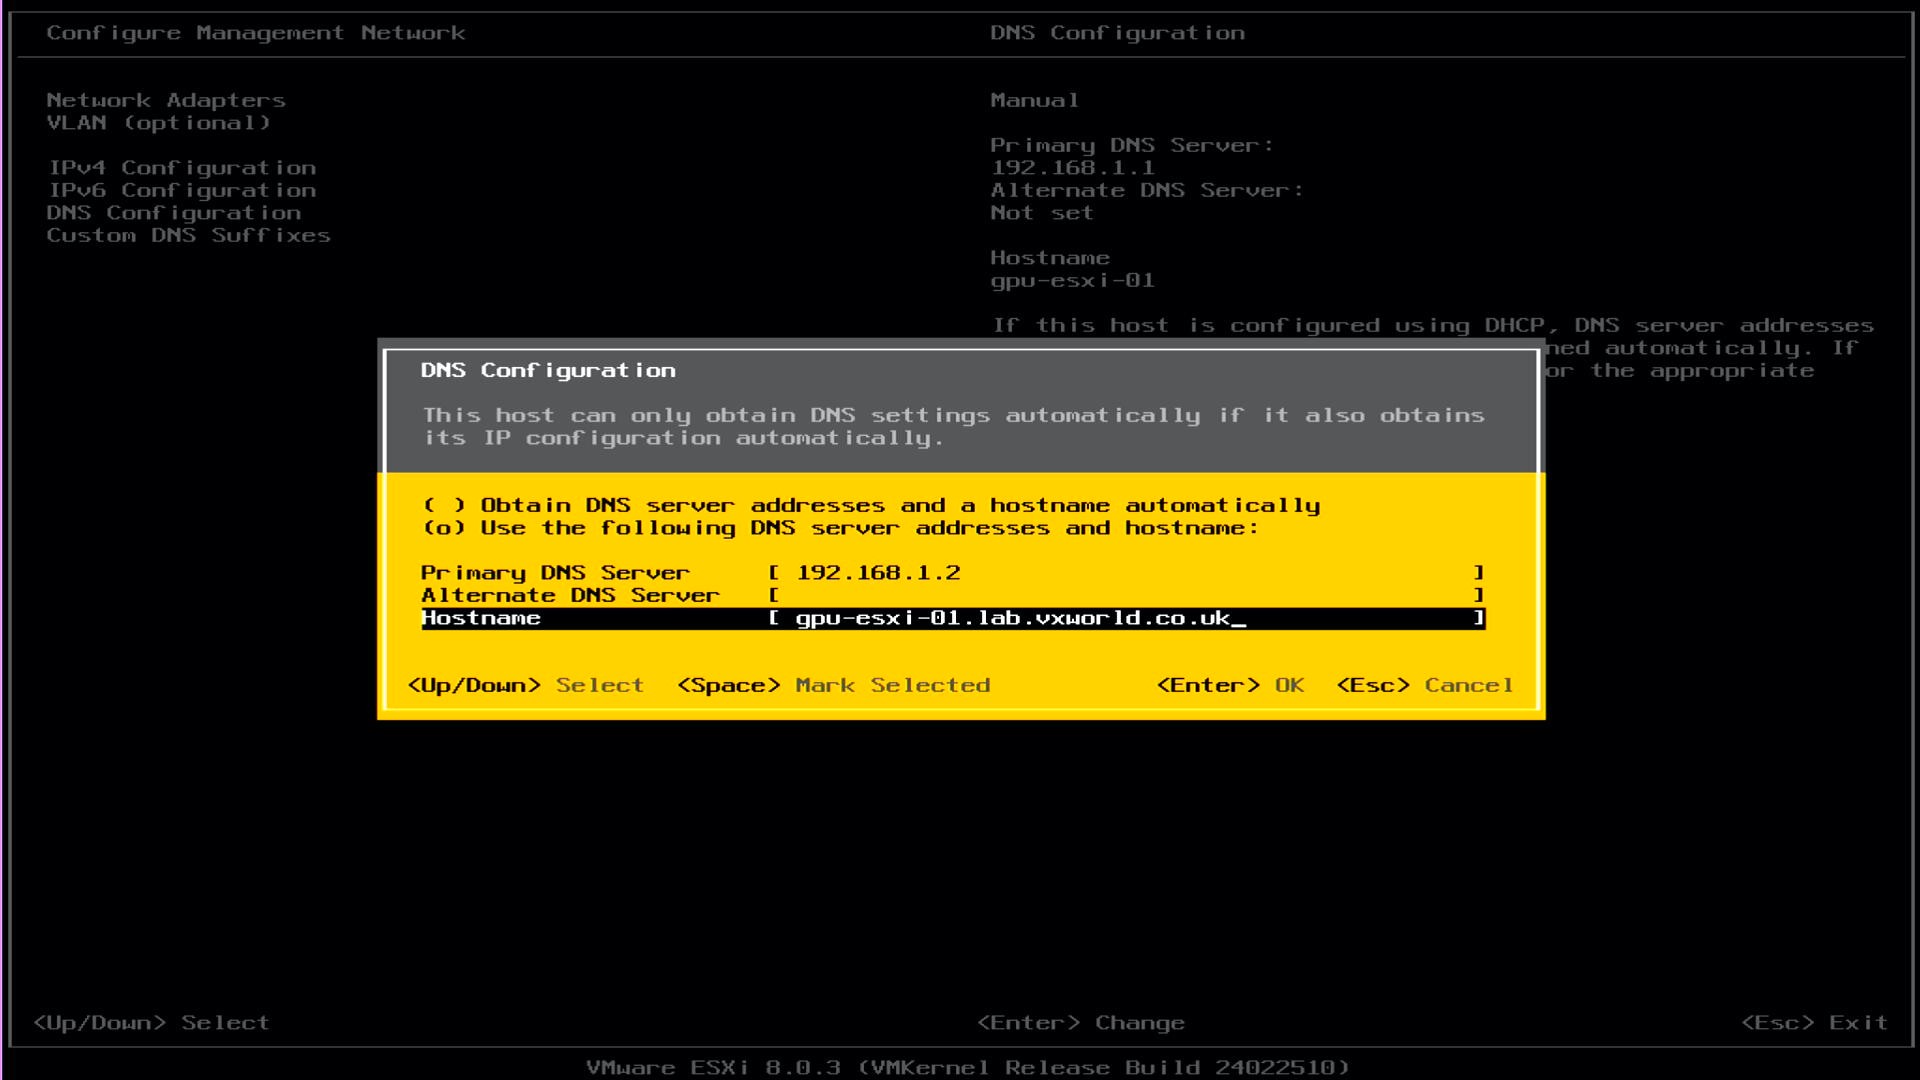
- Use the up/down arrows to select DNS Configuration
- Press Enter
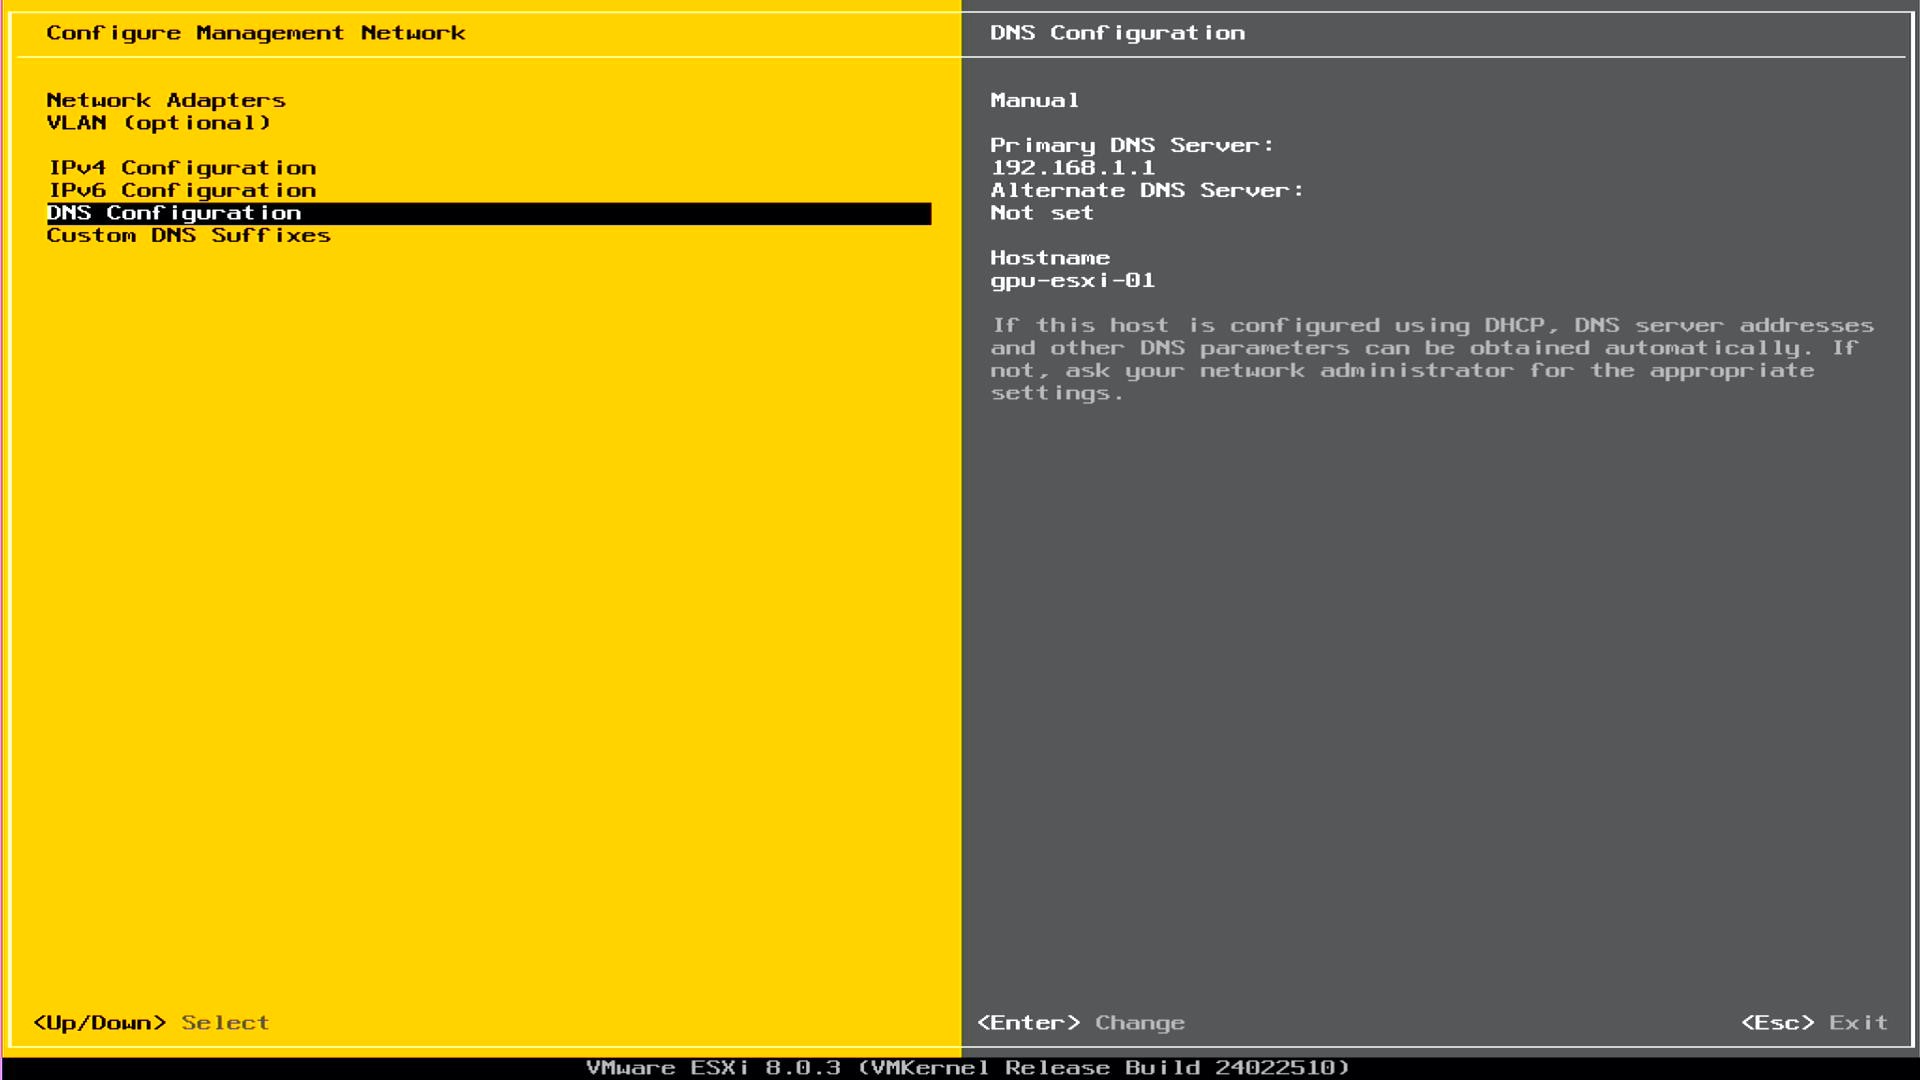
- Use the up/down arrows to select Use the following DNS server addresses and hostname
- Press the Space (bar)
- Press the down arrow, enter the Primary DNS Servers
- Press the down arrow, enter the Alternative DNS Server if applicable
- Press the down arrow, enter the FQDN in the Hostname field
- Press Enter
TIP
If you enter the FQDN in the hostname field, it will automatically split it between the hostname and domain name. The domain name will be moved to the DNS search suffix and the host name will remain in the IPv4 hostname field (once the network settings have been applied)
- To exit editing the network configuration, press Esc
- To restart the host to apply the changes, press Y
WARNING
If you disabled IPv6, the host be restarted. If you did not, just the management network will be restarted
- Wait for the host to restart
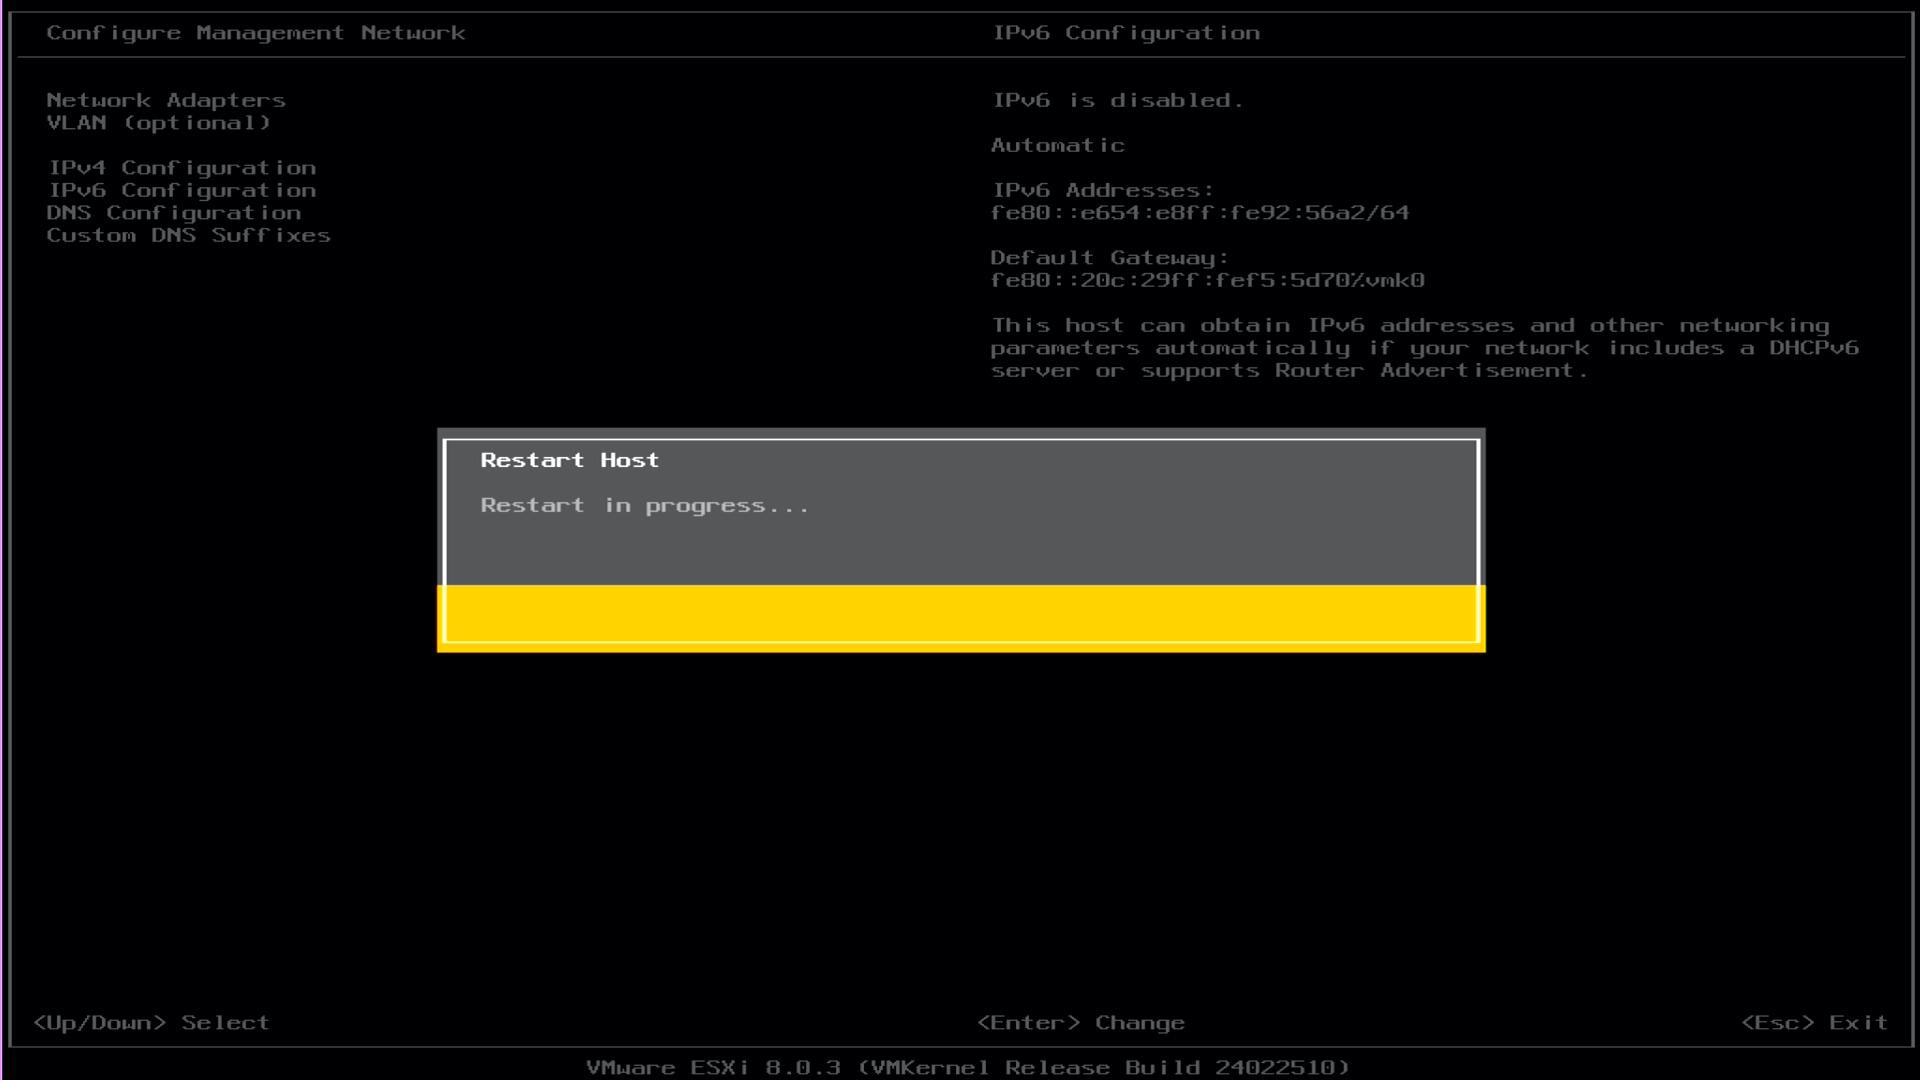
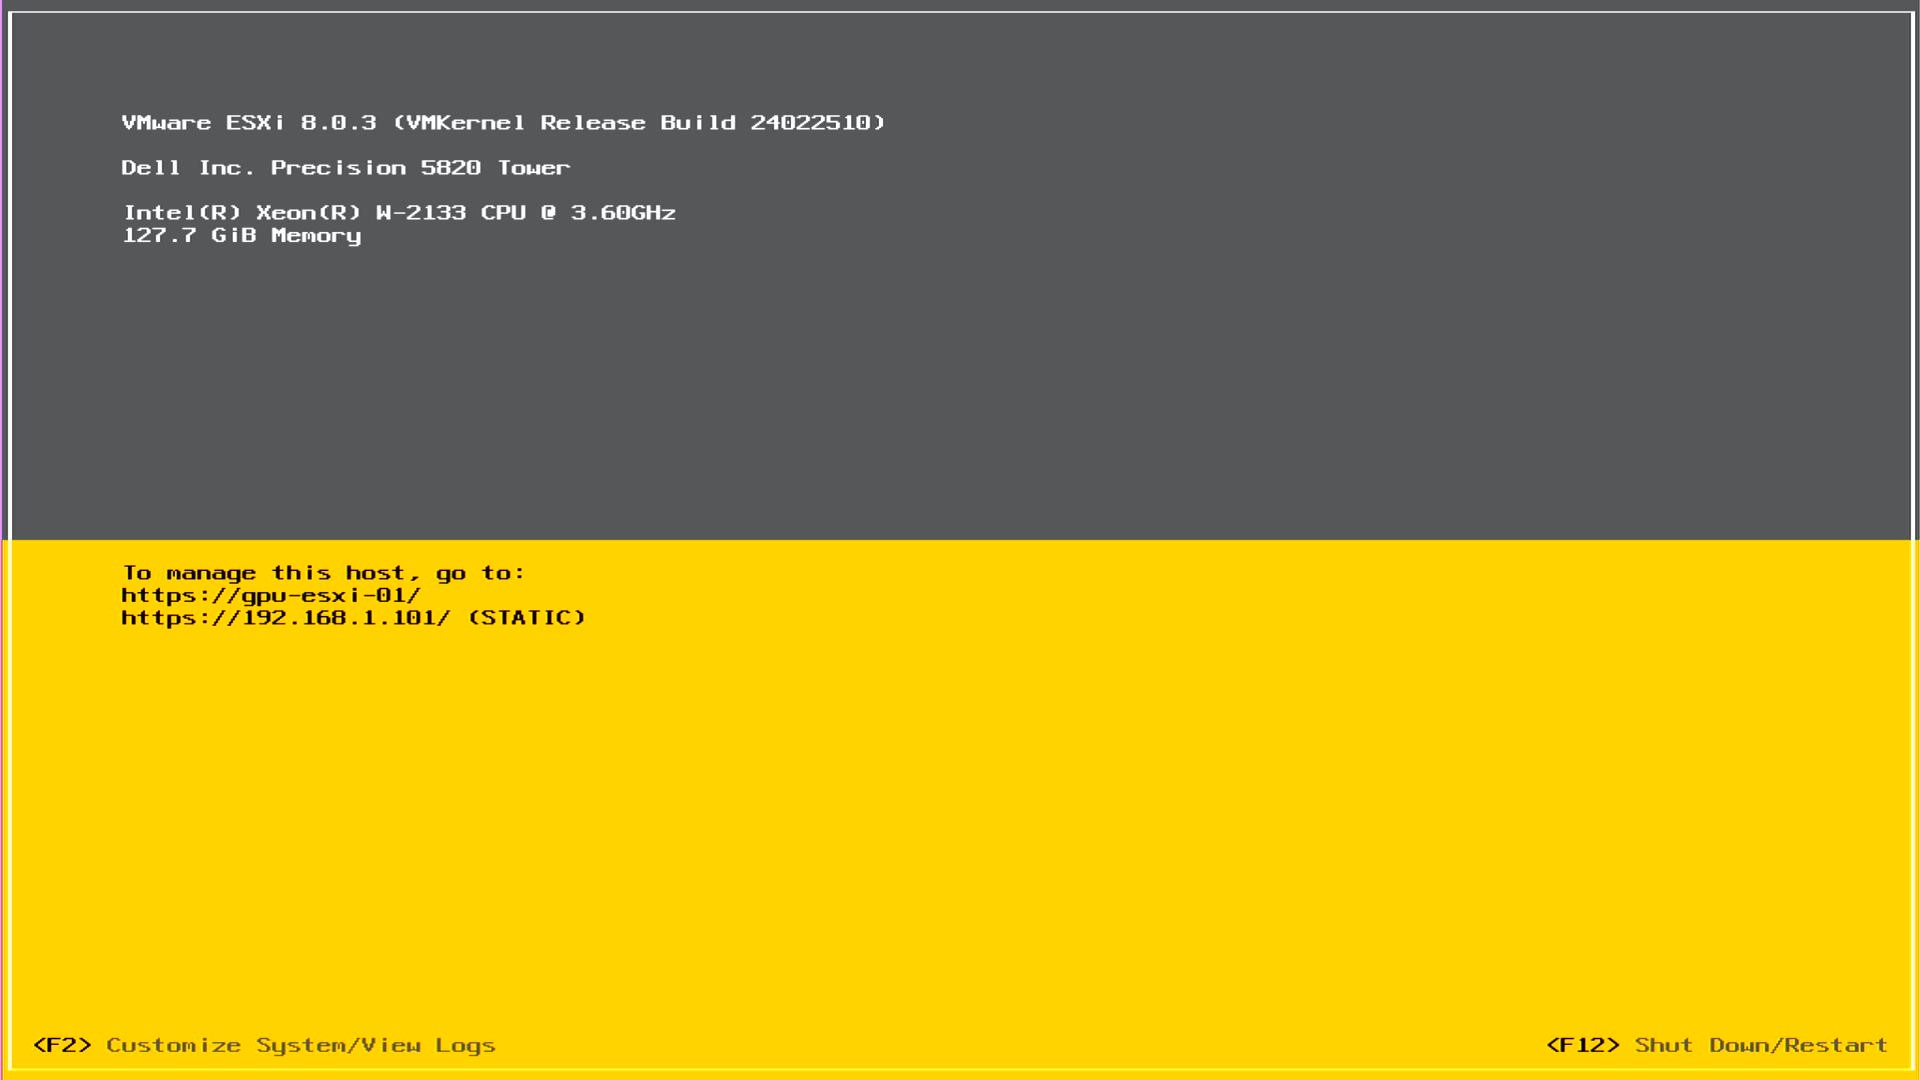
- Once the host has rebooted, log back into the host, the Direct Console User Interface (DCUI) should look like the image below.
Note
The DCUI now displays the IP and hostname we configured earlier
- Press F2 to enter the configuration menu
TIP
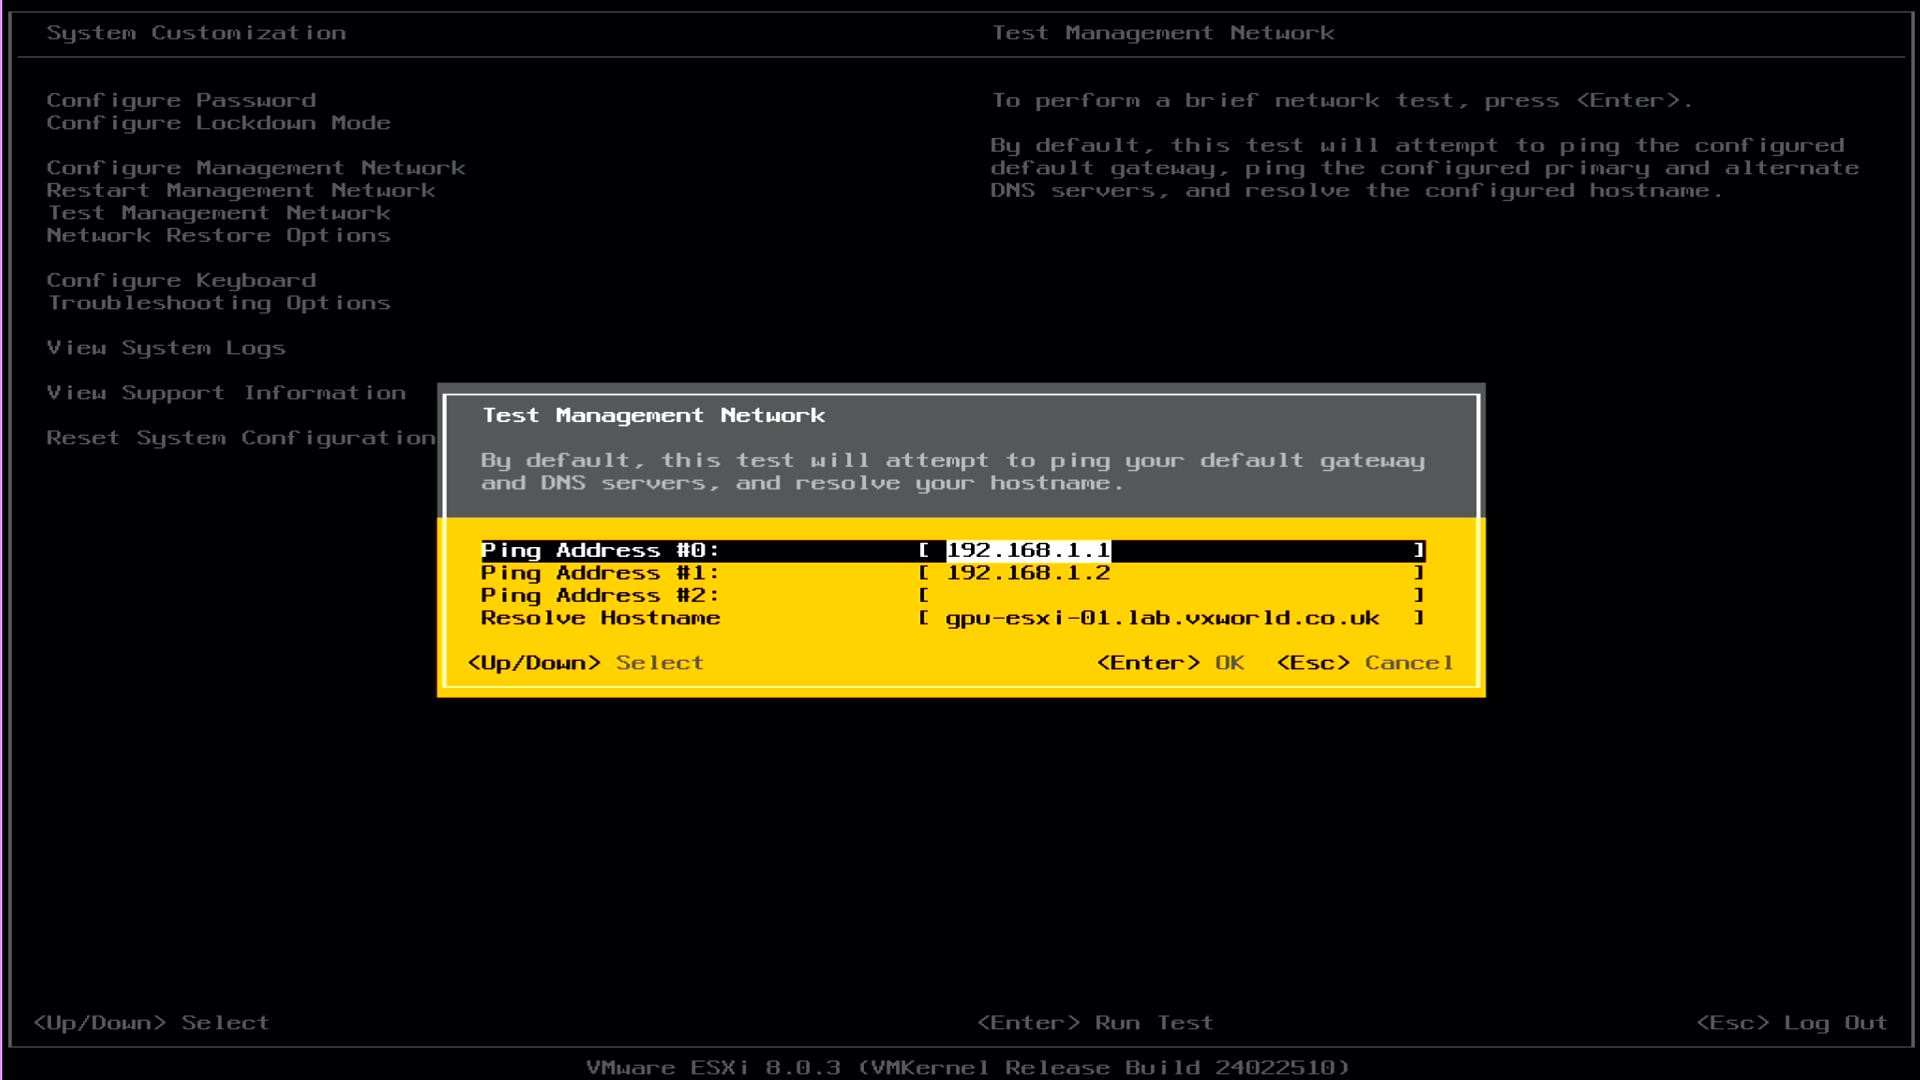
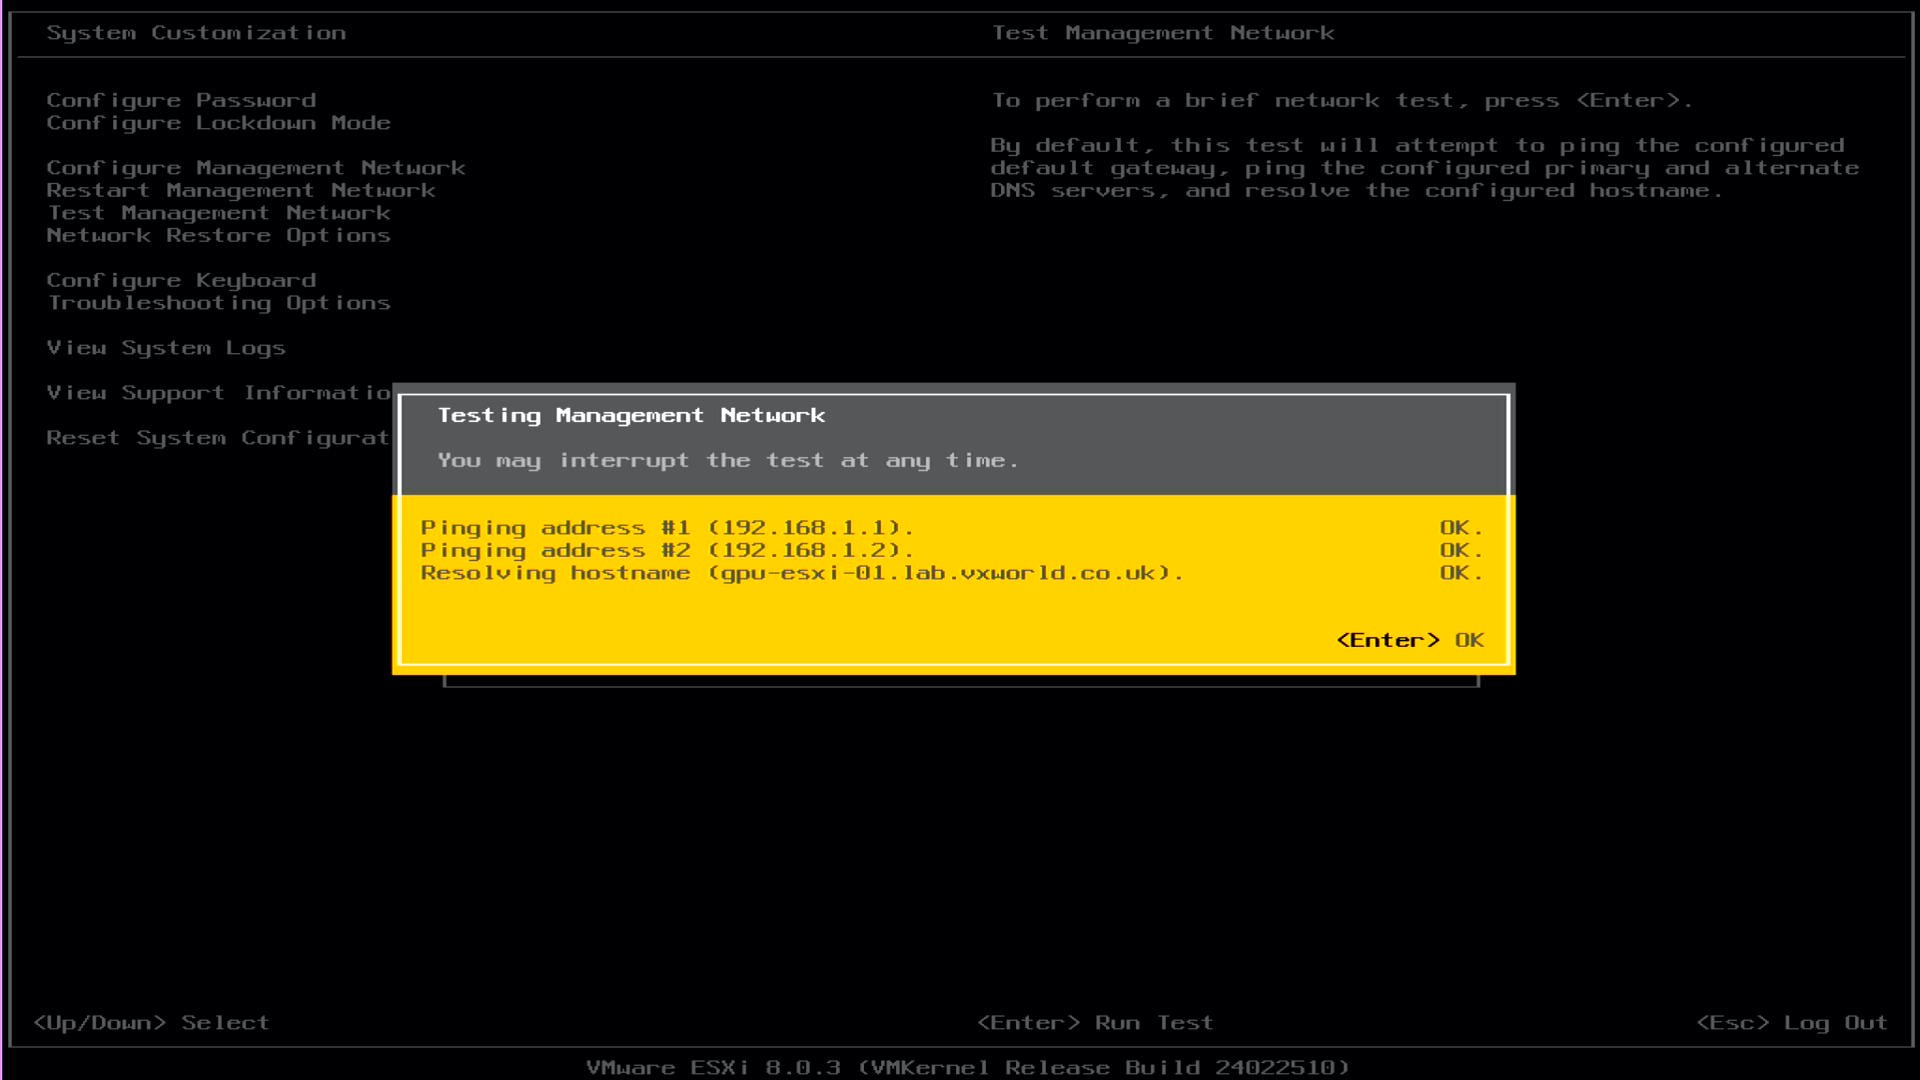
It is good practice after configuring the network settings to check if the host can access everything. By default when you run a management network test, it will attempt to ping your default gateway and DNS servers, and resolve its hostname.
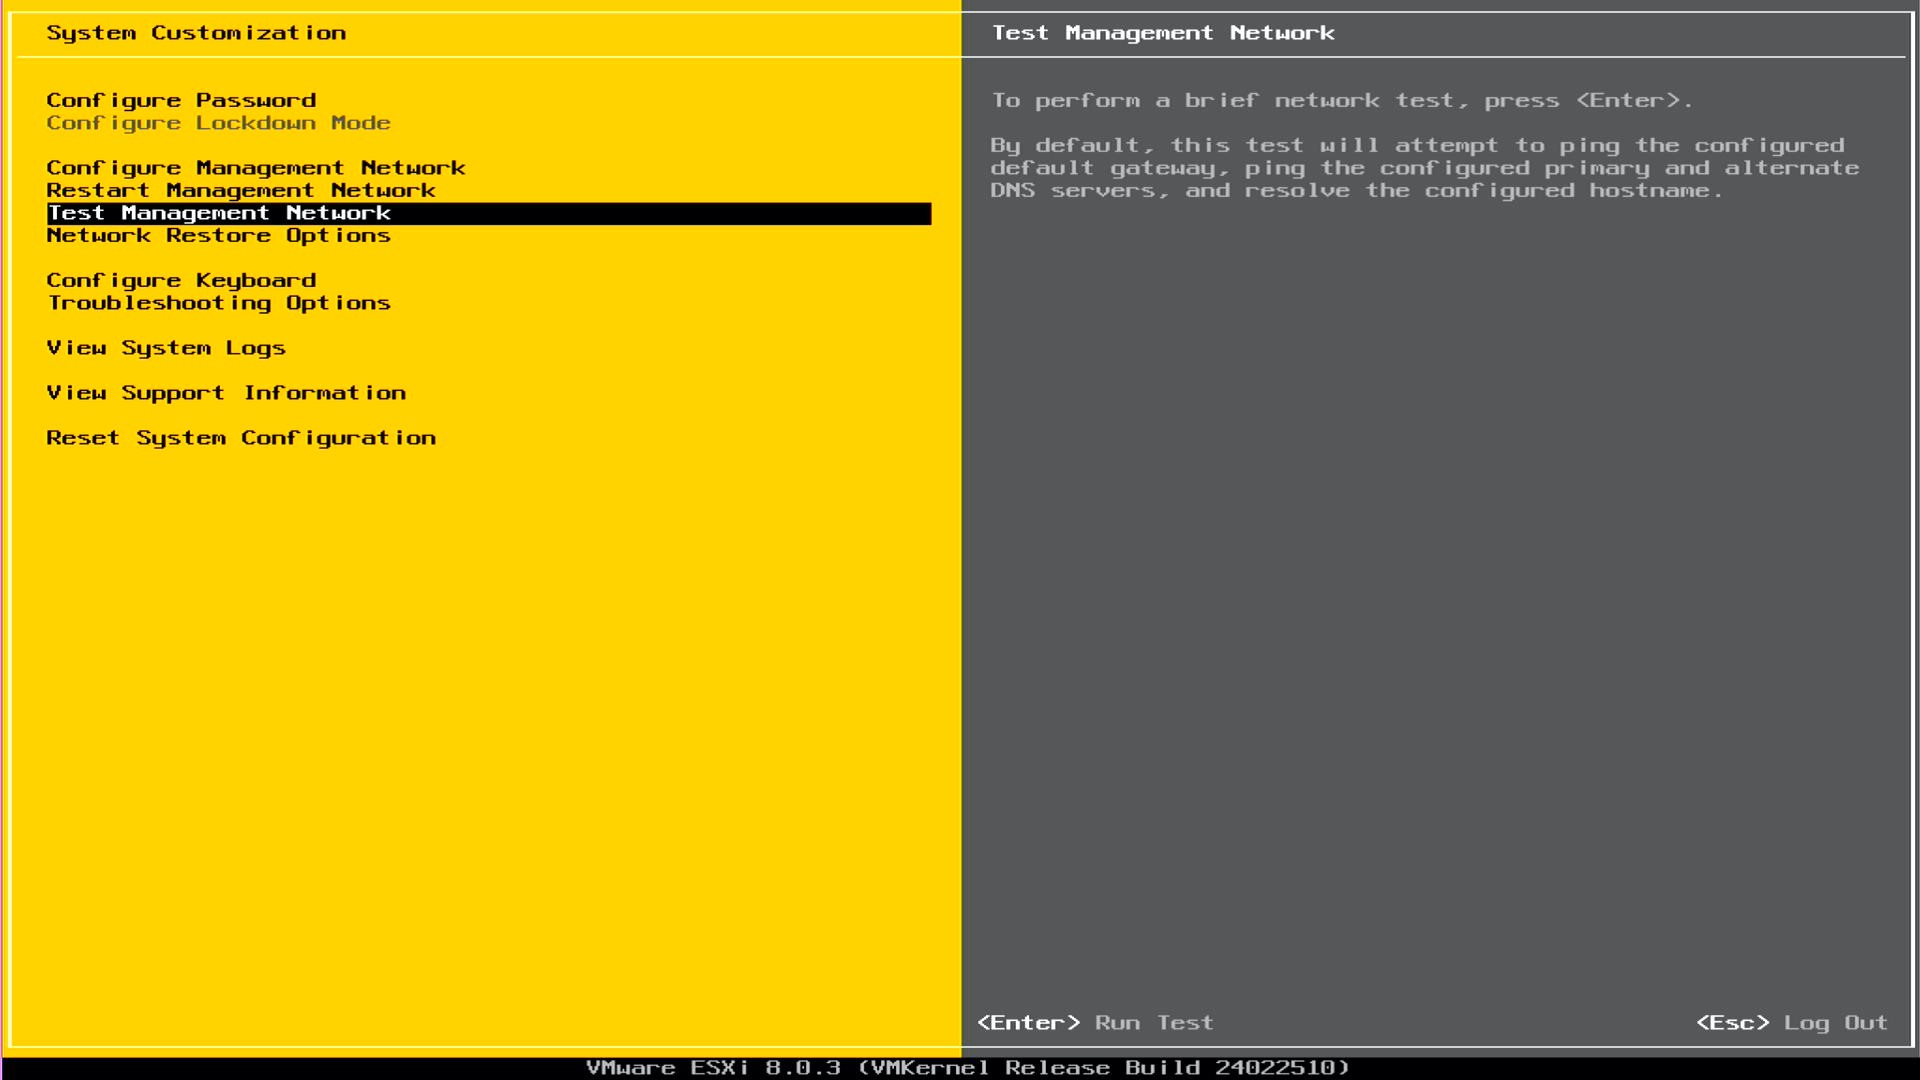
- Use the up/down arrows to select Test Management Network
- Press Enter
- Review the test defaults
- Press Enter to run the tests
- Review the test results
Note
For me, the results below are as expected at this stage. This is a chicken and egg situation. We are building a lab and the DNS server (192.168.1.2) has not yet been built (ping to 192.168.1.2) and nor does the hosts DNS entry (gpu-esxi-01.lab.vxworld.co.uk). Once this host is running, we will deploy a Windows Active Directory and DNS server. After that has been deployed, I will rerun these tests and expect them to pass.
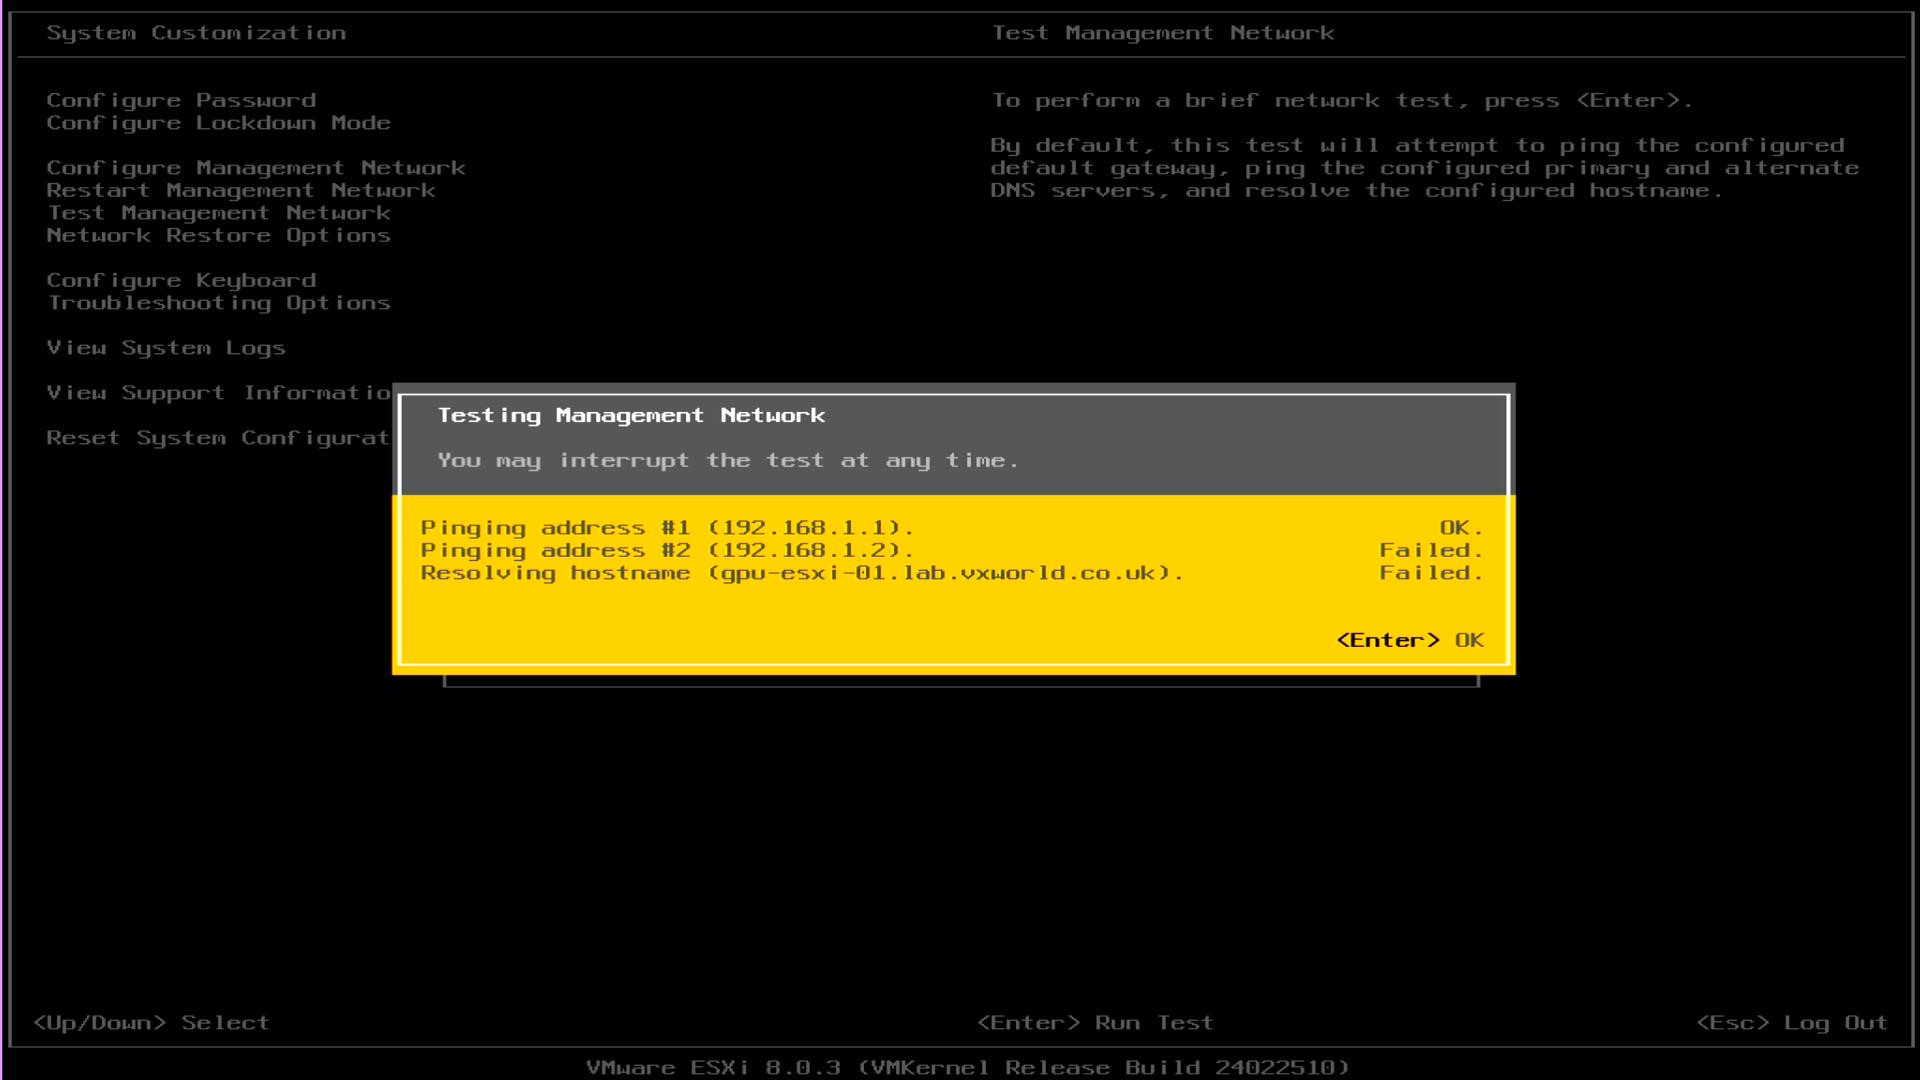
- Press Enter to exit the test results
- Press Esc to go back to the main DCUI screen
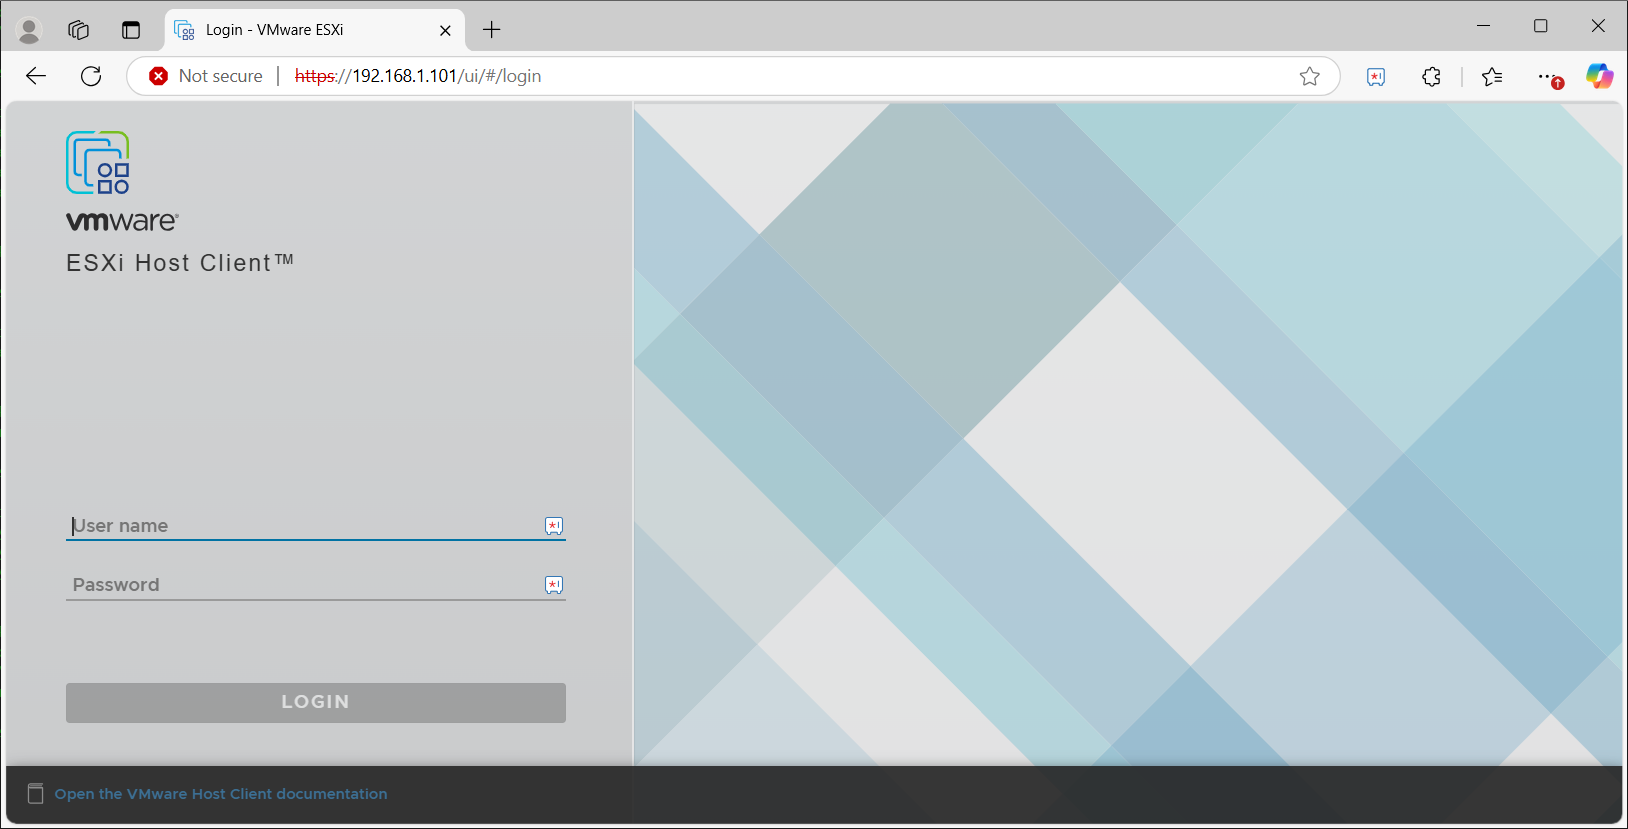
- At this point, you should be able to access the ESXi Host Client web interface from a computer that has access to the network the ESXi host is connected
- Open a web browser and enter https://ipaddressyouset (e.g. https://192.168.1.101)
- Press Enter
- You should see the login screen as pictured below.
- In the User name field, enter root
- In the Password field, enter the password you set during installation
- Click LOGIN
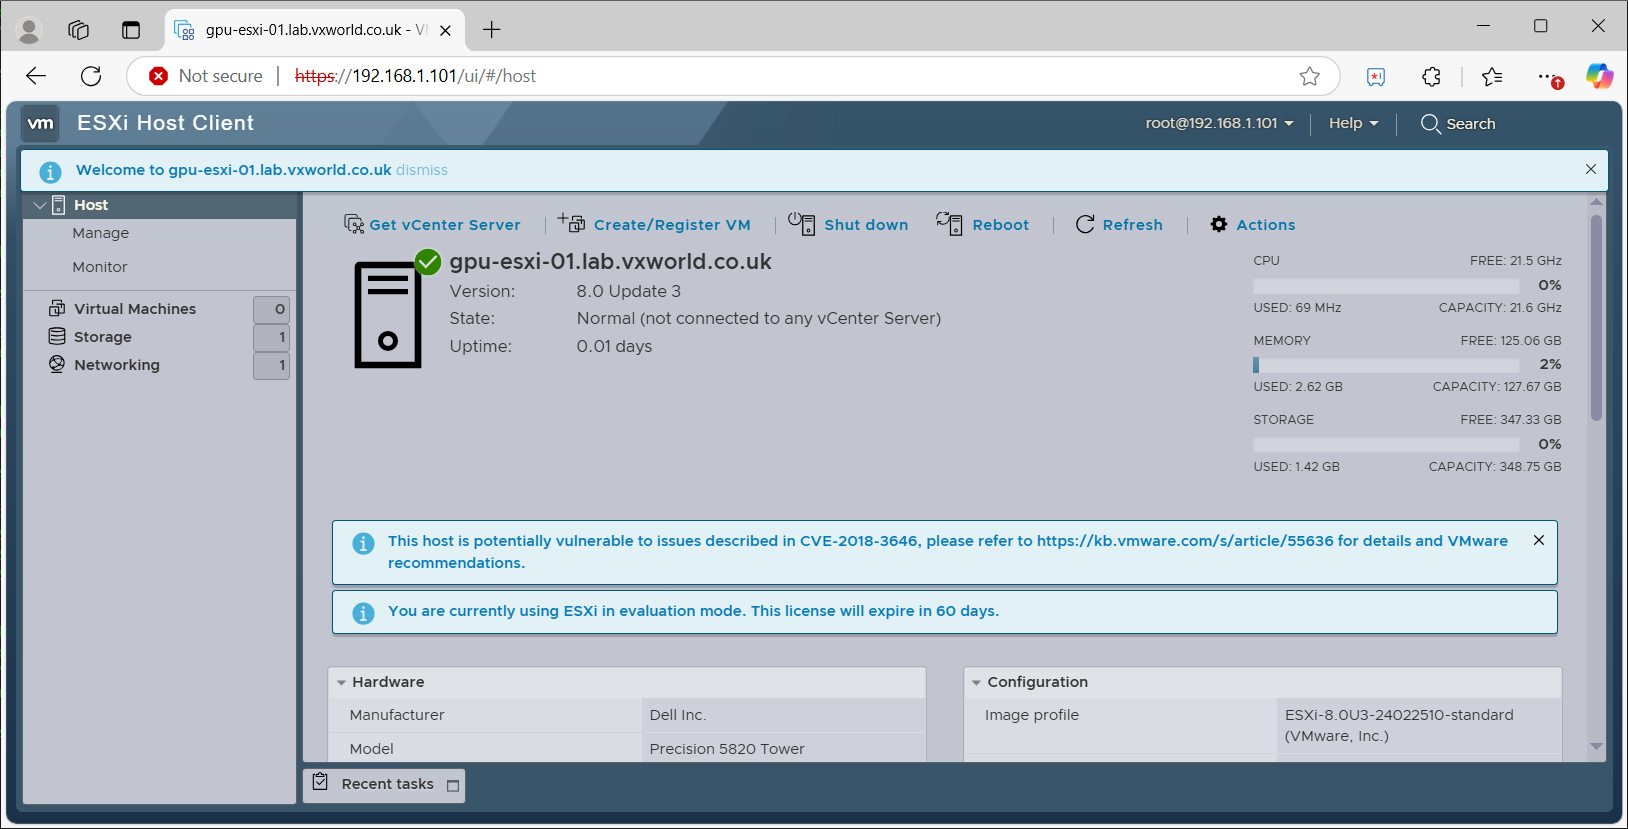
- Once logged in, you should see a user interface as pictured below
Post Install Configuration
UPDATE: 22nd January 2025
Initially, I had decided against using a VLAN for the Management Network. However, after further reflection, I realized it would offer greater flexibility in the long run. As a result, I have configured the Management Network to use VLAN 1001 via the DCUI (see the updated screenshot above).
Additionally, as this is a new lab setup, I encountered several “chicken and egg” configuration challenges. I was unable to proceed with certain changes until I had deployed a Windows Active Directory Domain Controller to provide essential services such as DNS and an authoritative time source (NTP) for the lab. Now that the domain controller has been deployed (as discussed in VMware GPU Homelab: Part 4 – Building a Windows Domain Controller and DNS server), I can move forward with configuring these services.
The updates have been broken down into the following sections:
- Management Network VLAN
- DNS server and name resolution
- NTP Configuration
Management Network VLAN
When using VLANs, it is common to deploy vCenter on the same VLAN as the ESXi hosts. To facilitate this, we need to assign a VLAN ID to the Port Group that will be used by vCenter during its deployment. Additionally, I will rename the Port Group from its default VM Network to a more descriptive VM Management Network. Note that a “Management Network” already exists and is used by the ESXi host (vmk0), which is the network configured via the DCUI.
- From a computer that has access to the network the ESXi host is connected
- Open a web browser and enter https://ipaddressyouset (e.g. https://192.168.1.101) or the DNS name (e.g. https://gpu-esxi-01)
- Press Enter
- Login using
- User name: root
- Password: the password you set during installation
- Click LOGIN
- Browse to Networking
- On the Port Group tab, Select VM Network
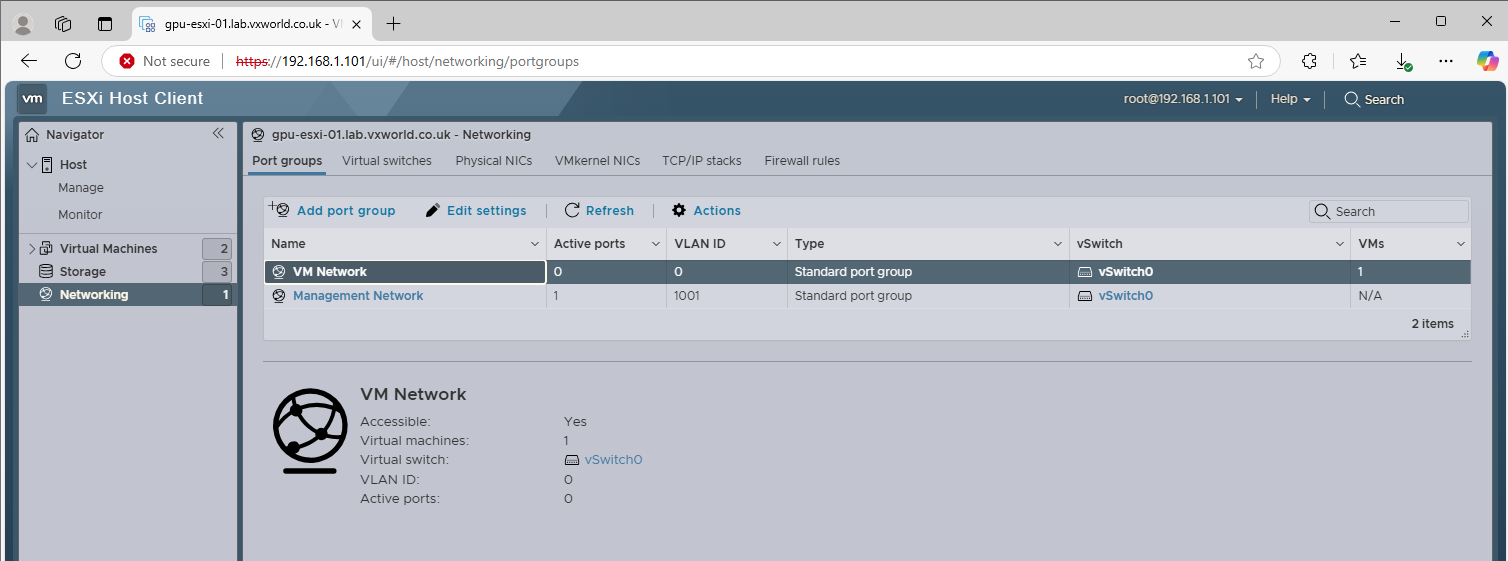
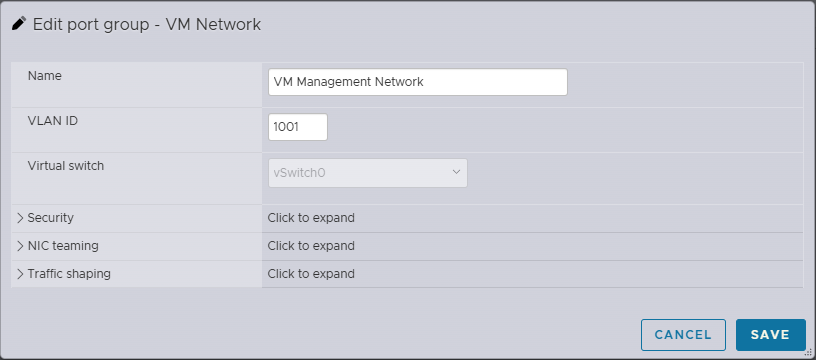
- Click Edit
- Update the Name to one of your choose. In my example, I am using VM Management Network
- Update the VLAN ID. In my example, I am using the same VLAN the ESXi hosts are using.
- Click Save
- When we deploy vCenter, we will deploy it to the VM Management Network
DNS server and name resolution
As you might recall, when we originally ran the Test Management Network from the DCUI, it failed to ping the DNS server and resolve the ESXi host name (due to the DNS server not existing). Now the DNS server has been deployed, all these tests pass (reminder: 192.168.1.1 is my gateway and 192.168.1.2 is my DNS server for the lab).
NTP Configuration
Secondly, we need to configure the NTP server for the host to use. This is an important step as we want all VMware components and supporting infrastructure to have a constant time.
- From a computer that has access to the network the ESXi host is connected
- Open a web browser and enter https://ipaddressyouset (e.g. https://192.168.1.101) or the DNS name (e.g. https://gpu-esxi-01)
- Press Enter
- Login using
- User name: root
- Password: the password you set during installation
- Click LOGIN
- Browse to Host -> Manage -> System -> Time & date
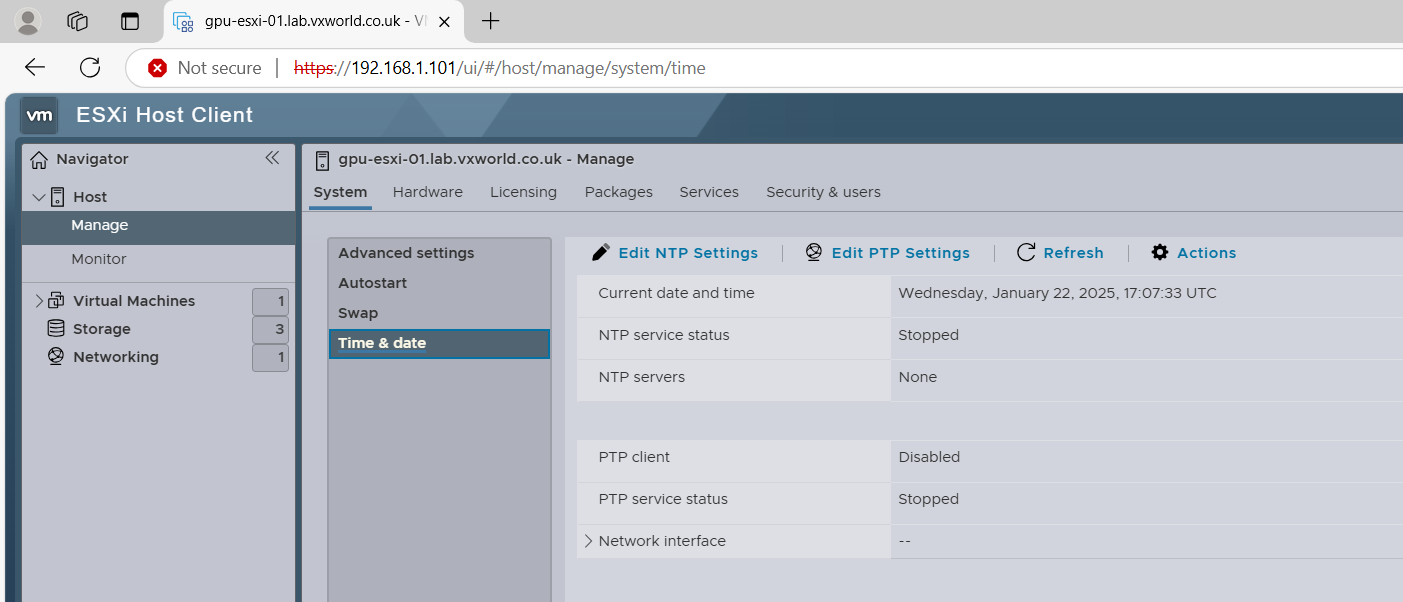
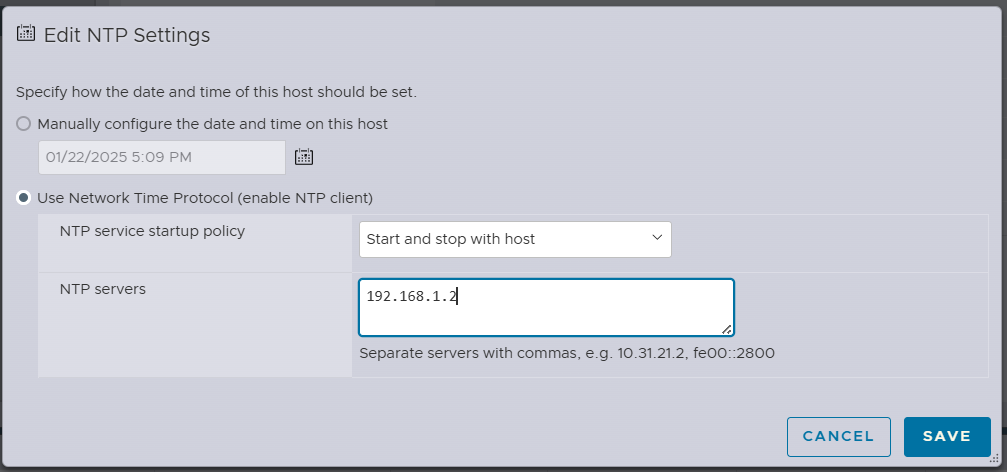
- Click Edit NTP Settings
- Select Use Network Time Protocol (enable NTP client)
- Under NTP service startup policy, select, Start and stop with host
- Under NTP servers, enter a comma separated list of NTP servers. For my Homelab, I just have the one running on the domain controller.
- Click Save
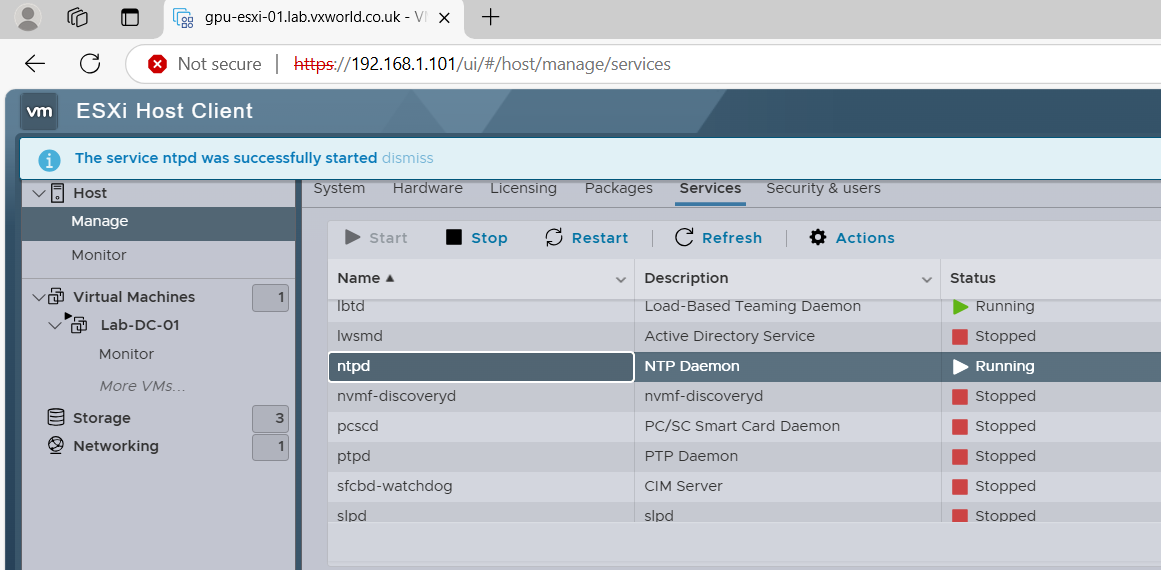
- To save rebooting, we will start the NTP service manually.
- Browse to Host -> Manage -> Services
- Select ntpd in the list
- Click Start
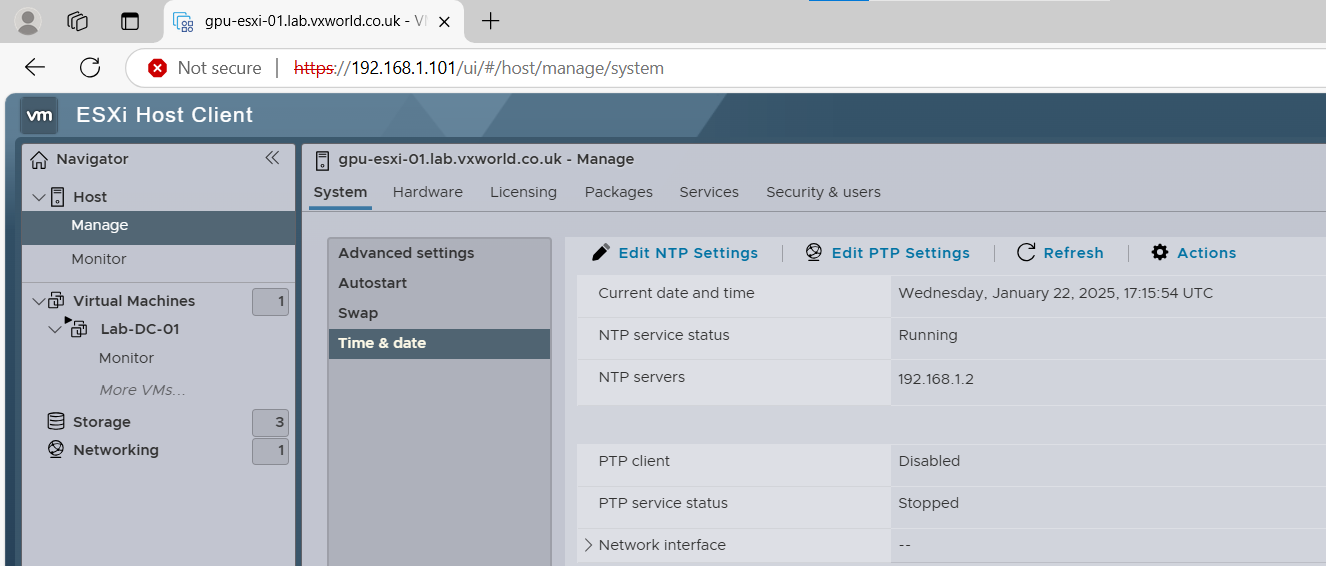
- Browse back to Host -> Manage -> System -> Time & date
- Click Refresh
- Check NTP service status is Running
- Check the Current date and time is correct
This concludes this post install configuration section. We now have an ESXi host that can resolve DNS entries and maintain NTP time synchronisation with the domain controller.
Summary
This post detailed the instructions to first create the USB install media that would be required to install ESXi. Then it detailed the step by step process to install ESXi 8 U3 onto a Dell Precision 5920 workstation. Finally, we performed some post configuration tasks to ensure VM accessibility over the network, ESXi host time synchronisation with an NTP server, and validate DNS name resolution works. We now have an ESXi host with basic configuration that is accessible over the network. This lays the foundation to perform more advanced post configuration tasks and add it into a vCenter.
In my next post, VMware GPU Homelab: Part 4 – Building a Windows Domain Controller and DNS server we’ll deploy a Windows Active Directory Domain Controller to provide the DNS service and NTP source required during the configuration steps outlined in this post.
This is the classic “chicken-and-egg” situation, as these supporting services are needed to configure ESXi, but until ESXi was installed, there was nowhere to create these servers.
This post has now been updated with the post configuration settings applied after the deployment of the domain controller. For details, refer to the updated Post Installation Configuration section above.


Leave a comment