Welcome to the first post in this series
I have not had a physical Homelab for a long time. I have been using VMware’s Hands on Lab (HOL) to learn new skills. HOL have been fantastic and enabled me to achieve many VMware certifications in 2024 (for example, VCAP-DCV Deploy 2024). However, I now want to further develop my GPU knowledge past what can be accomplished using VMware HOL, and share my experience with you.
To do this, I have decided to invest in a GPU enabled Homelab, but on a limited budget!
GPU and limited budget do not normally go in the same sentence, so I might fail spectacularly! But over a series of posts I will attempt to document the process of building this lab, including the good, the bad and the ugly.
So where did I start? Prior to purchasing anything, I looked for other blogs of people who had built something similar, but I was unable to find any. So I started with a blank sheet of paper!
After weeks of hunting on eBay and Facebook Marketplace, I bought two Dell Precision 5820 Workstations for a total of £465 – a bargain considering the spec of each!

These workstation will form the foundation of my two node VMware vSphere ESXi 8 GPU cluster.
Whilst the specs at the time of purchase is a good starting point, I need to make some changes. For example, I will be selling the GPU’s they came with, and buying ones compatible with NVIDIA vGPU. There will other components that are needed to make them more sutable for my use case. I will discuss that later in this post. However, for the money, they are two capable worktations.
The specs of each workstation as they were purchased are as follows:
Workstation 1
- CPU: Intel Xeon W-2133 @ 3.60GhHz (6 cores)
- Memory: 128GB
- GPU: NVIDIA RTX A2000 6GB
- Storage: 500GB SSD
Workstation 2
- CPU: Intel Xeon W-2123 @ 3.60GhHz (4 cores)
- Memory: 128GB
- GPU: NVIDIA Quatro P2000 5GB
- Storage: 500GB SSD
The Hardware
CPU
Dell Precision 5280 workstations support a number of CPU types (Precision 5820 Tower Spec Sheet). I decided to purchase ones containing the Intel w-21xx series CPU.
I chose this CPU family because these CPU’s are officially supported for ESXi 8. However it’s important to note, they have been deprecated in the next release of ESXi, as per Broadcom’s CPU Support Deprecation and Discontinuation In vSphere Releases article.
So why did I select CPUs have have been deprecated? Budget!
As mentioned at the start, I am putting this together to a limited budget. As the Intel w-21xx series are supported for ESXi 8, this starts the lab in a good position (noting lots of other labs using consume CPUs are not supported anyway) and hopefully it will still work with ESXi 9 despite not being supported. With a bit of luck, ESXi 9 will continue to honour the allowLegacyCPU parameter (see William Lam’s blog about Heads Up – ESXi 8.0 Update 2 requires XSAVE CPU instruction even with allowLegacyCPU=true) to allow me to get continued uses from these hosts. Only time will tell if that gamble pays off.
Inside
Below is a photo of the inside of one of the workstations. As you can see, the 6 PCIe slots provides lots of options to add GPUs, NICs and an NVMe card (more on that later).

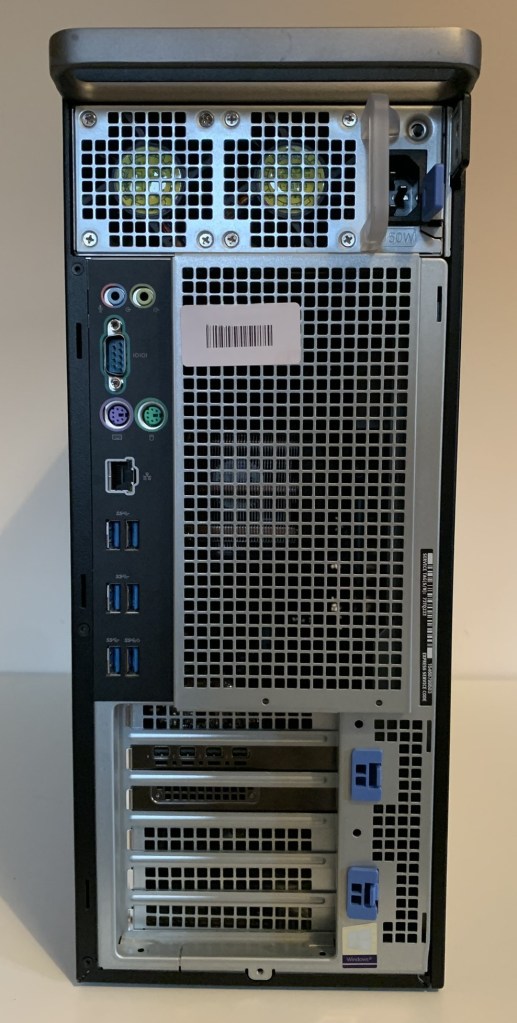
Back
The photo below shows the back of one of the Dell Precision 5820 Workstations. Whilst offering USB C on the front, the back hosts some retro PS2 connectors!
Storage
Both the Dell 5280 workstations I have purchased have four hot plug removable drive bays (Flex Bays). Some Dell 5280’s have been built to support two NVMe drives within the hot plug Flex Bays (mine do not).
If you are looking for second hand workstations like it was, it is worth noting, to support M.2 NVMe drives in two of the Flexbay’s, the workstations requires an NVMe backplane to enable two of the Flex Bays and an M.2 Flexbay Module (adapter) plus M.2 NVME Tray for each M.2 NVMe drive.
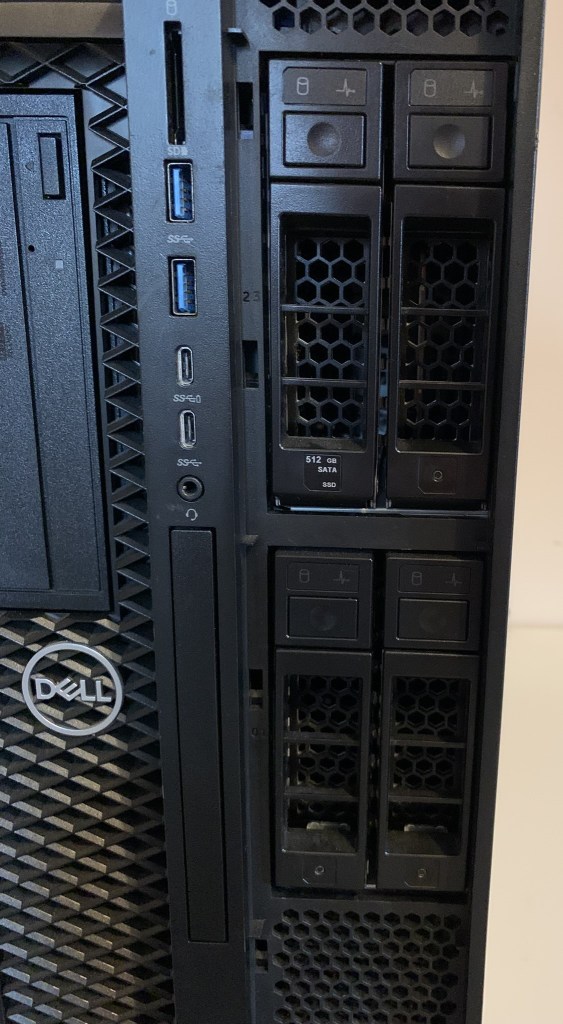
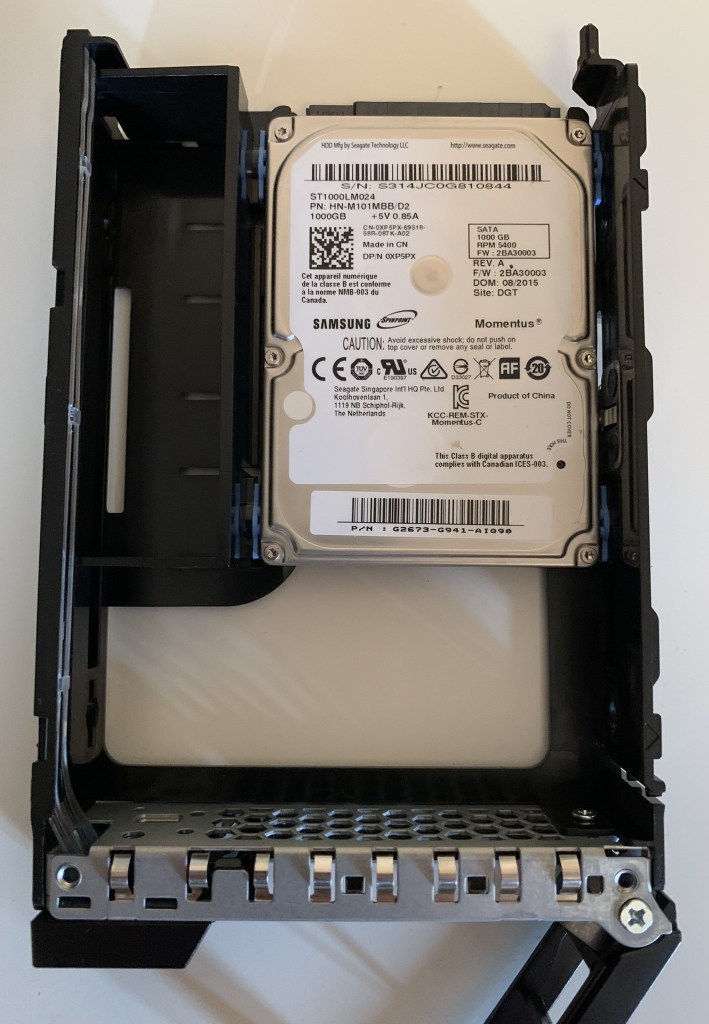
Below is one of the Flex Bay caddies removed. As you can see, they are designed to take both 3.5″ and 2.5″ disks. They are a screw less design and very easy to change the disks. For testing, I have installed a standard 2.5″ mechanical HDD. I will be swapping that out for a small SSD to install the ESXi OS onto. (Standard consumer HDDs and SSDs appear to work within these Flex Bays)
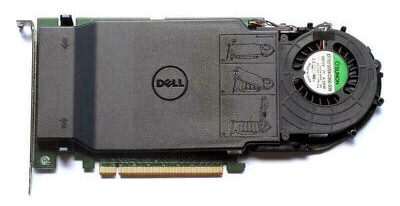
I decided it was not worth the money to find a unit with support for NVMe within the Flex Bays. I discounted installing it myself as secondhand, the components listed above sell for a good amount. I decided, I would buy a secondhand Dell Ultra Speed Drive Quad NVMe m.2 PCIe x16 Card (6N9RH) instead, this would allow me to install up to four m.2 MVMe drives.
I managed to pick one up for about £70. If it works as hoped, I will order a second one for the other host. The longer term intention is these hosts will be able to use this to support vSAN ESA.
Networking
The two workstations I purchased come with a single onboard 1Gbps NIC. This will get me started for a single host deployment, but longer term I will be adding some 10Gbps network card(s) to support vSAN and other traffic.
GPUs
One of the reasons I purchased the workstations I did, was they came with good GPUs. One has an NVIDIA RTX A2000 6GB whilst the other has an NVIDIA Quatro P2000 5GB. Whilst these GPUs will not work with NVIDIA’s vGPU software, they have good resale values. Selling them will allow me to purchase GPUs compatible with NVIDIA vGPU.
There is no onboard GPU so in addition to GPU(s) to be consumed by vGPUs (VMs), I need a basic GPU to allow me to interact with the hosts console.
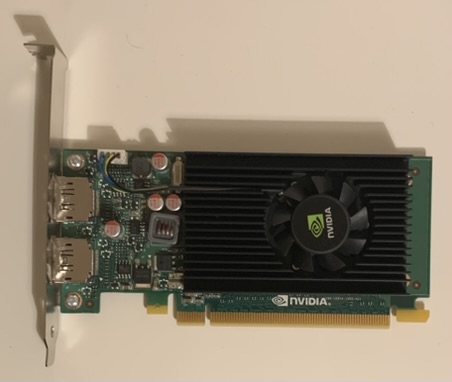
I will be installing NVIDIA NVS 310 512MB GPUs picked up from eBay for less than £10 each. I choose this model as they are basic 2D GPUs that have dual display port outputs (I only need one) and are on the compatibility list for the Dell Precision 5820.
Summary
Hopefully this post has given you an insight into the purpose of my GPU Homelab and the design decisions that have gotten me to this point. I hope you enjoy following this journey.
In the next post, VMware GPU Homelab: Part 2 – BIOS I detail the BIOS settings I have configured prior to installing ESXi.


Leave a comment